Layout and customization options Copied
Order panels
All panels can be edited and rearranged by providers for more efficient use. Non-provider users cannot edit the layout of the panels on the screen or edit panel contents, edit panel name, or remove a panel. These options will display in a disabled state.
Changing the layout
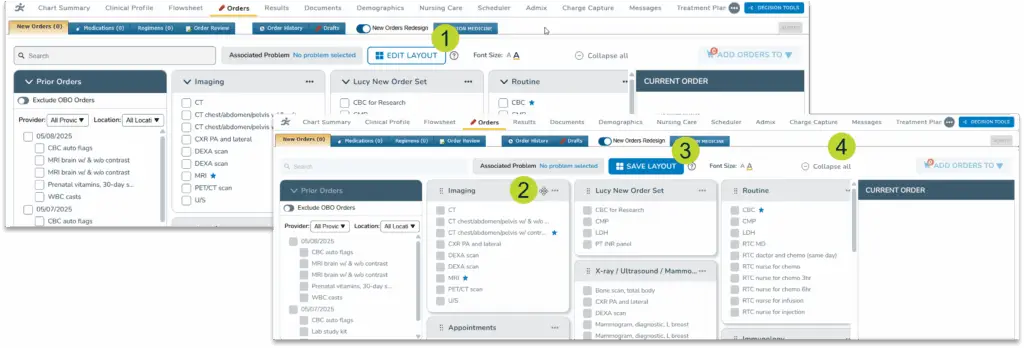
To change the layout of order panels:
- Click the Edit Layout button (callout 1).
- Hover over the header until your cursor turns into the move icon (callout 2).
- Drag and drop the boxes until they align with your preferred display.
- Click the Save Layout button to preserve your changes (callout 3).
- You can also expand or collapse the panels on the screen (callout 4).
-
- Once you expand a panel, it will remain expanded across additional charts and the system will retain this view in subsequent login sessions. If you prefer not to keep the panel expanded, collapse it when finished.
-
Editing each panel
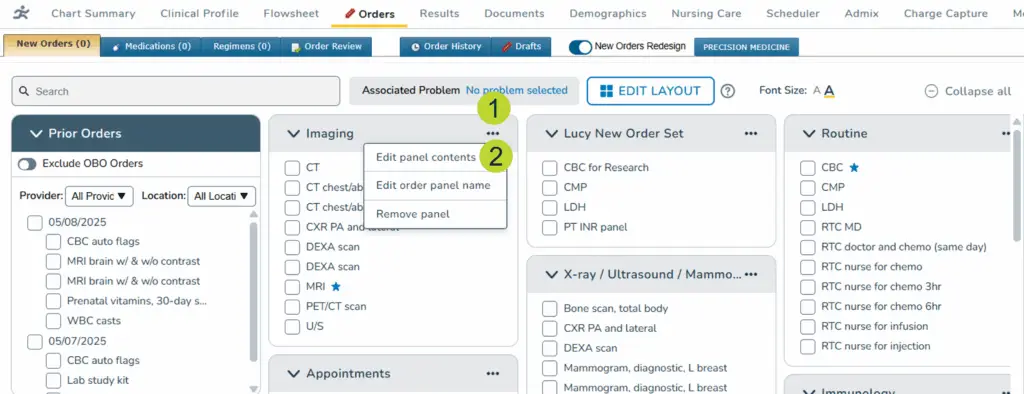
To edit each panel, select the three dots in the header and choose Edit panel contents to reorganize, add, or remove items (callouts 1-2).
Reorganizing items in a panel
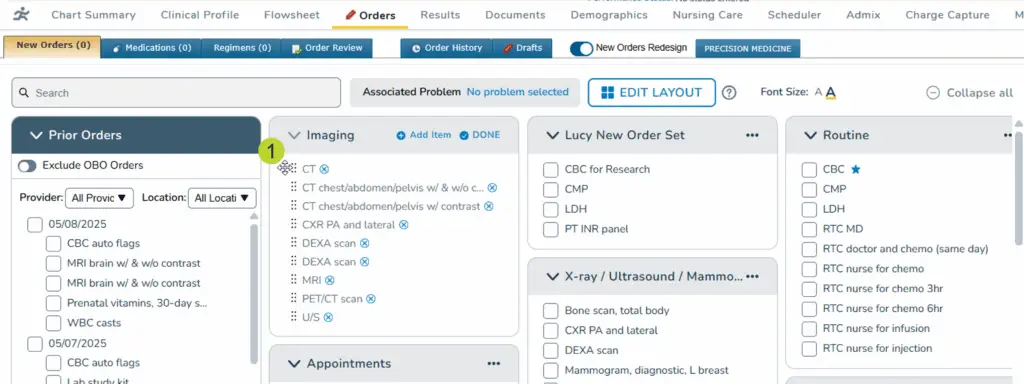
To reorganize the items in a panel, hover over the dots until your cursor turns into the move icon (callout 1). Drag and drop the items into your preferred order.
Removing items in a panel
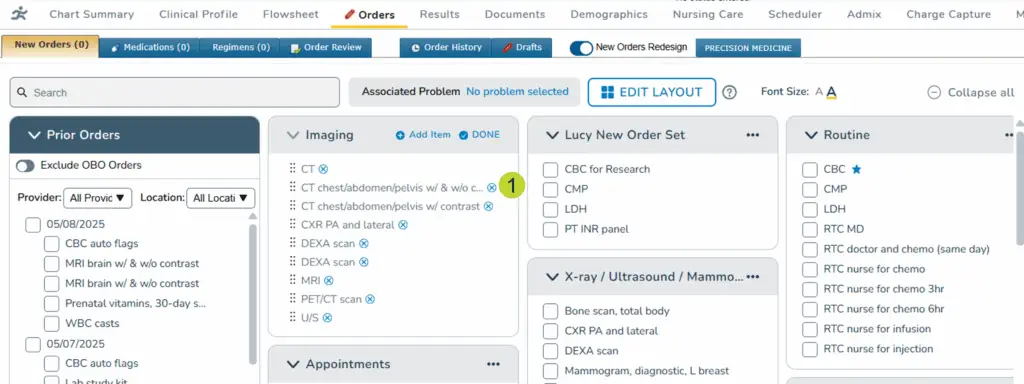
To remove items in a single panel, click on the x icon next to the item (callout 1).
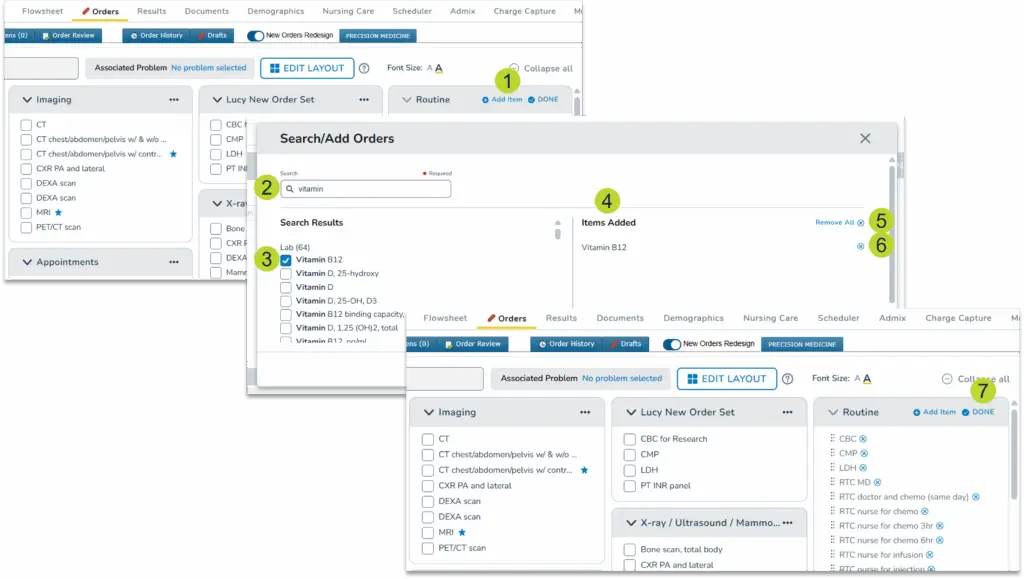
Adding items to a panel
- To add items to a panel, click Add Item in the header (callout 1).
- In the Search/Add Orders window, use the search bar to locate an item (callout 2).
- The results will be organized into categories (Lab, Service, etc.), making it easier to locate the item needed.
- Select the correct item from the results (callout 3).
- It will appear in the Items Added column (callout 4).
- If you need to remove the item, click the Remove All or the x icon (callouts 5-6).
- Save your changes.
- Once the panel is customized to your preferences, click DONE (callout 7).
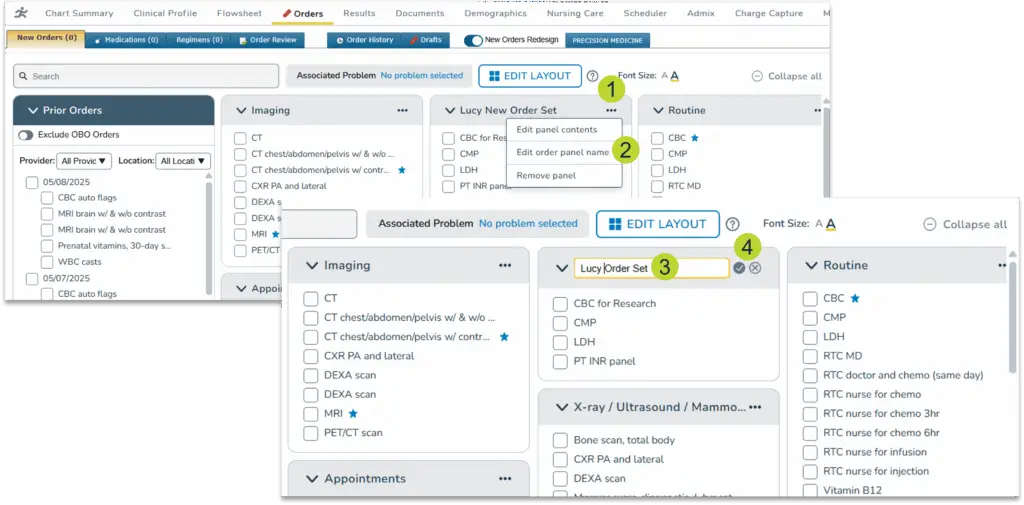
Renaming a panel
- To rename a panel, select the three dots in the header and choose Edit order panel name (callouts 1-2).
- Enter the preferred title in the text field (callout 3).
- Click the check mark to save the new name or the x icon to keep the current name (callout 4).
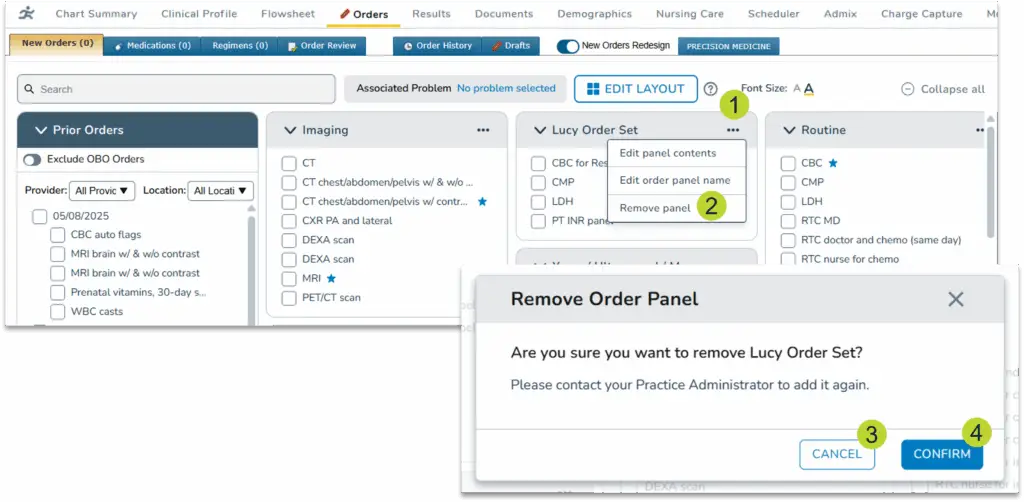
Removing a panel
- To remove an entire panel, select the three dots in the header and choose Remove panel (callouts 1-2).
- A window will appear to confirm the changes.
- Click Cancel to keep the panel or Confirm to remove the panel (callouts 3-4).
NOTE: You cannot re-add a panel from the patient chart once it’s been removed. An administrator with access to Manage Order Sets will need to create or copy the panel for the user.
Editing Order Sets
Order sets can be customized by providers differently depending on whether they are defined by individual users or by the practice as a whole:
- User-defined order sets can be fully customized. Users can rearrange, remove, edit, and rename these order sets to suit their workflow needs.
- Practice-defined order sets have limited customization options. Users can only rearrange these sets but cannot edit, remove, or rename them. This restriction ensures that standardized order sets, accessible to all users in your practice, remain consistent and avoid unintended changes.
Non-provider users cannot access the customization options for order sets. They cannot edit order set contents, edit order set name, or remove an order set. This also applies to entering orders On Behalf Of another provider.
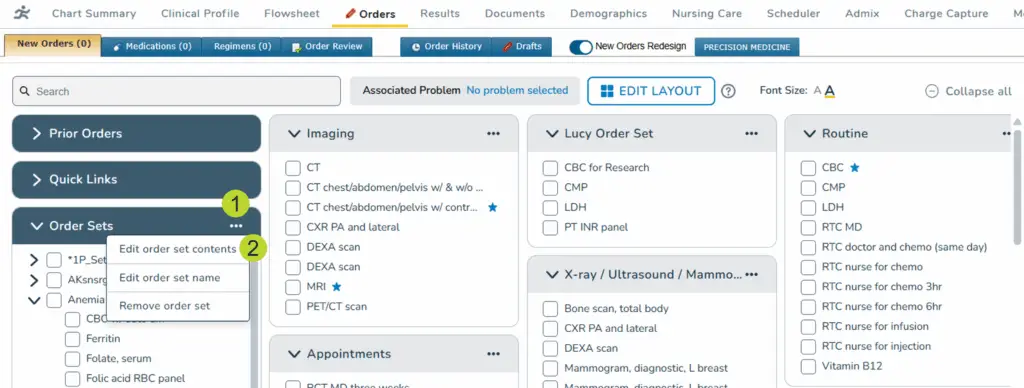
Editing an order set
To edit an order set, select the three dots in the header and choose Edit order set contents to reorganize, add, or remove items in the order set (callouts 1-2).
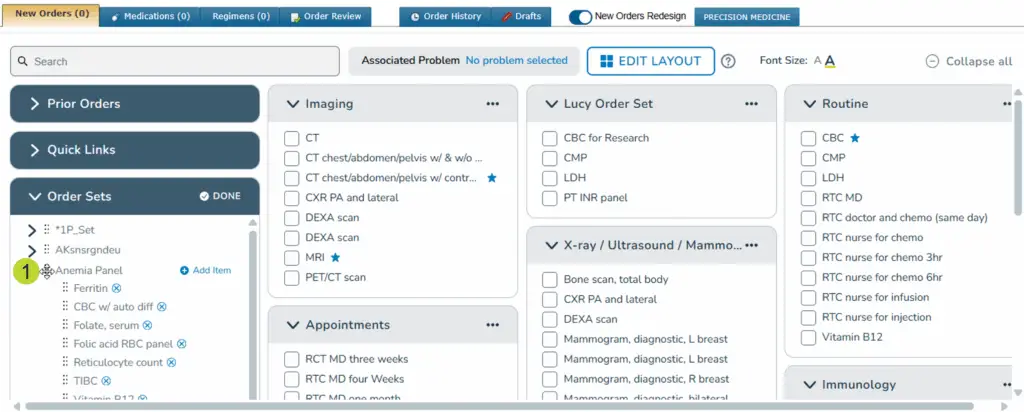
Reorganizing items in an order set
To reorganize a practice or user-defined order set, hover over the dots until your cursor turns into the move icon (callout 1). Drag and drop the items into your preferred order.
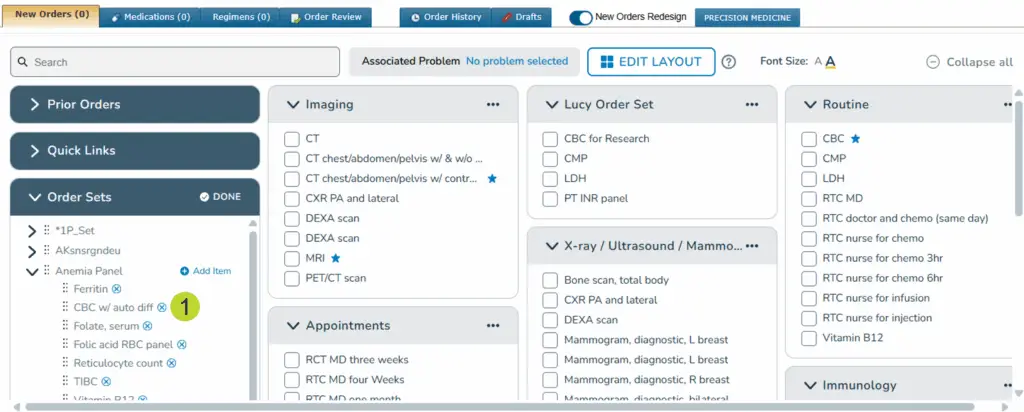
Remove items in an order set
To remove items from a user-defined order set, click on the x icon next to the item (callout 1).
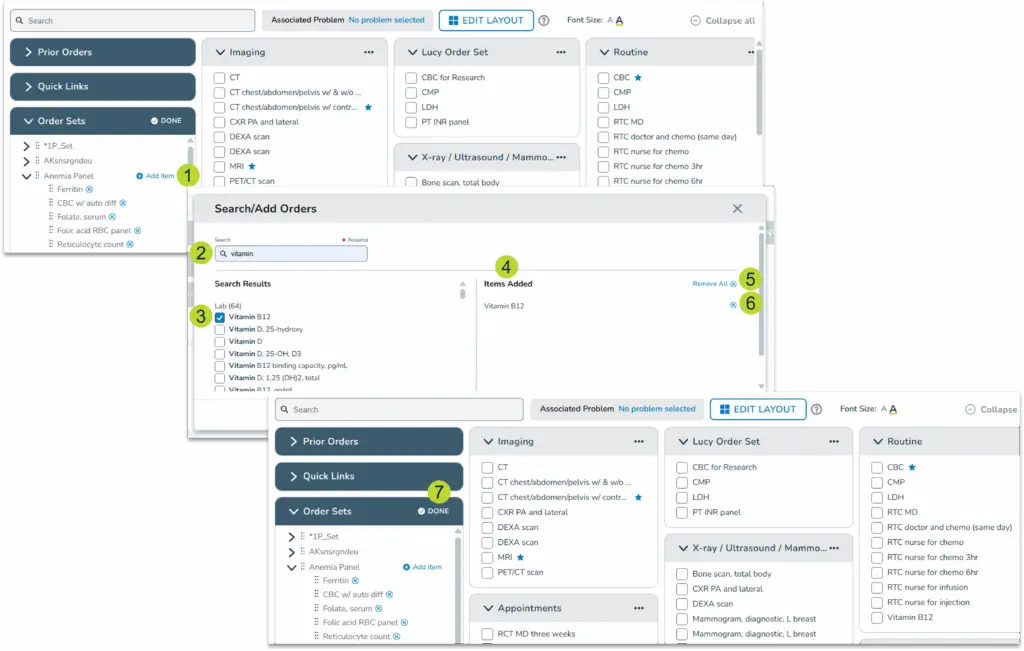
Adding items to an order set
- To add items to a user-defined order set, click Add Item in the header (callout 1).
- In the Search/Add Orders window, use the search bar to locate an item (callout 2).
- The results will be organized into categories (Lab, Service, etc.), making it easier to locate the item needed.
- Select the correct item from the results (callout 3).
- It will appear in the Items Added column (callout 4).
- If you need to remove the item, click Remove All or the x icon (callouts 5-6).
- Save your changes.
- Once the order set is customized to your preferences, click DONE to save your changes (callout 7).
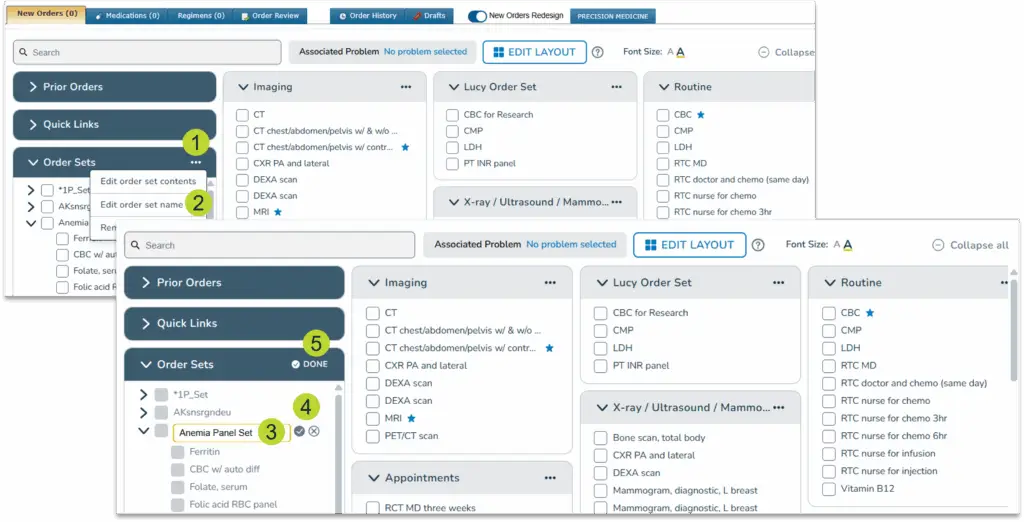
Renaming an order set
- To rename a user-defined order set, select the three dots in the header and choose Edit order set name (callouts 1-2).
- Enter the preferred title in the text field (callout 3).
- Click the check mark to save the new name or the x icon to keep the current name (callout 4).
- Click DONE to save your changes (callout 5).
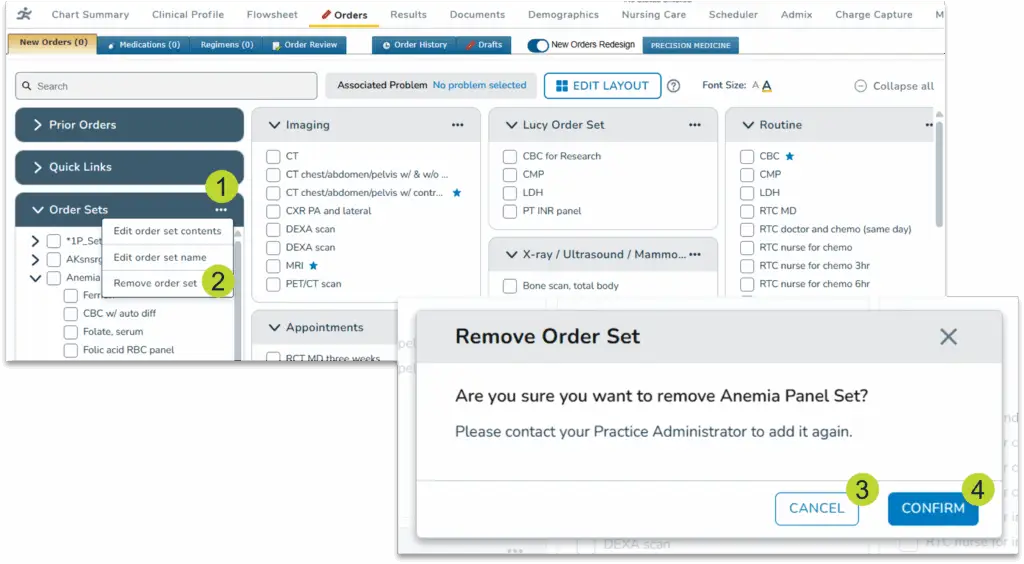
Removing an order set
- To remove a user-defined order set, select the three dots in the header and choose the Remove order set to delete a user-defined order set (callouts 1-2).
- Click the x icon next to the order set (callout 3).
- A window will appear to confirm the changes.
- Click Cancel to keep the order set or Confirm to remove the panel (callouts 4-5).
NOTE: You cannot re-add an order set from the patient chart once it’s been removed. An administrator with access to Manage Order Sets will need to create or copy the order set for the user.
Related Articles:
|