Send and manage insurance forms and insurance cards Copied
Filling out paper forms is a tedious task for patients and practice staff. Ontada Health e-registration modernizes this important aspect of patient care, including the completion of insurance forms and sharing of insurance card images.
Patient’s insurance forms process
From the Assigned Forms page, patients must locate the insurance form and click the Start button to begin the process.
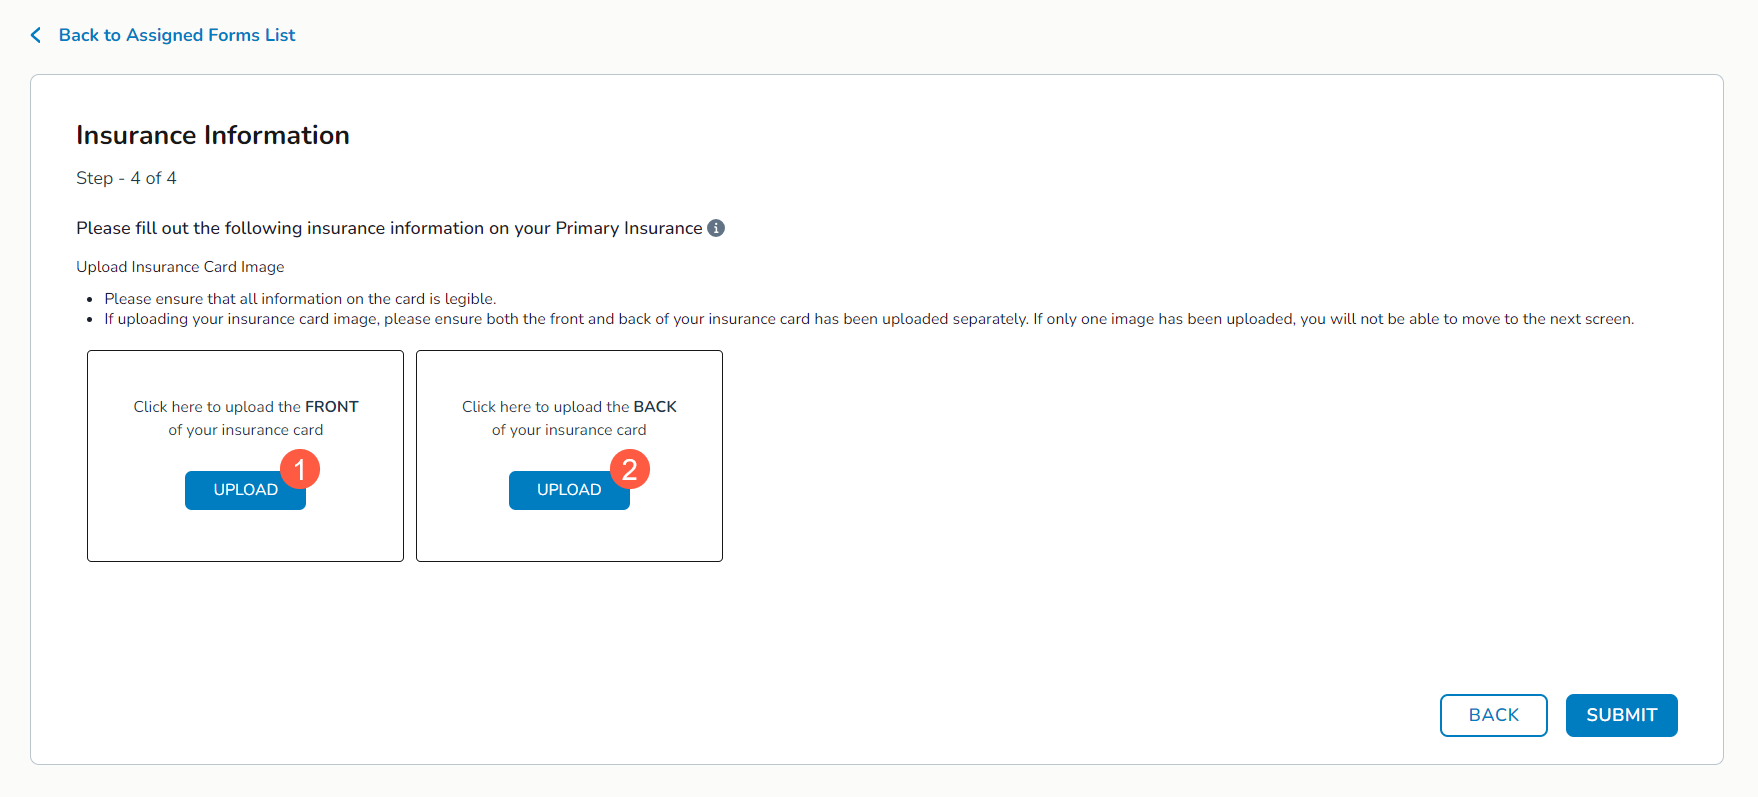
- After entering their insurance information, they will be prompted to upload insurance card images for each insurance entered in the form, e.g., primary insurance, secondary insurance, and/or prescription drug coverage.
- Clicking the Upload buttons (callouts 1 and 2) will prompt them to search for the images among their saved files.
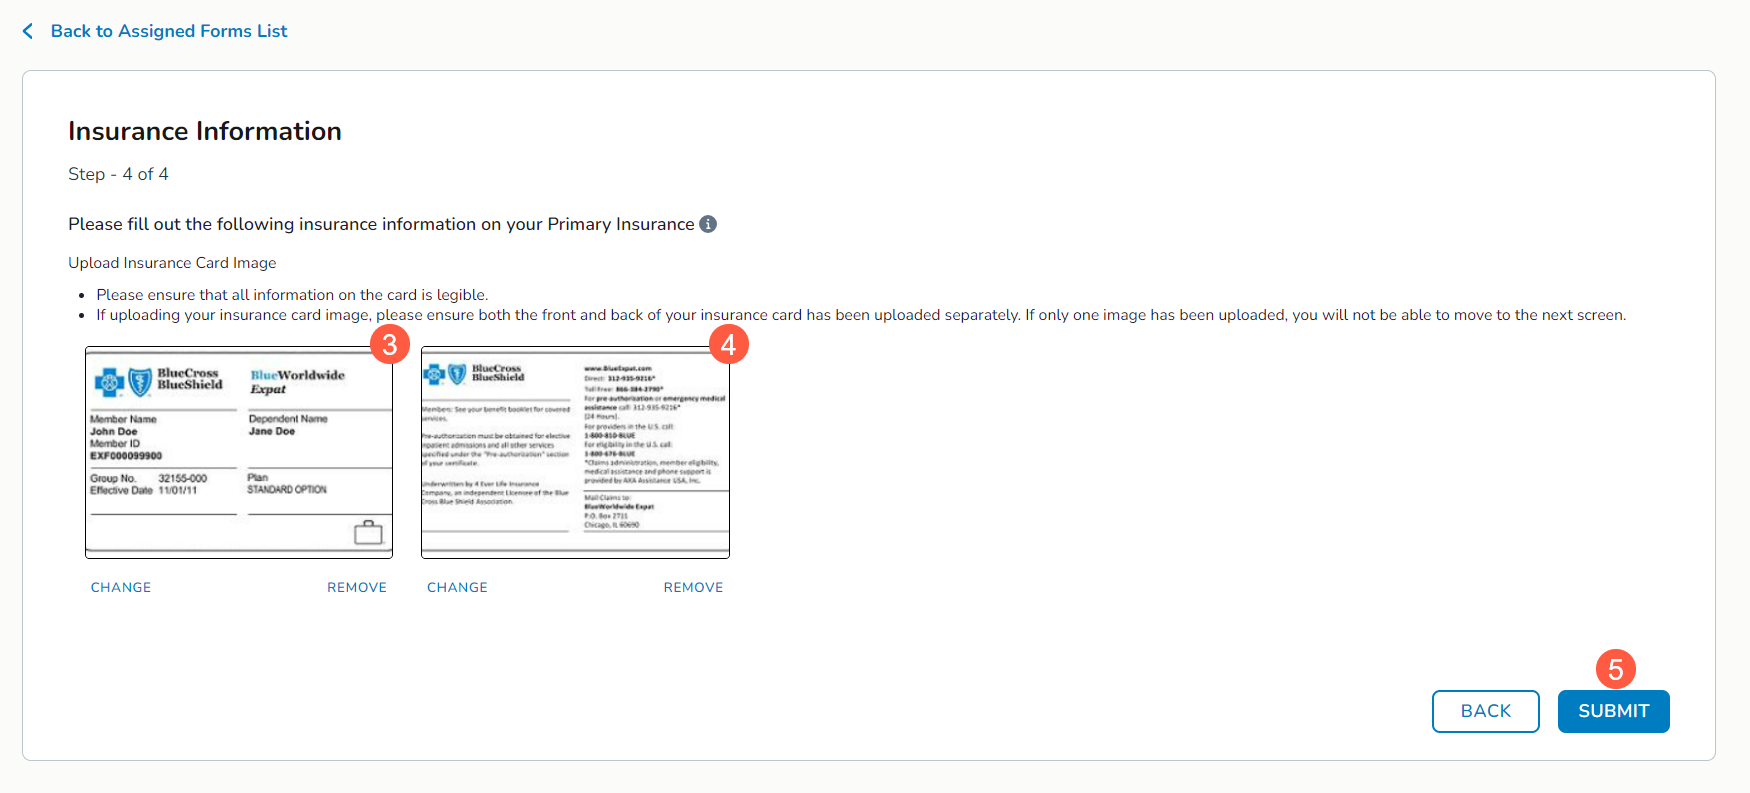
- As they upload each image, a preview appears on the page (callouts 3 and 4). They can choose to Change or Remove the images as needed.
- Once both images are uploaded, they must click the Submit button (callout 5) to complete the process.
Practice’s insurance forms process
Once a patient completes the insurance form, it will be routed to your Forms Queue in the Ontada Health tab. Open the queue and locate the completed form.
- Click on the item to view more information and see what action is required by your practice.
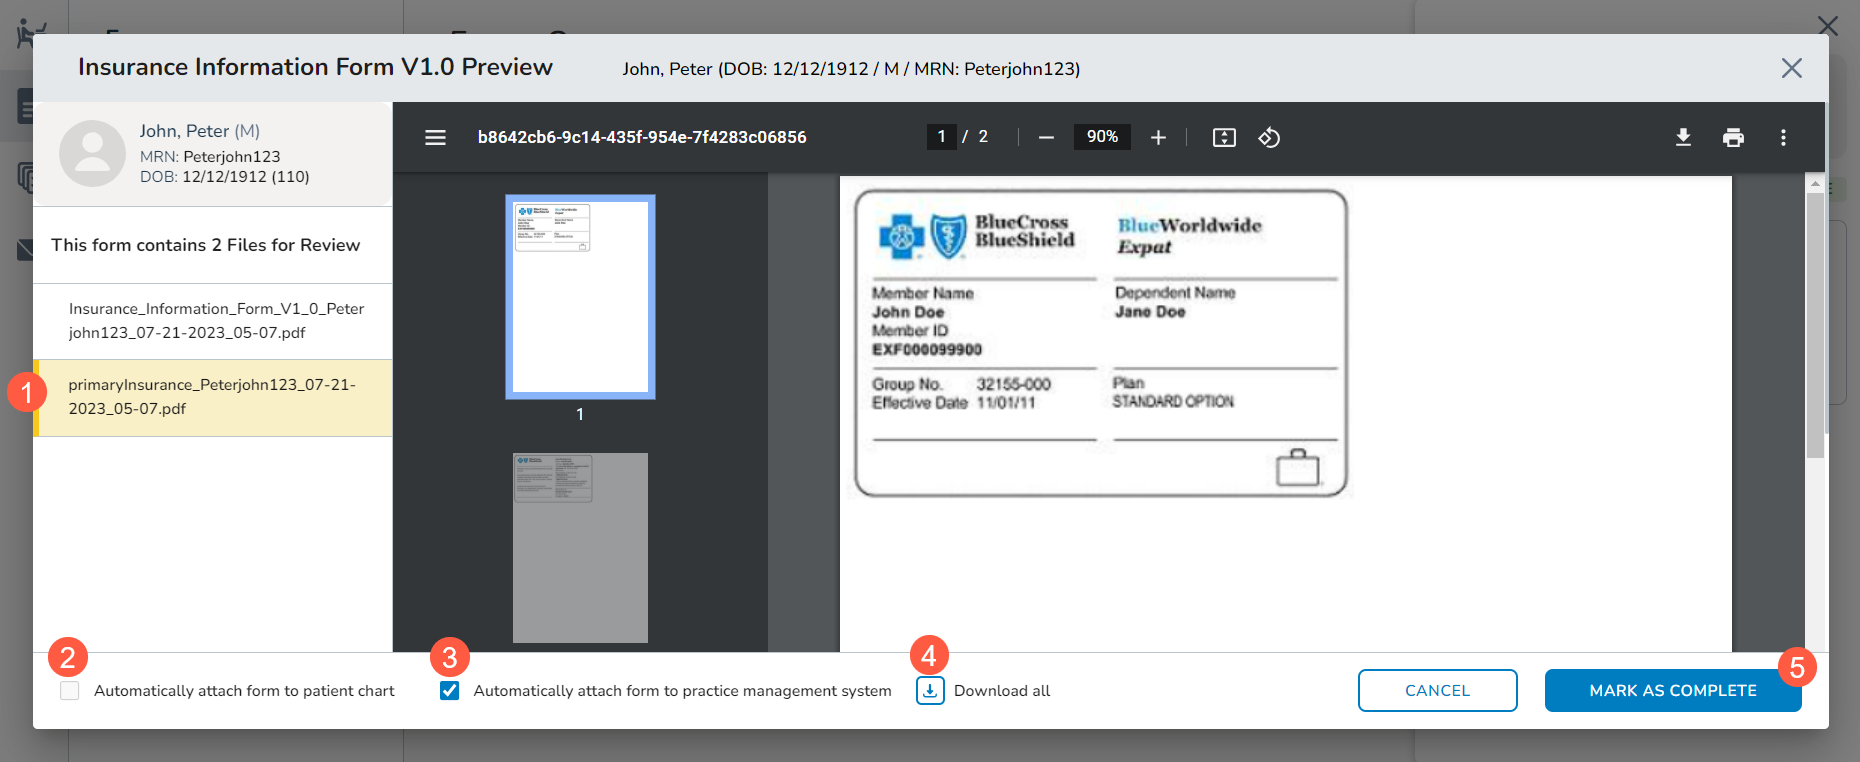
- Click Take Action to open the information in a new window.
- On the left-hand side of the window, you can choose to see the files attached for review (callout 1). Both the insurance form and the uploaded images of the insurance card will be listed.
- If configured, attach the form and images to the patient’s chart by checking the box next to Automatically attach form to patient chart (callout 2).
- A copy will be routed to the Documents tab of the patient’s chart. From there, you can click on the item to preview the PDF on the screen.
- If configured, send a copy of the form to your practice management system by checking the box next to Automatically attach to practice management system (callout 3).
- You may also download a copy of this information using the download icon (callout 4).
- This allows you to save the form to your personal files and manually upload or share it when needed.
- Lastly, if the information looks correct and your review is complete, click the Mark as Complete button (callout 5).