Scheduled Self-service reports Copied
We’ve added a new scheduling feature to Reports to enhance your workflow by automating report generation. All General reports can now be scheduled, reducing manual report generation, and ensuring reports are readily accessible within your defined timeframe. This new feature minimizes the need to request reoccurring reports from your Account Manager, improving workflow efficiency.

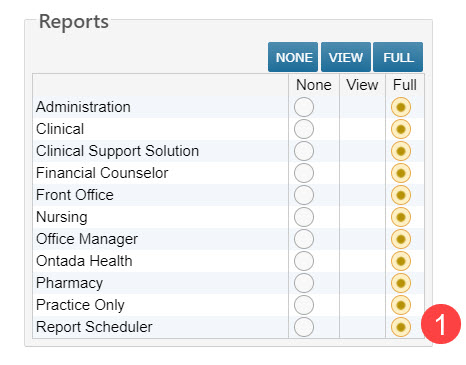
Setting up permissions
To enable the scheduler for a user:
- Navigate to the user’s profile and go to Permissions.
- Locate the Reports section.
- Change the new Report Scheduler option to Full (callout 1).
NOTE: Permission changes take effect after the next nightly refresh.
Scheduling a report
- Go to Admin > Reports from the top navigation.
- Select a report from the General reports list.
- Set the report filters, especially the date filters to ensure the report includes the needed data, e.g., Patient Visit Date (callout 1).
- Use the new Custom Period option to schedule reports based on today’s date for past or future dates (callout 2).
- Click the Schedule button to open the scheduling window (callout 3).

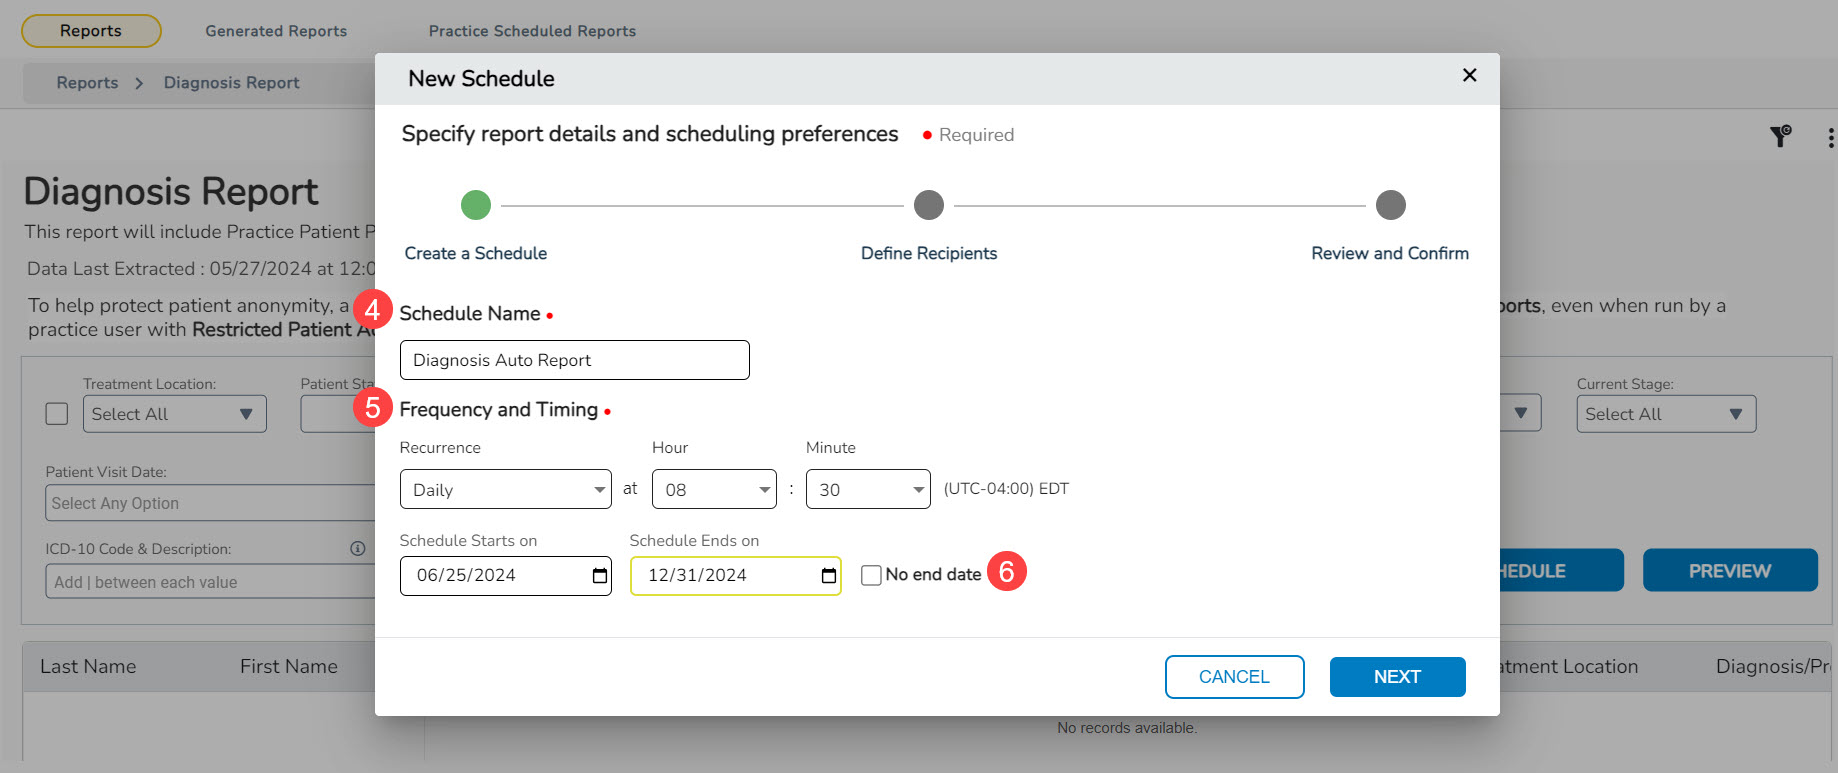
- Enter a name for the report in the Schedule Name field (callout 4).
- Choose recurrence type and delivery time under Frequency and Timing (callout 5).
NOTE: The data in iKnowMed is updated with a 48-hour delay. When scheduling the frequency of your reports, ensure to account for this delay and plan for the data to be up to 2 days behind the current date.
- Set the start and end dates for report delivery or opt for No End Date (callout 6).
- Click Next to proceed.
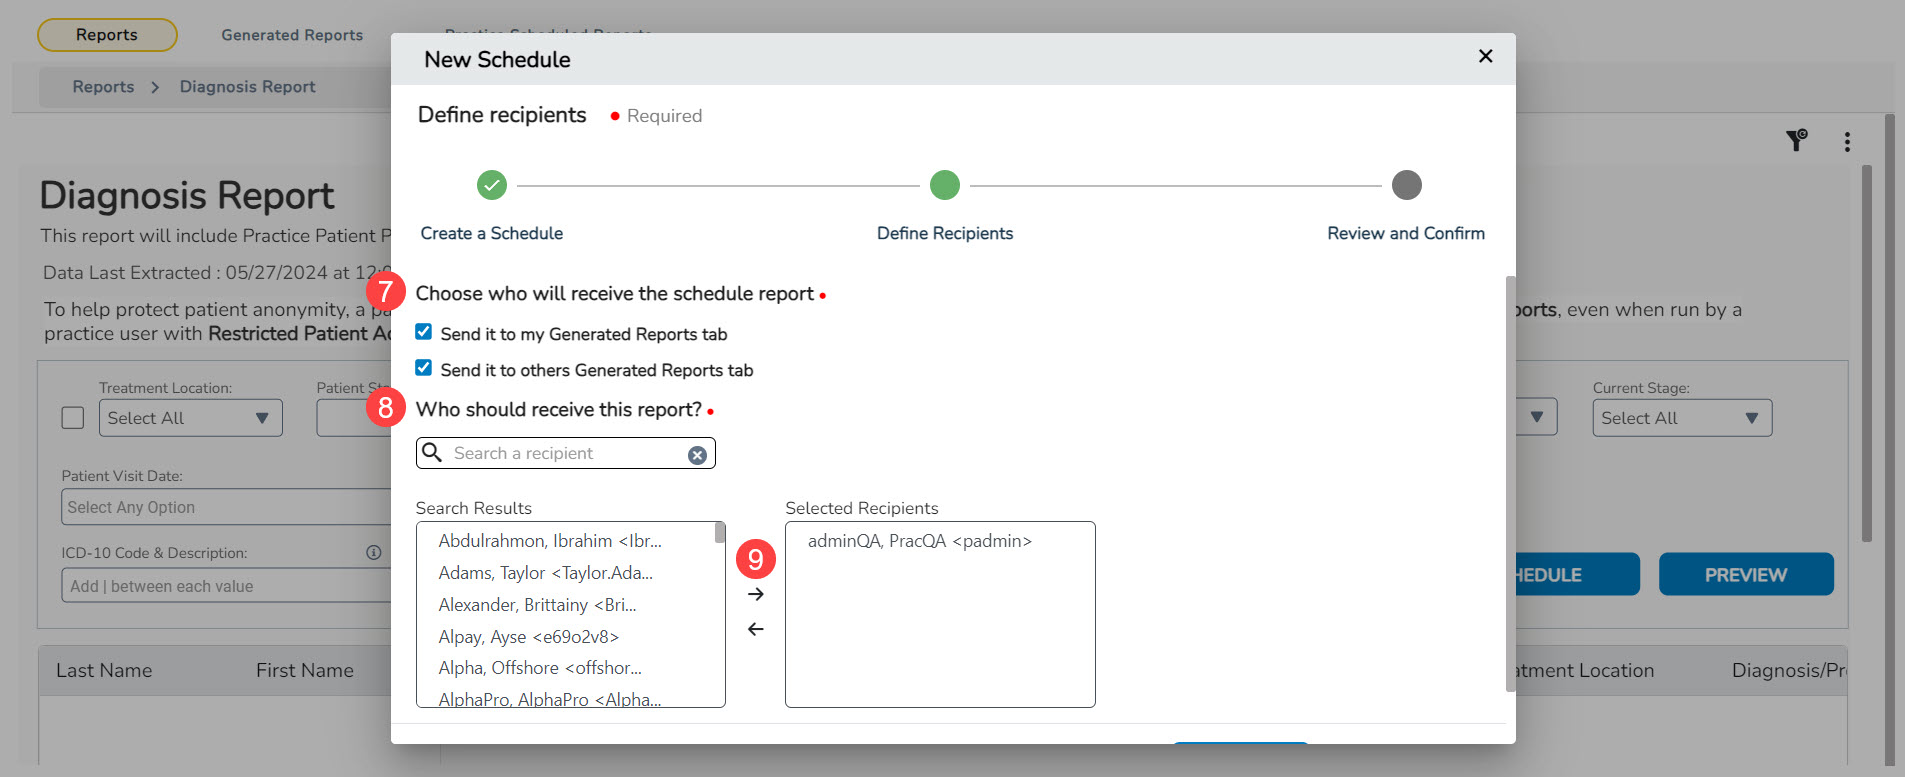
- Choose whether to send the report to your Generated Reports tab and/or to others’ tab (callout 7).
- If you send it to others, a feature will appear where you can search for a recipient (callout 8).
NOTE: Only those with permission to access the report will appear in the search results. If someone needs to receive this report and they do not appear in the results, their permissions will need to be updated.
- Click on a person in the search results and use the arrows to add/remove them from the Selected Recipient list (callout 9).
- You may add as many recipients as you wish.
- Click Next to continue.
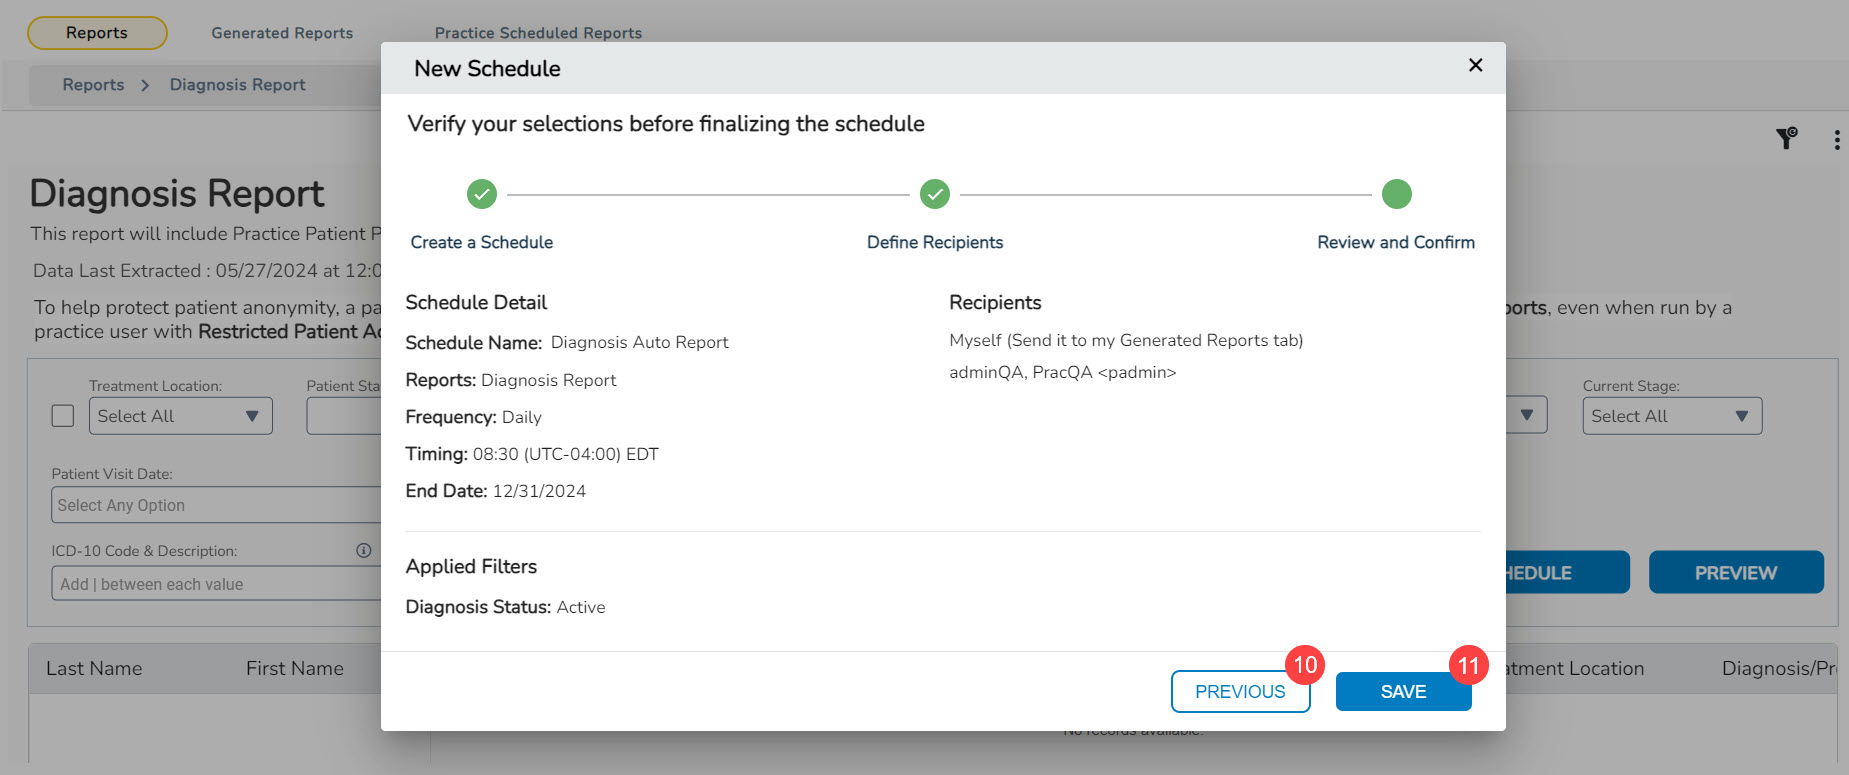
- Review the schedule and recipient details.
- Use the Previous button to amend details if necessary (callout 10).
- Click Save to finalize the scheduled report (callout 11).
NOTE: The report will be delivered on the next closest date (e.g., if set to daily, it will appear the next day).
Managing scheduled reports
To review or edit your scheduled report:
- Go to the Practice Scheduled Reports page (callout 1).
- The queue on this page is shared among your practice users with the Report Scheduler permissions set to Full. This means any permissioned users at your practice can do the following to all scheduled reports:
- Pause Schedule to stop the automatic generation until it’s manually started again (callout 2).
- Generate reports instantly with results appearing on the Generated Reports page (callout 3).
- Edit the schedule to change the timing, frequency, and recipients (callout 4).
- Delete the schedule so the automatic generation stops, and the report is removed from the queue (callout 5).
- Use the Updated On (by) column as an audit trail to track changes to the report schedule (callout 6).
