Precision Medicine Electronic Orders Copied
The enhanced Precision Medicine ordering process allows users to send electronic orders directly to genomic testing vendors. This new workflow brings Ontada closer to a fully electronic, end-to-end precision medicine solution.
Supported Vendor Testing
For a complete list of supported tests by vendor, please visit the Help Menu.
NOTE: For Precision Medicine tests not supported in the Electronic Ordering, editable PDF order forms will be available through the Precision Medicine button after an iKnowMed order is entered in the Orders Tab > New Orders.
Complete a Precision Medicine electronic order
To use the electronic order functionality, you must place a signed genomic order in iKnowMed on the >Orders tab > New Orders. Select an order from your practice specific order panel to add to the cart and sign and save the order. The Biomarker Ordering tool which houses the pdf versions of the requisitions is not available to select which requisition you intend to order.
Order Panels are managed by the iKnowMed lead at your practice. If you do not see an order panel with the genomic test, please contact your iKnowMed practice lead.
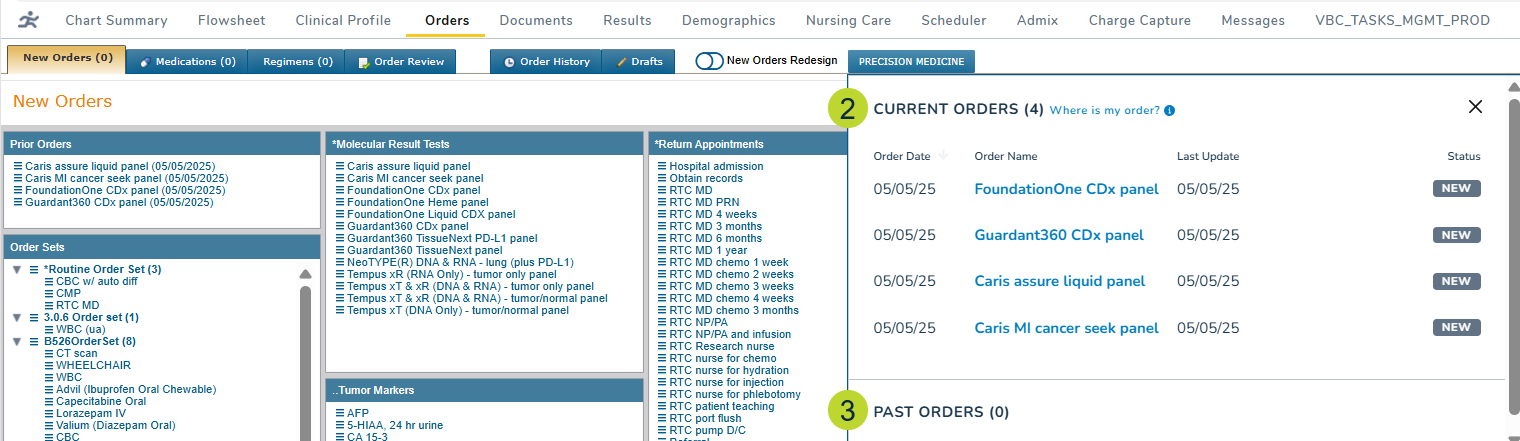
After ordering a genomic test, click the Precision Medicine button (callout 1) near the top of the Orders page.

View orders
The window will display both Current Orders and Past Orders.
- Current Orders: View the list of active orders (callout 2).
- Past Orders: View the list of orders sent to the vendor (callout 3).
- Each section is sorted by Order Date and includes the Order Name, Last Update, and Status.
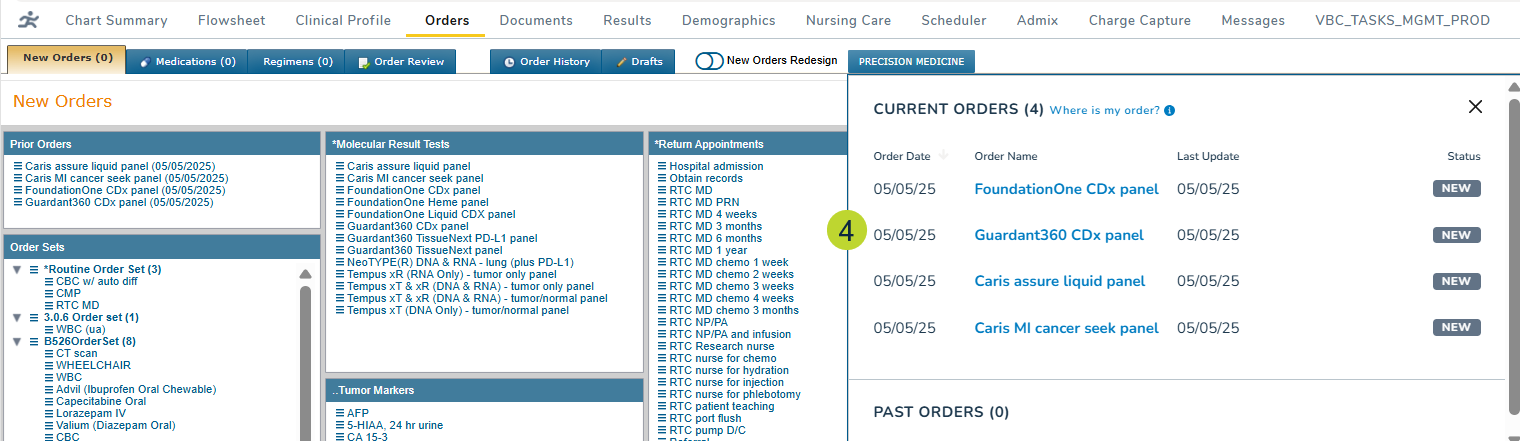
Place an order
- Click on the new or in-progress order you wish to submit (callout 4).
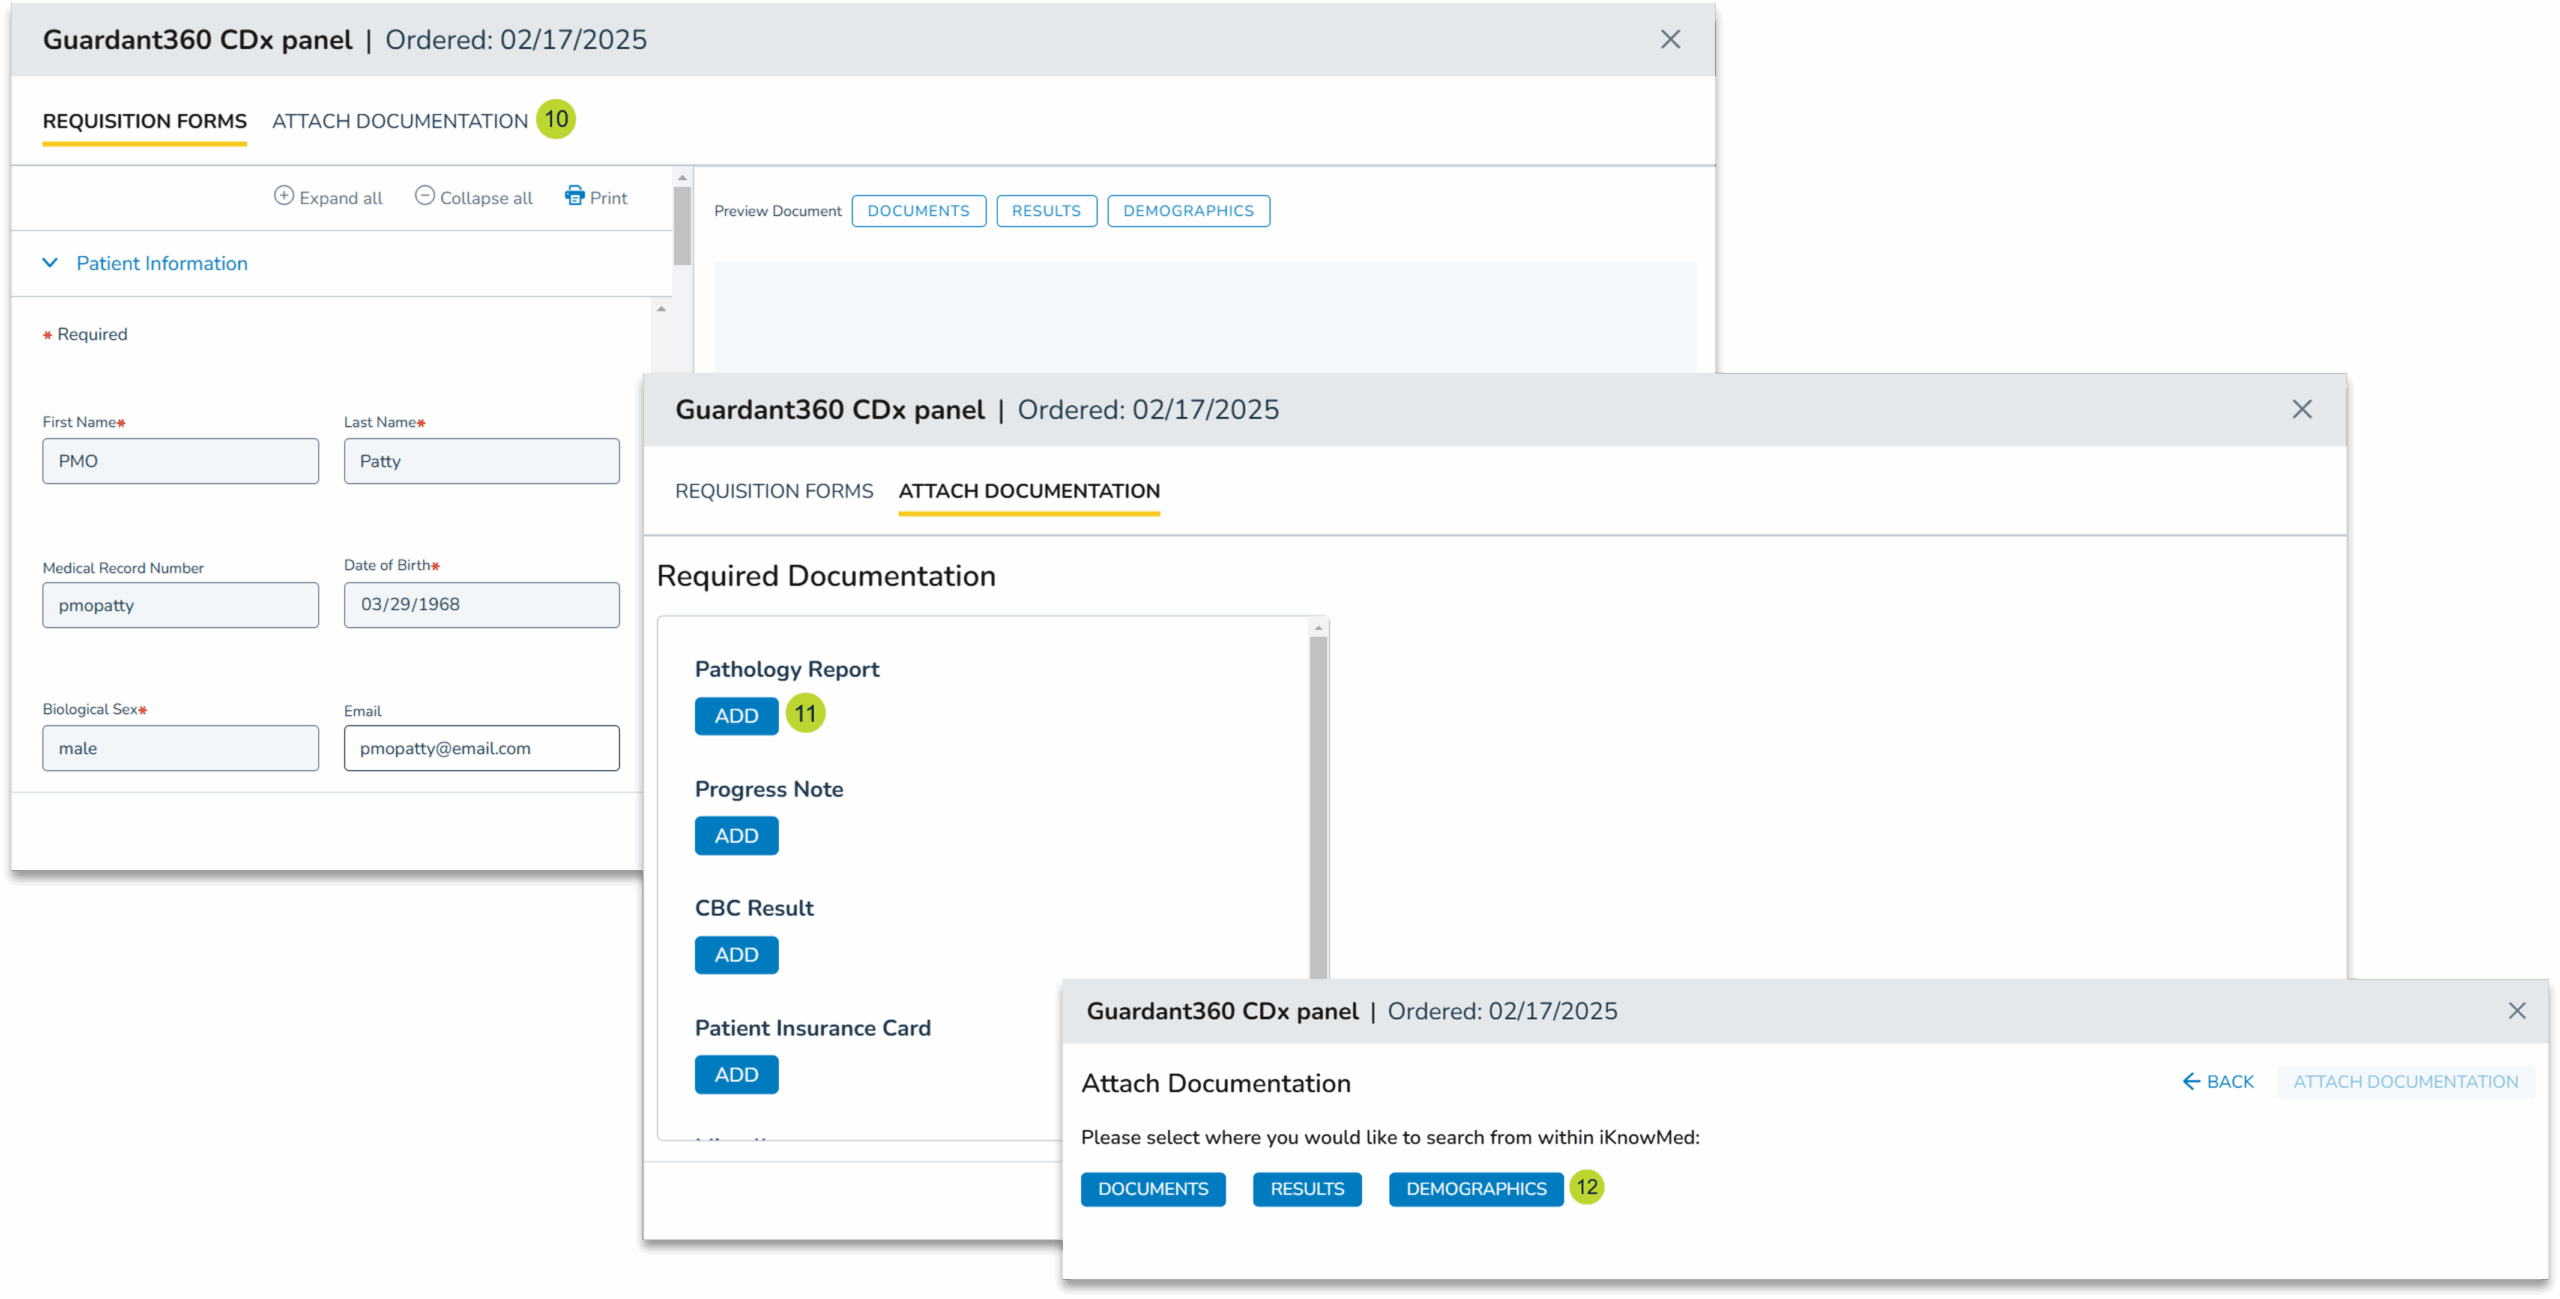
- The Requisition Form will appear and can be expanded, collapsed, or printed as needed (callout 5).
- The form also contains pre-populated information, such as patient demographics and ICD-10 codes associated with the diagnoses.
- Fields that are required and need manual input will be marked with a badge and error message (callout 6).
- Complete all required fields before proceeding.
- As needed you can view the documents, results or demographics data that may help you in completing the requisition.
- Click the documentation type you wish to view (callout 7).

- This will open the Select Documents feature where you can choose from items already attached to the patient’s chart.
- Locate and choose the needed item before clicking the Select Document button (callouts 8-9).
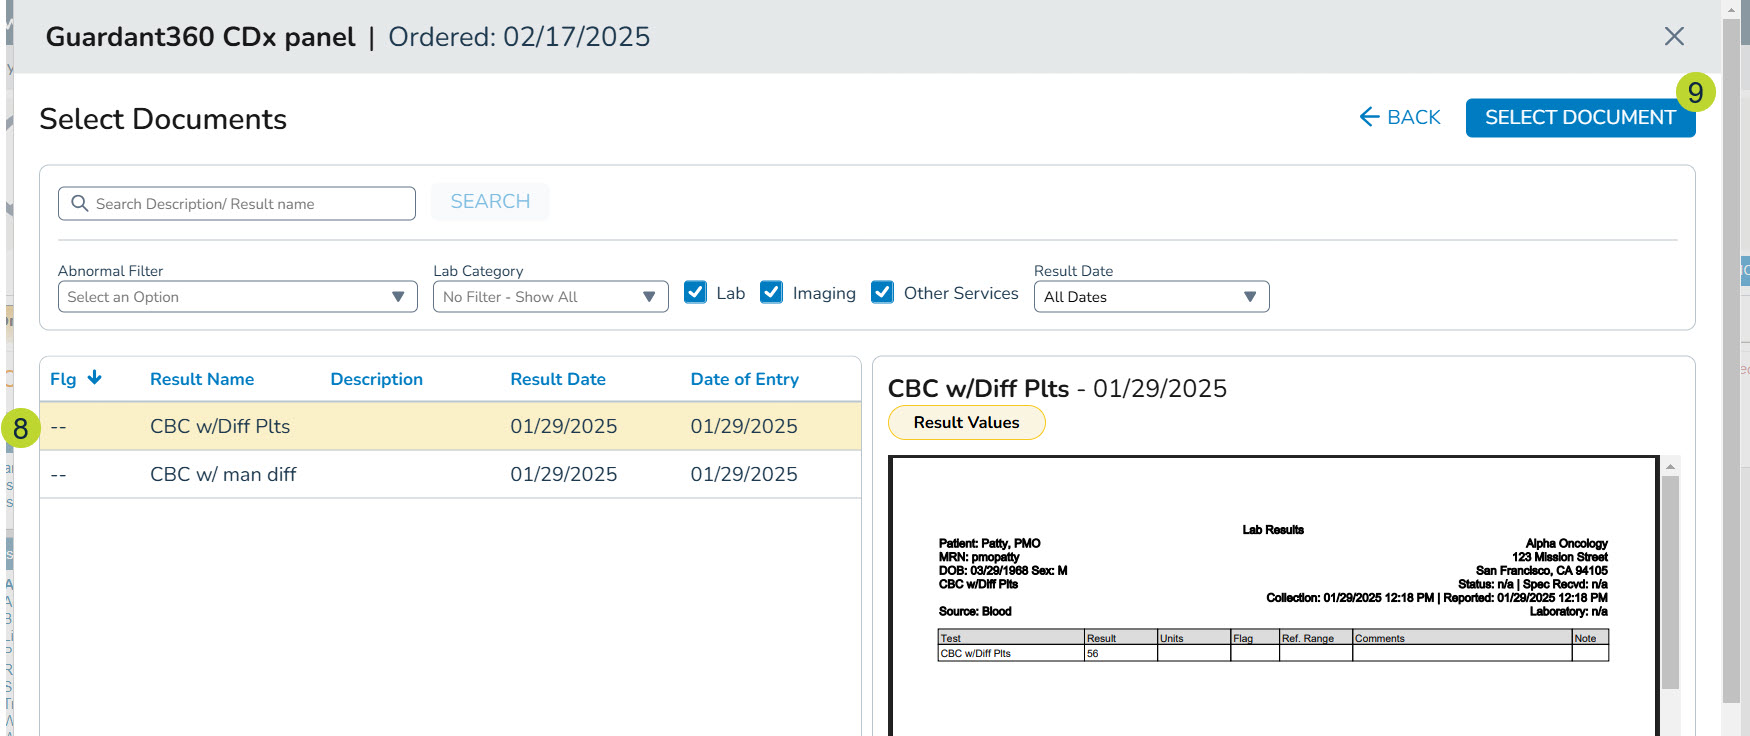
- This will display the document next to the requisition form, making it easier to complete.
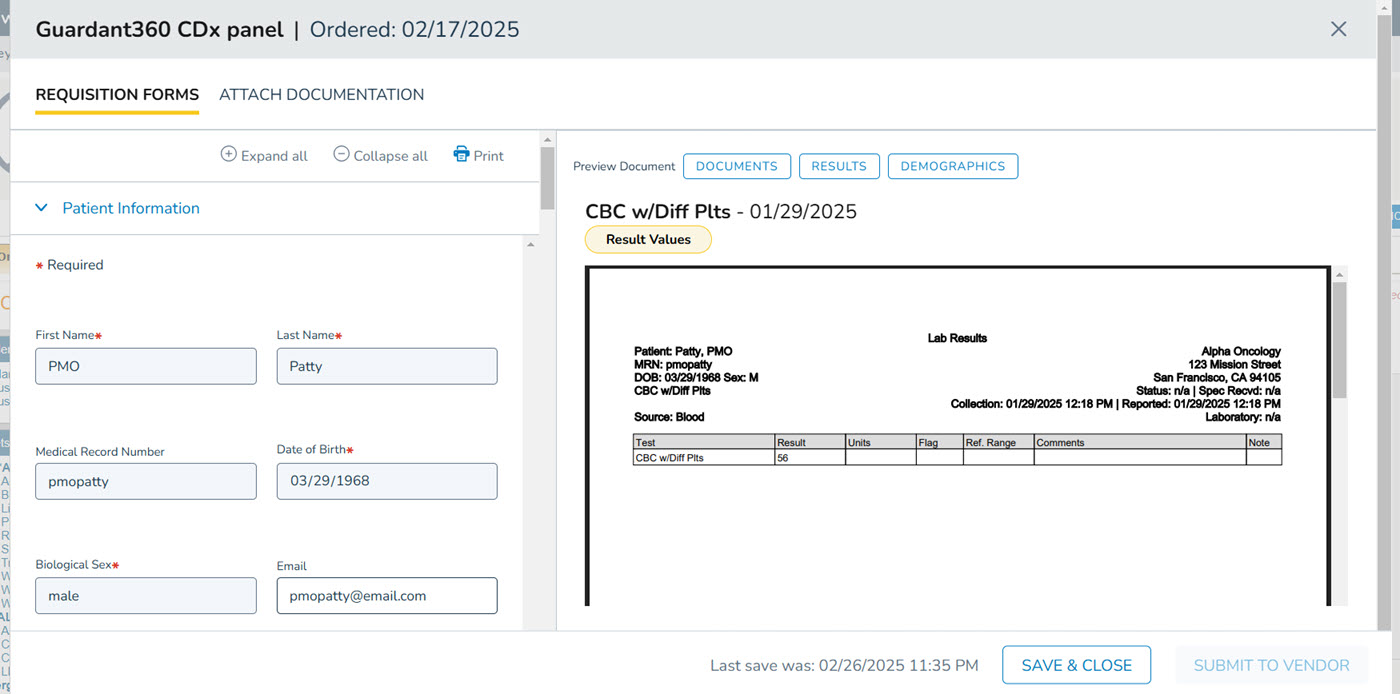
- To attach items to the requisition form for the vendor, navigate to the Attach Documentation page (callout 10).
- Click the Add button beneath the type of document you wish to attach (callout 11).
- Choose to add Documents, Results, or Demographics (callout 12).
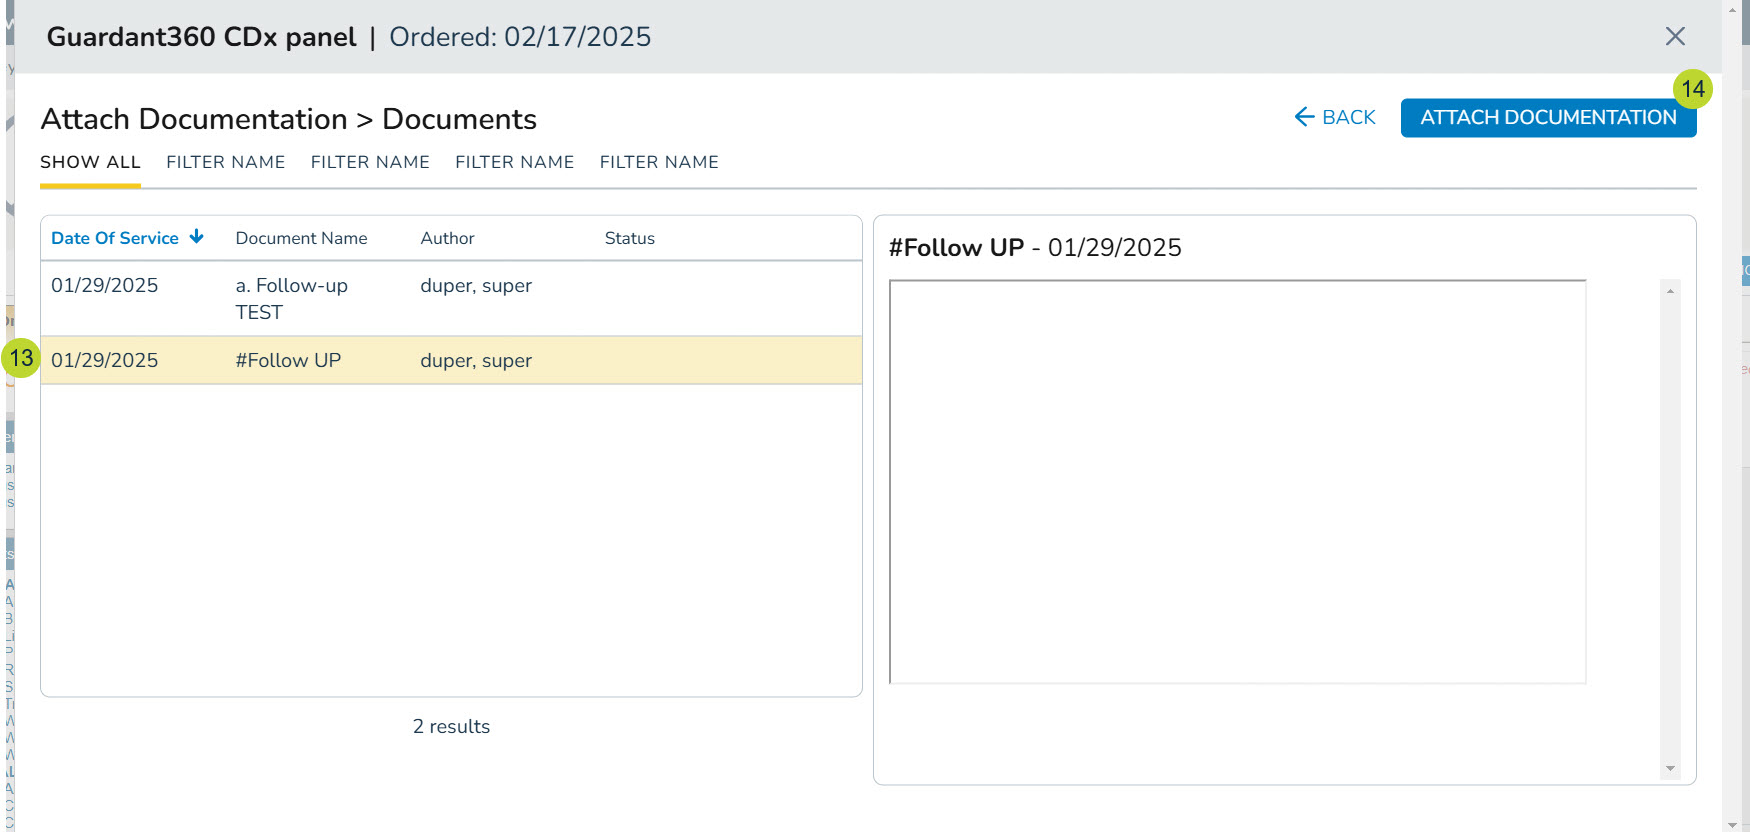
- Locate and choose the needed item before clicking the Attach Documentation button (callouts 13-14).
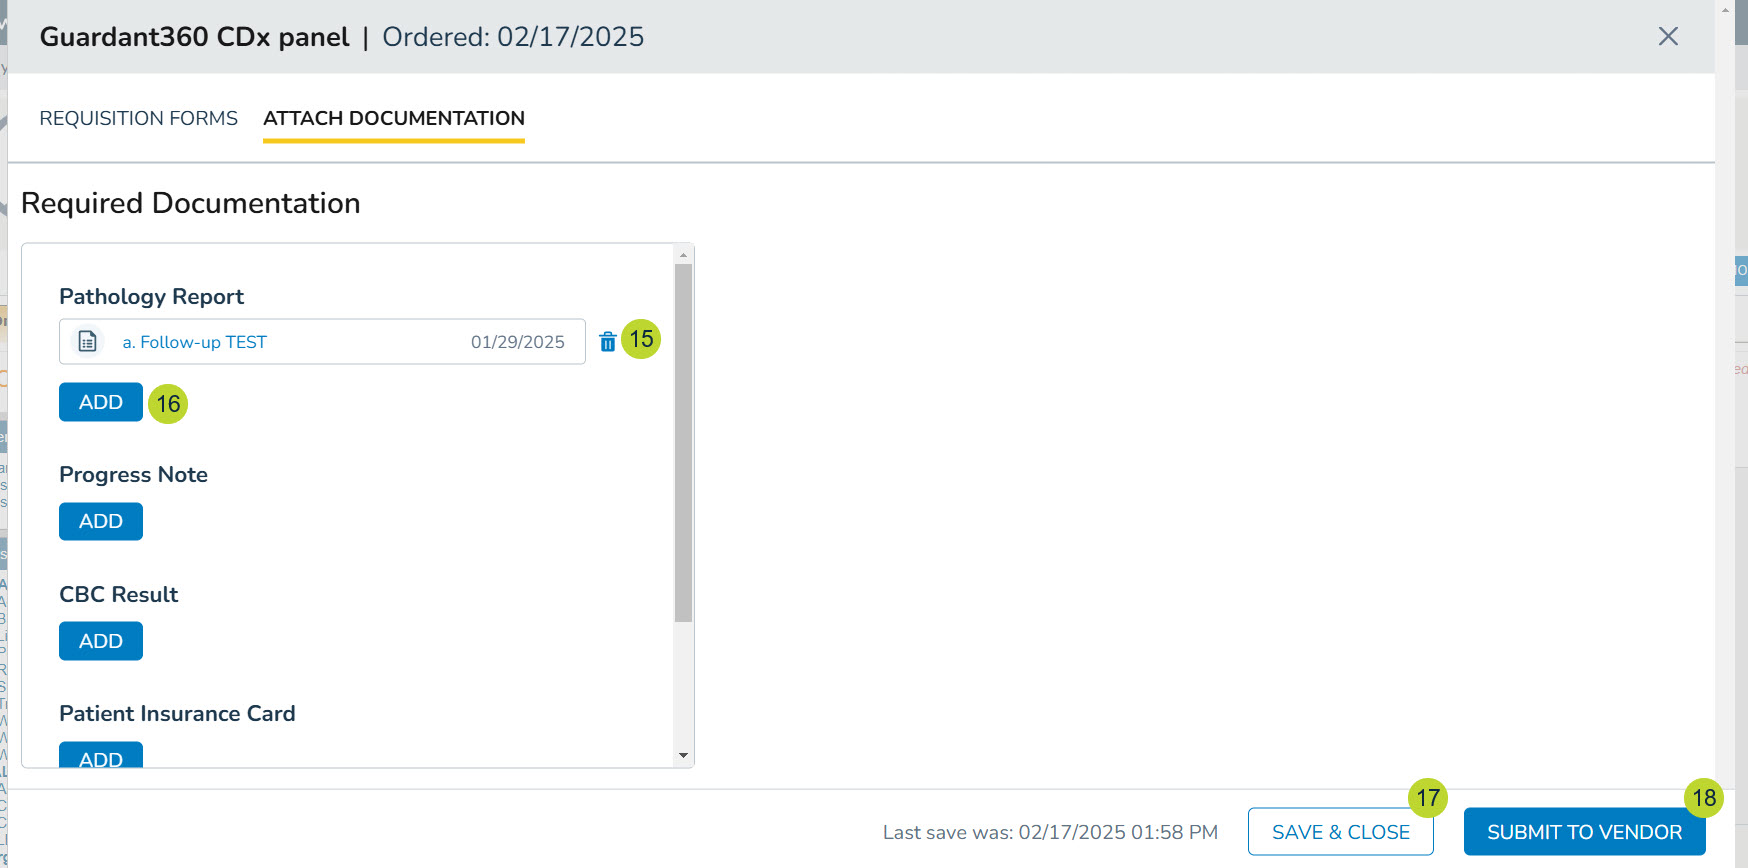
- Once an item is added, it can be removed by clicking on the trash icon (callout 15).
- To add another document to the same category, click the Add button again (callout 16).
- Once all required information is added, you may click Save & Close to save the order as a draft (callout 17) or click Submit To Vendor to send the completed order (callout 18).
- When submitting the form, a window will appear to confirm the submission. Click the Confirm button to continue (callout 19).
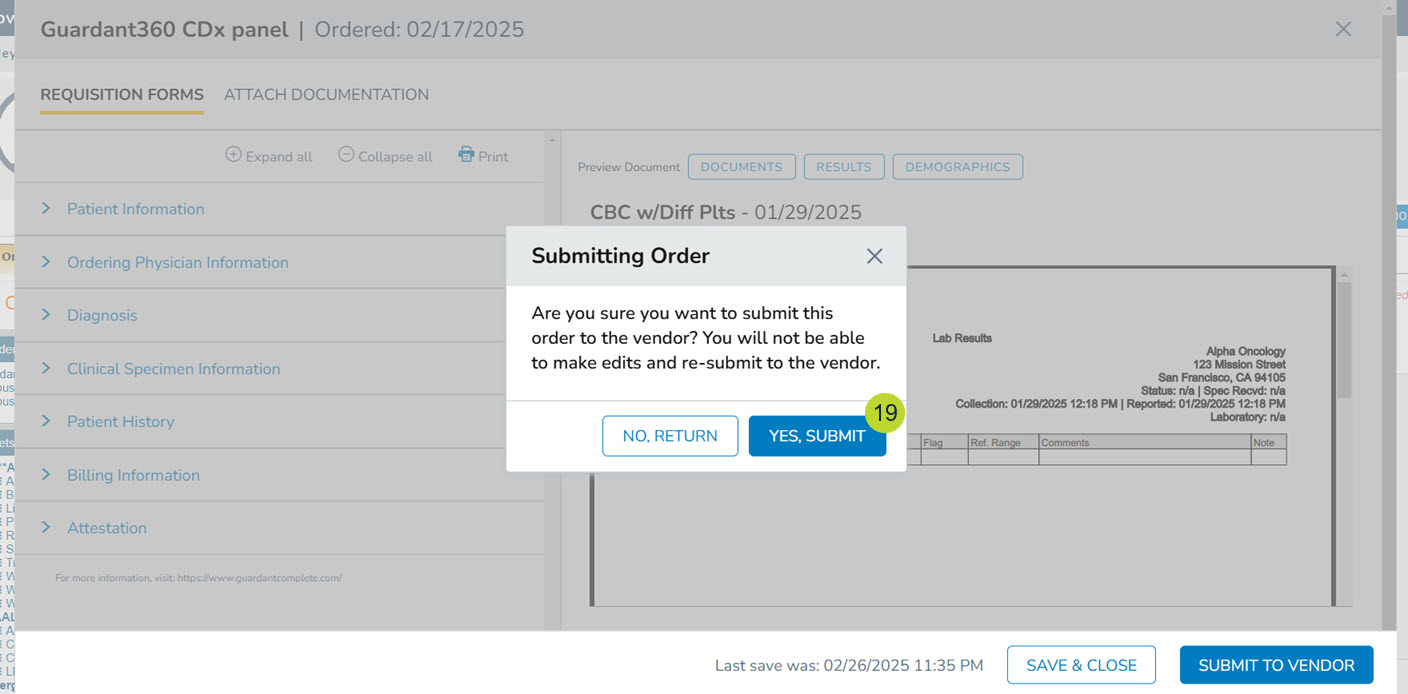
- A success message will appear to confirm the form was sent to the vendor.
