New Location for Messaging Groups Copied
The iKnowMed Generation 2 team is enhancing the process of creating and maintaining user groups to include the ability to associate groups with provider type, medical specialty, region, and/or location.
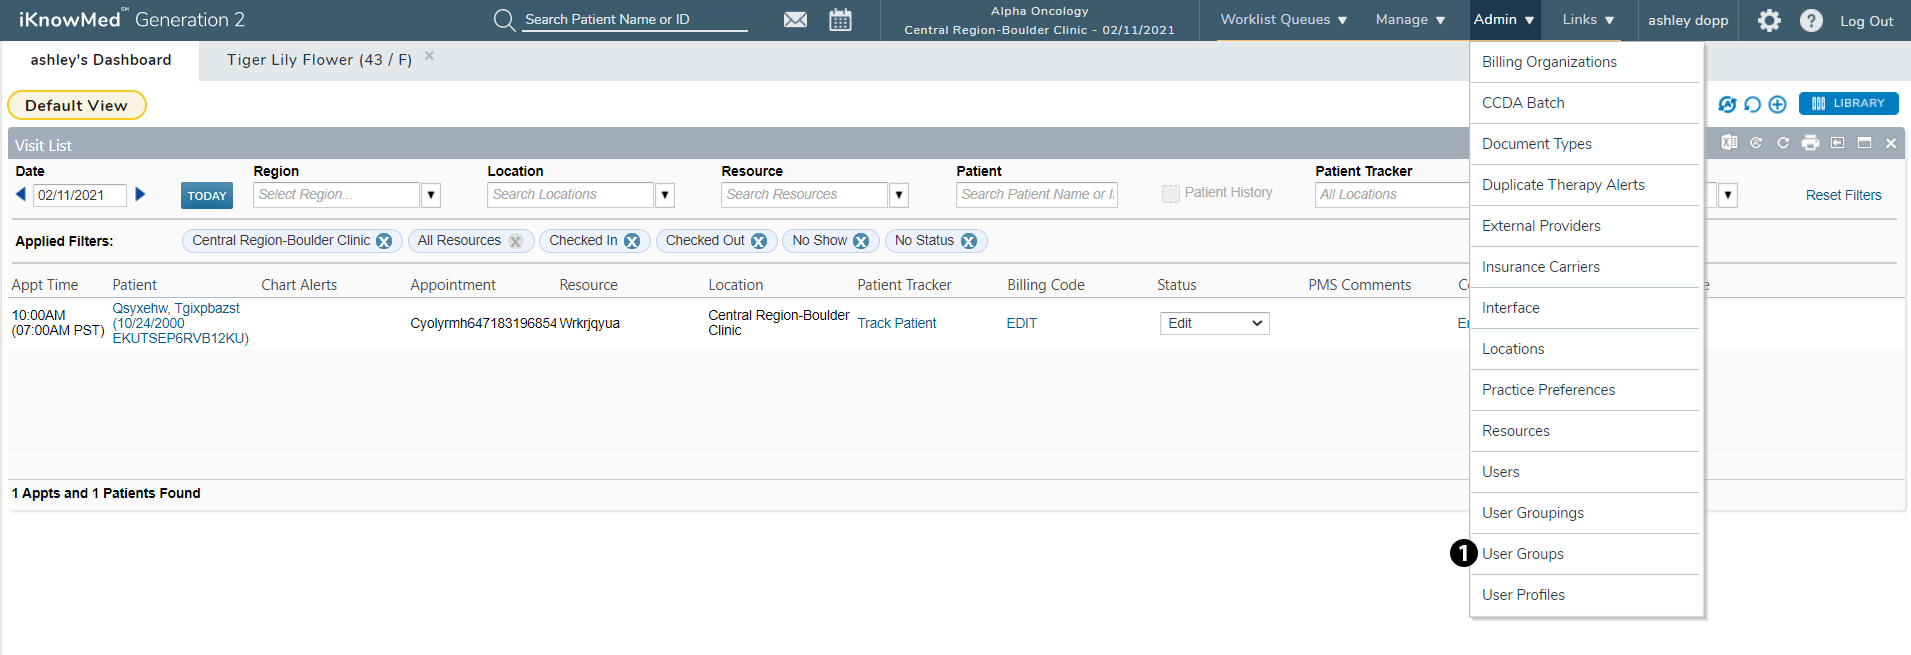
The first step in this enhancement includes the relocation of the creation and maintenance of user groupings. Starting with version 3.0.21, users must create and maintain messaging groups under ADMIN > User Groups (see callout 1).
The previous location in ADMIN > User Groupings will remain to create and maintain all other user grouping types as this enhancement will be a phased roll out.
To work with an existing group:
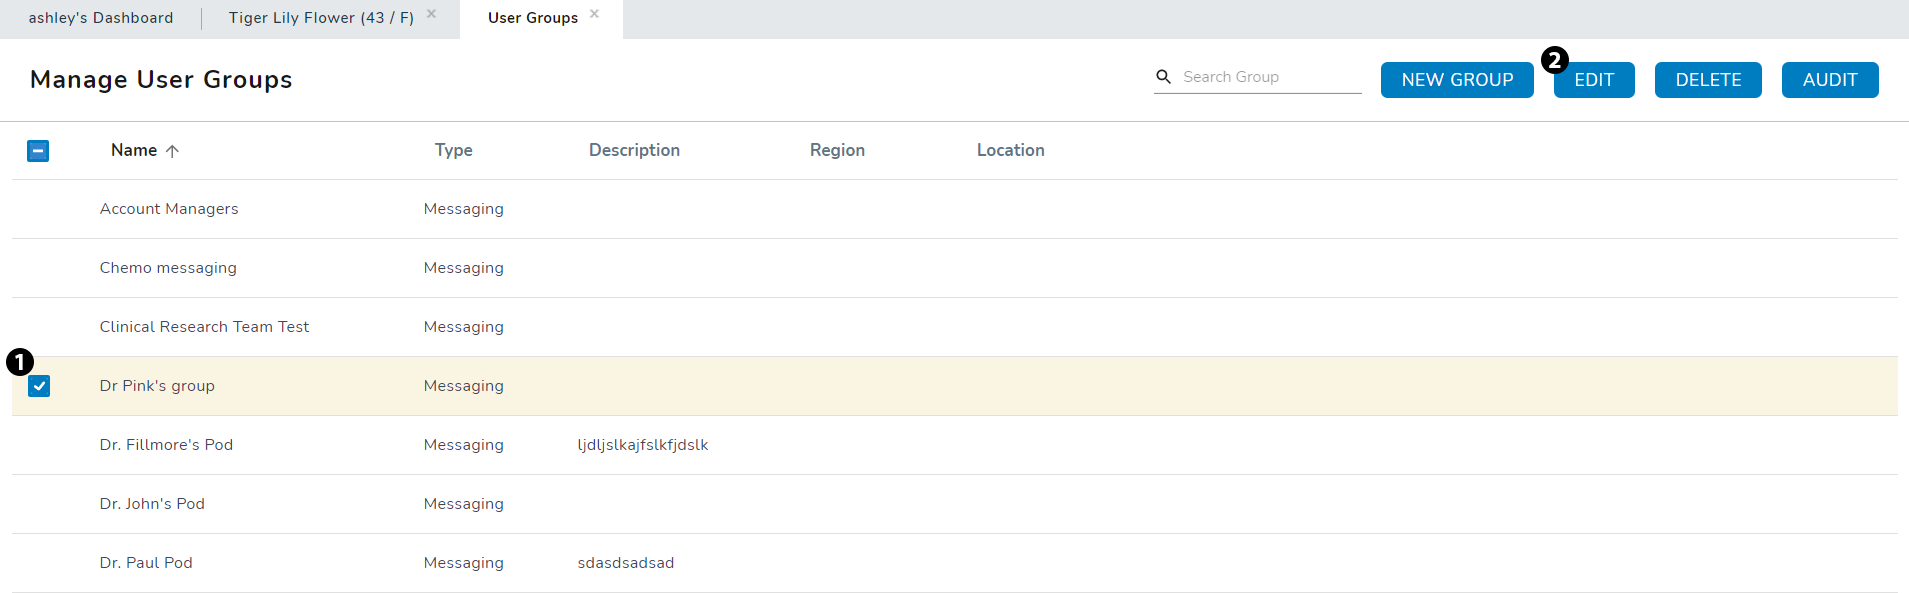
The new ADMIN > User Groups page will be prepopulated with all your practices’ previously created groups so that you can continue to maintain them.
-
Select an existing group on the page (see callout 1).
-
Choose either the EDIT, DELETE, or AUDIT buttons (see callout 2).
-
EDIT: allows you to make changes to an existing group, such as members associated with this group.
-
DELETE: allows you to remove an existing group.
-
AUDIT: allows you to see any actions taken on this group and when those actions took place, as well as who took those actions.
-
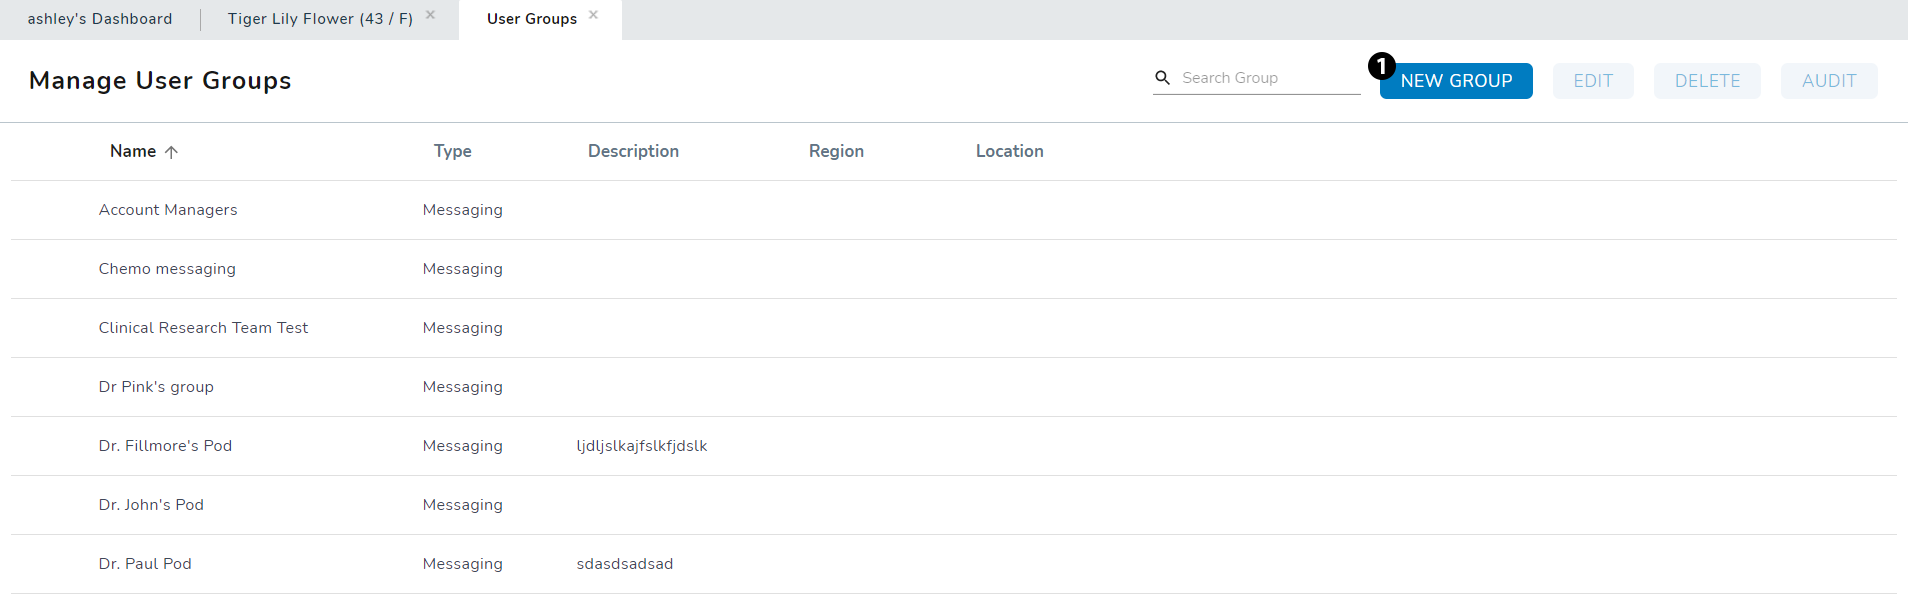
To create a new group:
-
Click the NEW GROUP button (see callout 1).
-
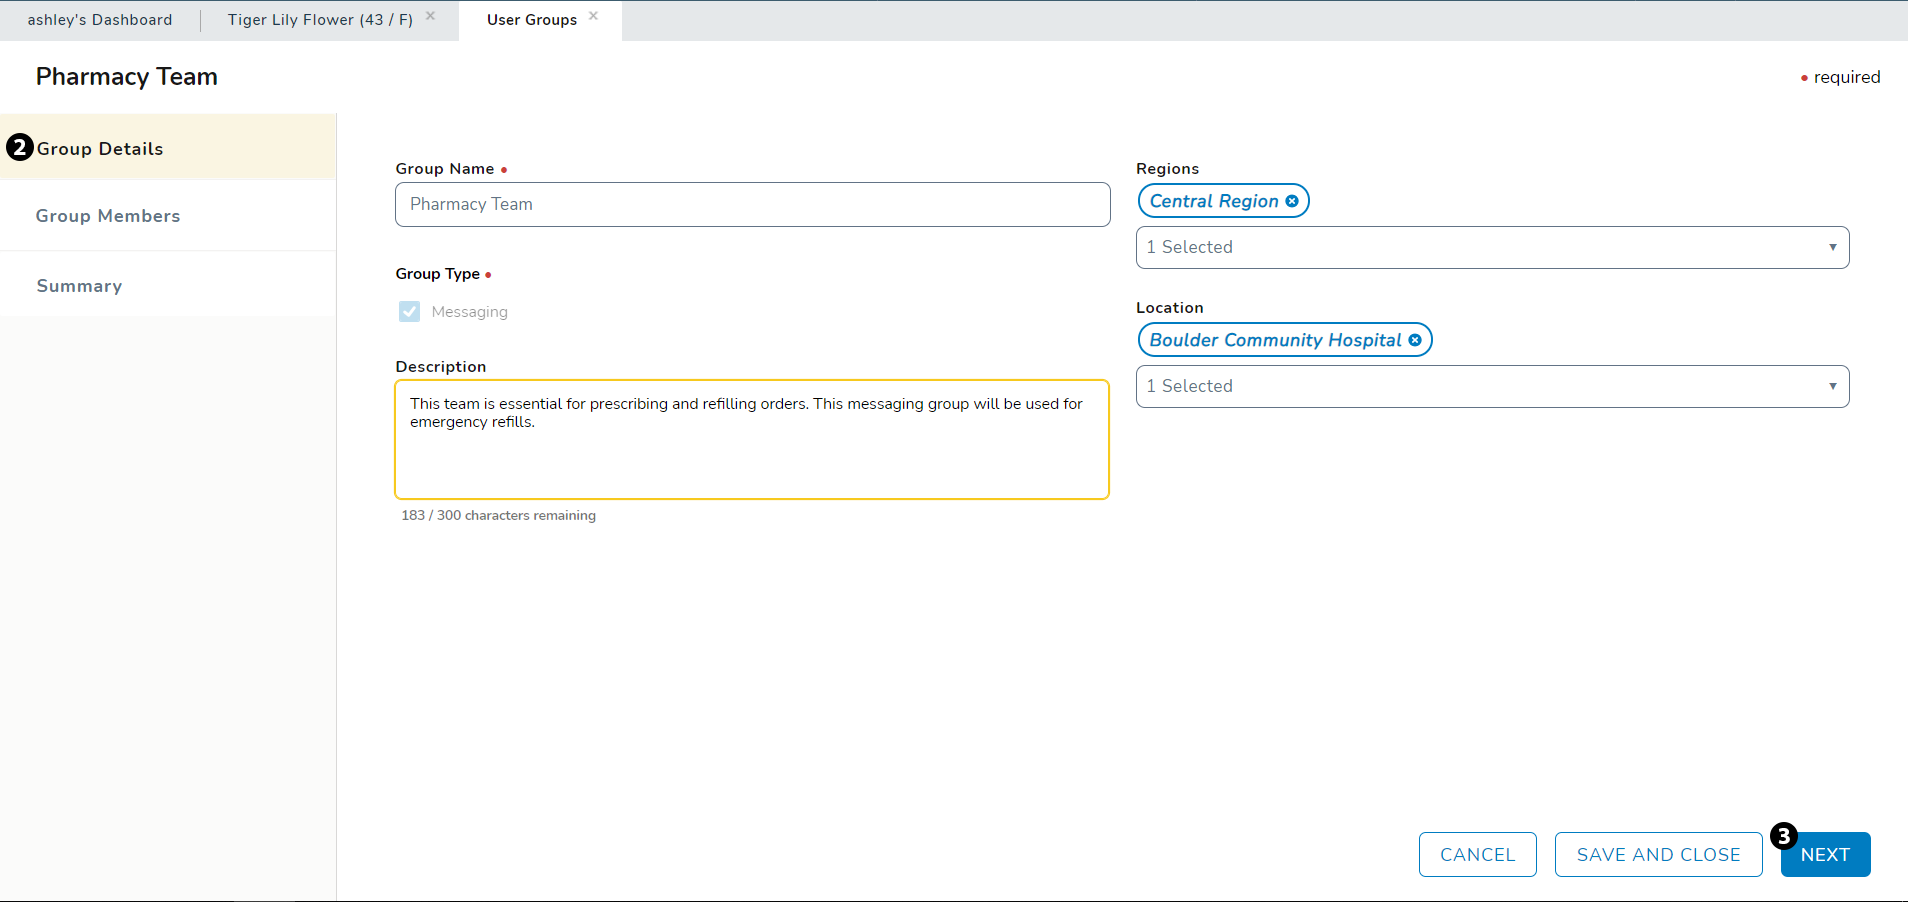
From the Group Details section in the left-hand menu (see callout 2), enter as much information about the group as needed.
-
Group Name: this is a required field. Name the group in a way that makes it easy to identify later.
-
Group Type: currently this required field will default to Messaging and cannot be changed.
-
Description: use this field to enter a description of this group to help you identify it later, such as who is in the group and why.
-
Regions: you have the option to choose the region this group belongs to.
- Location: you also have the option to choose a location if this group is associated with a certain place.
-
-
Click the NEXT button (see callout 3) or select Group Members from the left-hand menu (see callout 4).
-
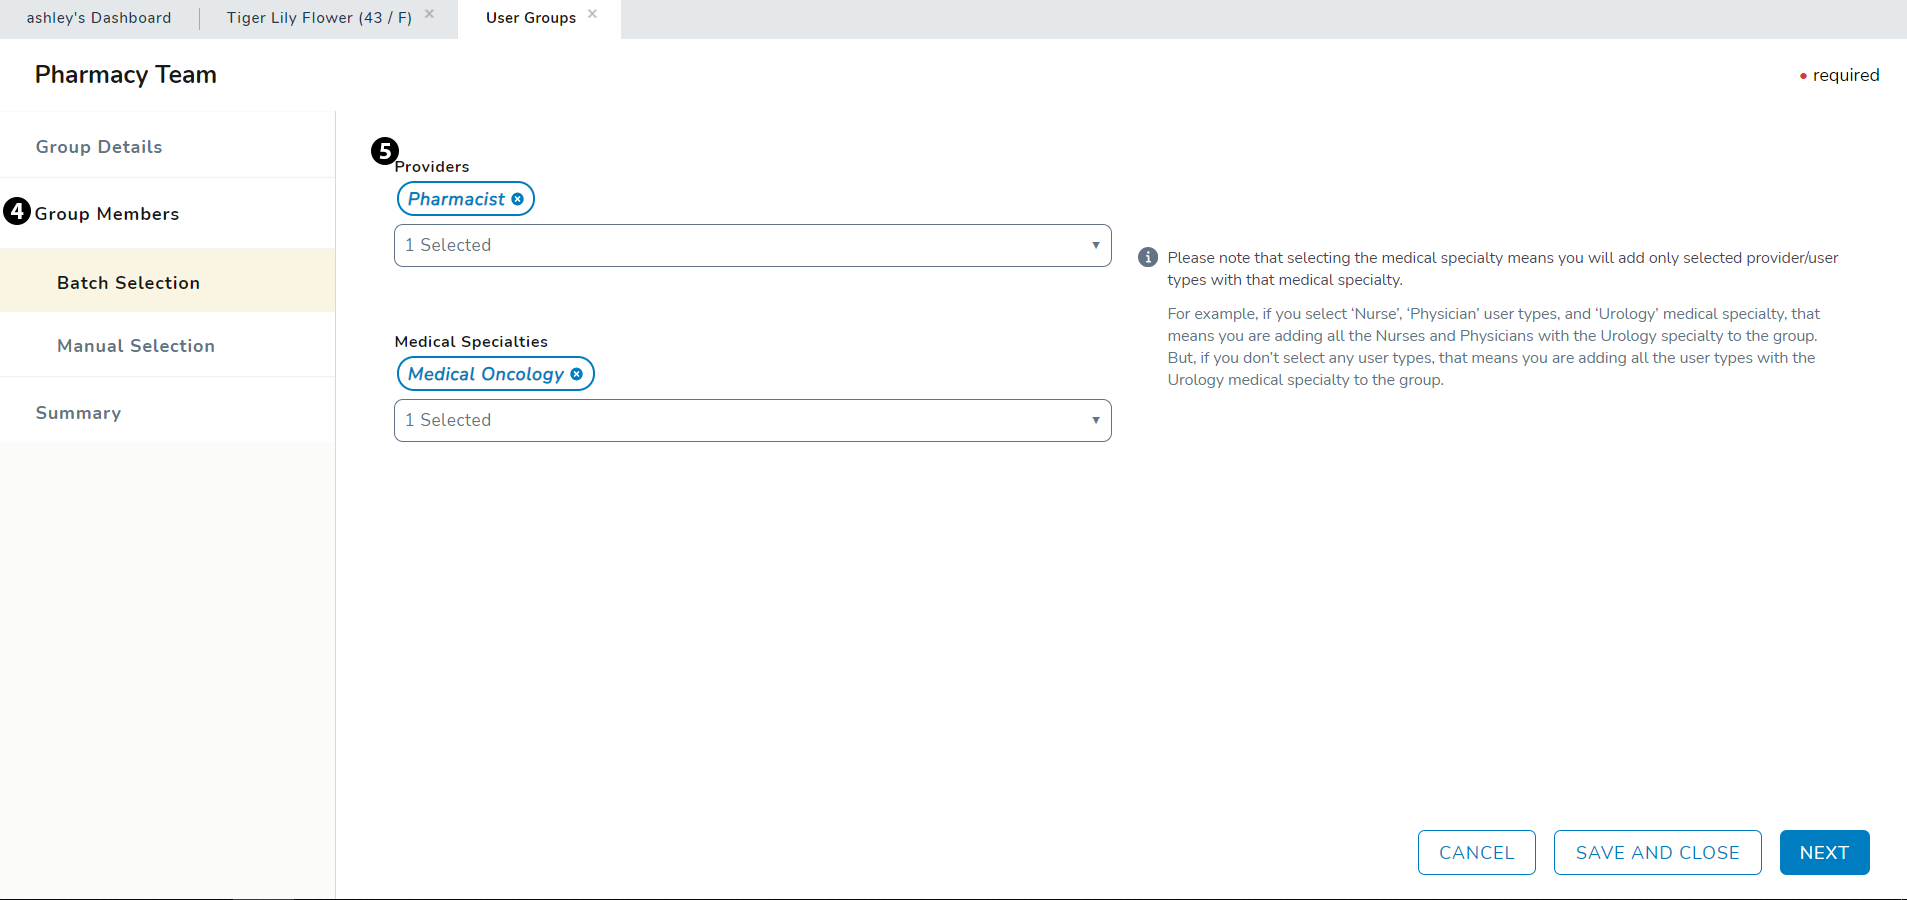
The Group Members section gives you the option to add members using a Batch Selection and/or a Manual Selection.
-
Batch Selection: allows you to choose all users at your practice by provider type or medical specialty. Any users in your practice whose profile is assigned these roles will be included in your messaging group (see callout 5).
-
Please note that when creating groups using provider type, those users will not show on the Summary page until it is saved and then edited.
-
-
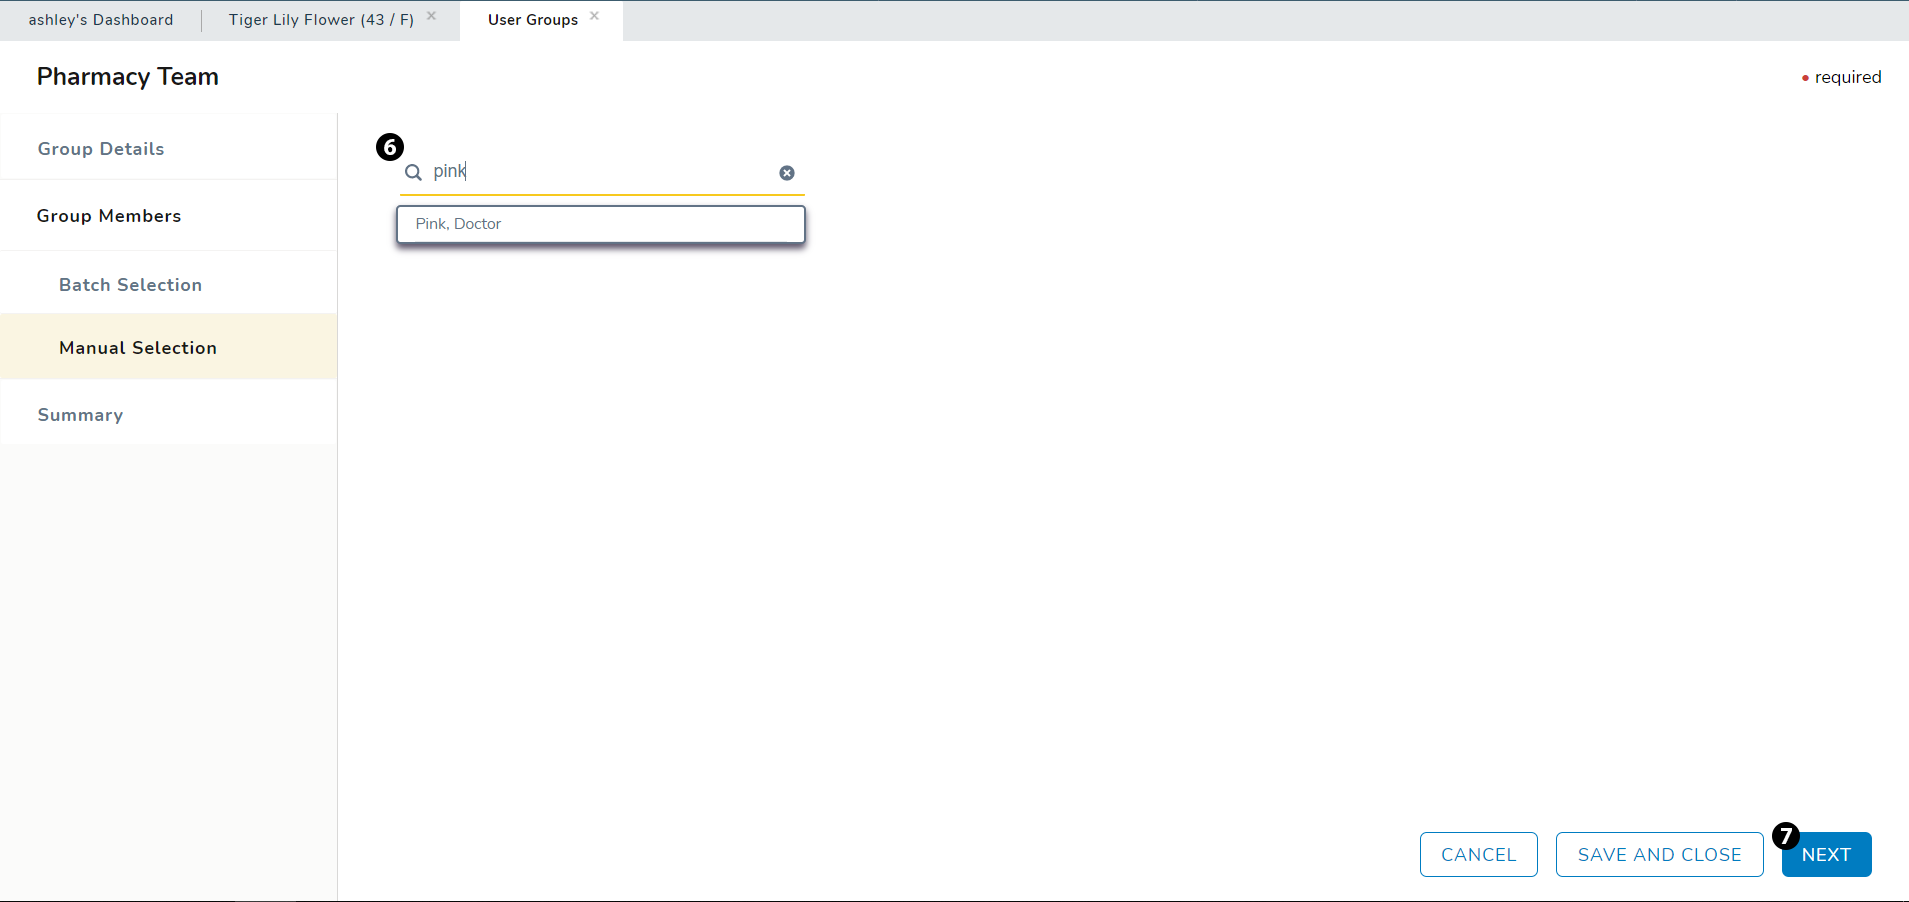
Manual Selection: allows you to search for and add group members individually by their name (see callout 6).
-
-
Click the NEXT button (see callout 7) or select Summary from the left-hand menu (see callout 8).
-
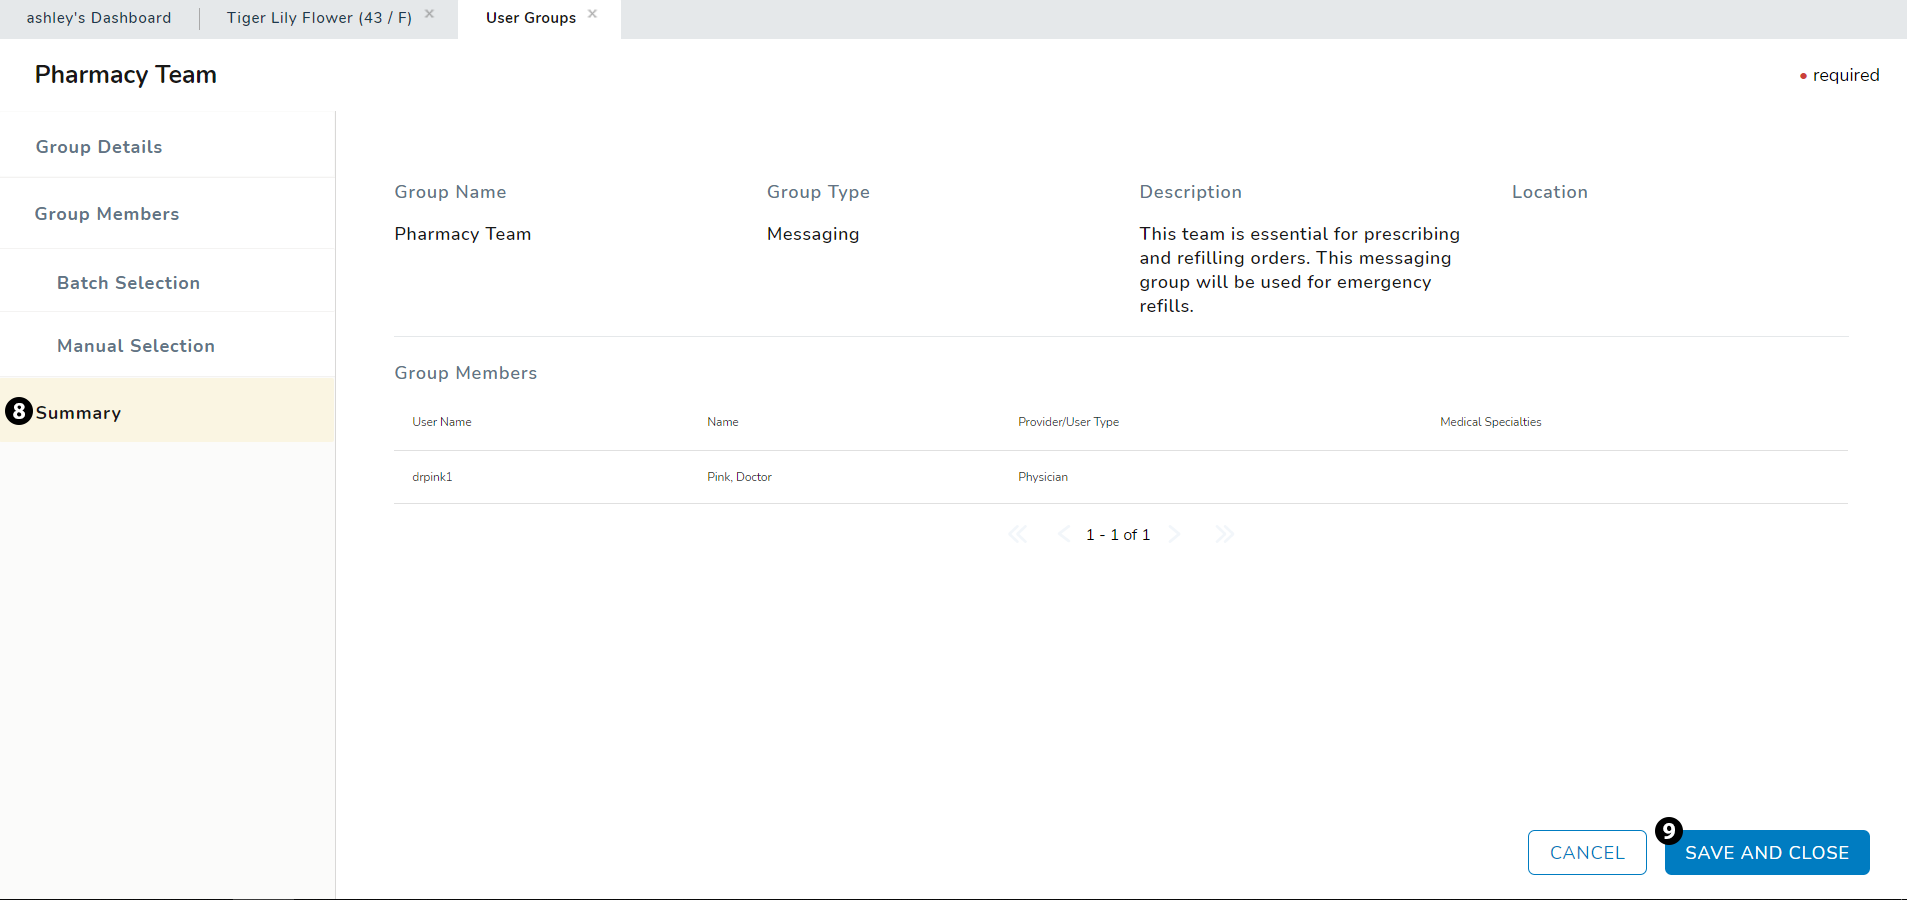
The Summary page displays all the information you entered for this new messaging group. If you need to change anything, simply select an area from the left-hand menu to go back. If all the information is correct, select the SAVE AND CLOSE button at the bottom of the page (see callout 9).
-
Please note that groups creating using provider type will not show on this page until it is saved and then edited.
-