New iKnowMed G1 Report Copied
As iKnowMed EHR, commonly called Generation 1 or G1, is phased out, users may need to access certain patient information that was not fully migrated to iKnowMed Generation 2. To address this, users with Restricted Patient Access permission set to full can now access the iKnowMed G1 Report to view legacy data from G1.
This new report includes:
- Historical billing data from the Charge Capture Report.
- Notes from patient encounters that were documented and signed in G1.
- The G1 All Visit Data Note.
- The Regimen and Lab Summary for all dates for study patients only.
How to use the report
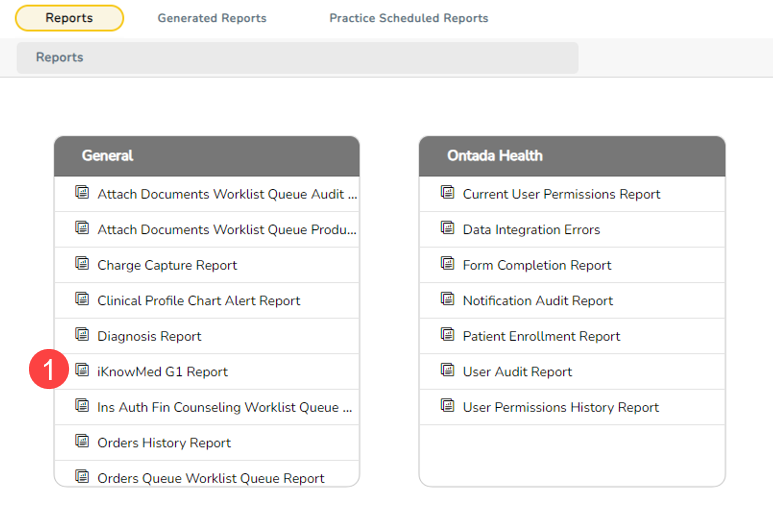
- From the top navigation, access Admin > Reports.
- On the Reports page, find and click on iKnowMed G1 Report (callout 1).
- Use the filters to narrow your search by patient, document type, date of service range, location, and/or G1 customer.
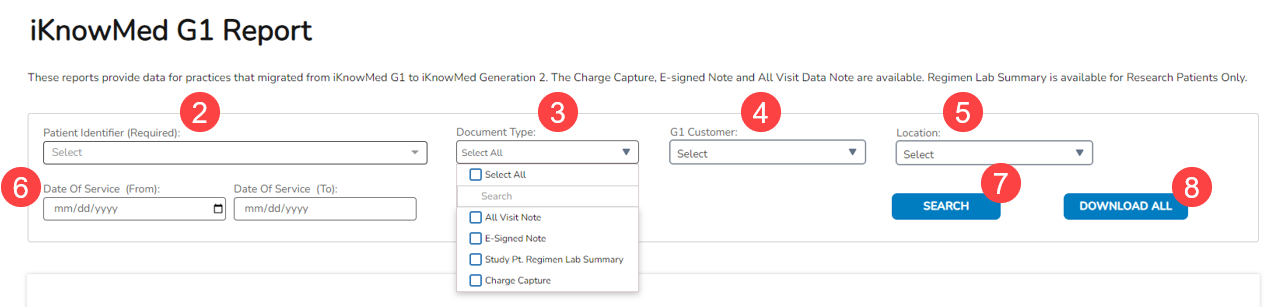
- Patient Identifier: This field is required. Enter the patient’s name, date of birth, or MRN to initiate the search (callout 2).
- Document Type: Select one or more options from All Visit Data, Charge Capture Report, Electronically Signed Note, or Study Pt. Regimen Lab Summary (callout 3).
- G1 Customer: In some instances, information for multiple G1 customers is available. This occurs when the customers may have been separated in G1 but are combined in G2, e.g., Texas Oncology (callout 4).
- Location: This is the G1 visit location (callout 5).
- Date Of Service: The G1 visit date range for the patient selected (callout 6).
- Click the Search button (callout 7).
- To download multiple documents for a single patient, adjust the filter options to find the set of desired documents. Once the set appears in the list on the page, select Download All (callout 8).
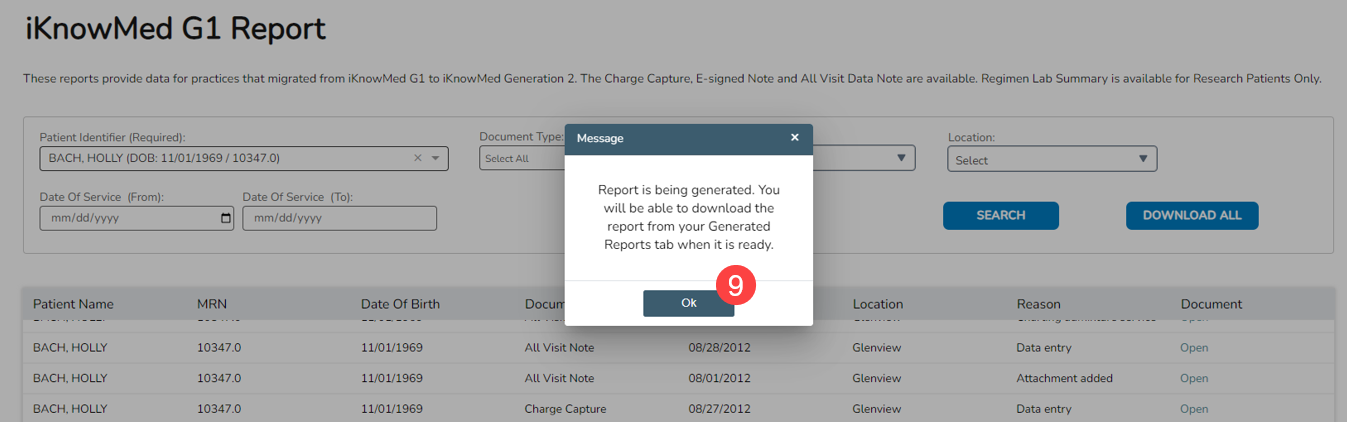
- A window will appear stating that your report is being generated and that you can retrieve it from your Generated Reports when ready. Click the OK button to dismiss the message (callout 9).
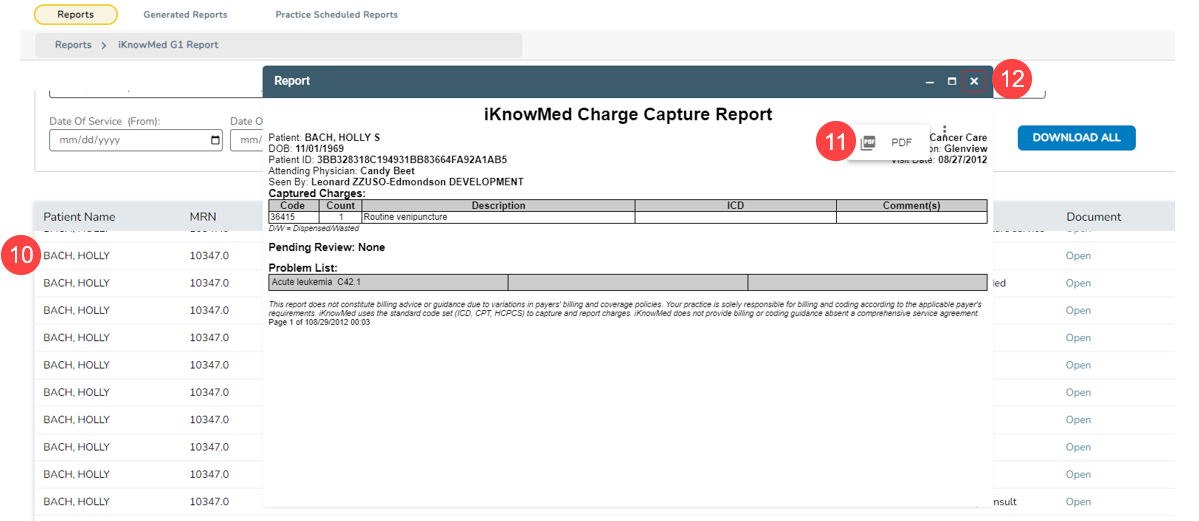
- To download single documents, click on an entry in the search results table to view the report (callout 10).
- The report will open in a pop-up window for your review.
- To download the report, click the three dots in the upper-right corner and select the PDF option (callout 11).
- To close the report, click the X in the upper-right corner (callout 12).
- If you decide to download the report, a window will appear stating that your report is being generated and that you can retrieve it from your Generated Reports when ready. Click the OK button to dismiss the message (callout 13).

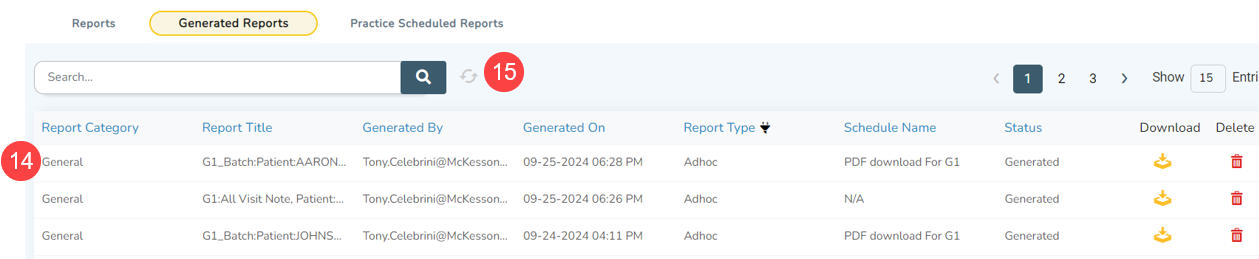
- Downloaded reports will be available on the Generated Reports page (callout 14).
- You may need to select the refresh icon to see the generated report (callout 15).
NOTE: When Download All is used to download multiple documents, a single report row will be present on the Generated Reports tab.
By reviewing this report, practices can also identify opportunities for transitions to more cost-effective alternatives, such as direct exchange.
We’re updating the Orders History Report to help you easily distinguish between orders processed in the old and new order queues.