Launch release notes Copied
We know getting the information you need when you need it is important for your practice. With iKnowMed Generation 2 reporting, we’ve created standard self-service reports, allowing you to run them as needed. Self-service reporting aims to decrease practice wait times for custom reports with standard reports that can be downloaded on demand.
View available reports
Want a full list of available self-service reports in iKnowMed Generation 2? Visit our reports page to see the latest reports iKnowMed has to offer along with report details.
NOTE: The reports are permission-based and will appear based on your role in the practice. Please work with your practice administrator to access reports.

Granting report permissions
Only those with user permissions under Admin Menu > Users set to FULL can assign reports to users based on their role in the practice.
To grant permissions:
- Go to Permission in the user’s profile, locate the new Reports section, and change each report’s settings from None to Full, as needed (callout 1).
NOTE: The changes will not take effect until the next nightly refresh is complete.
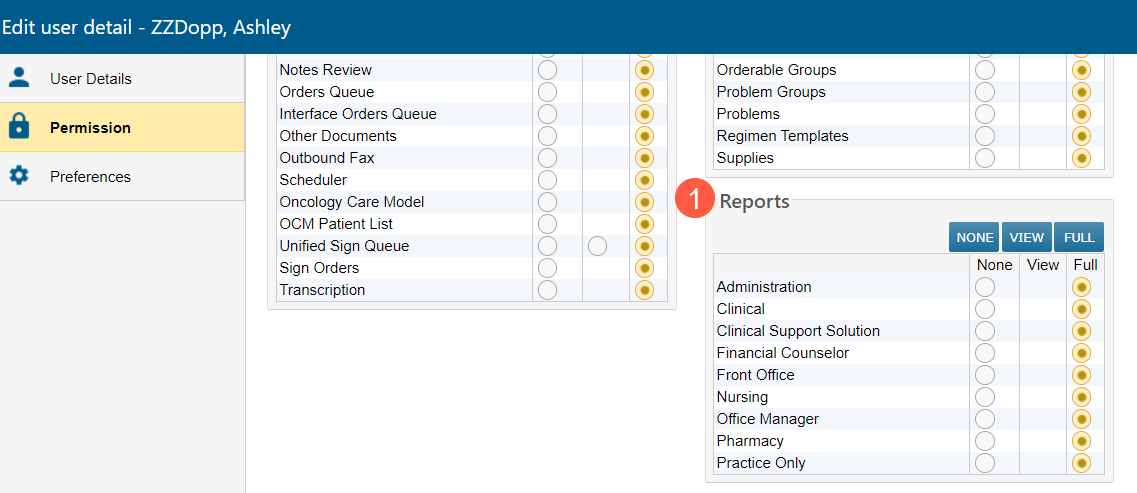
- The Reports Permission role set to FULL will allow access to the following Reports:
Permission Role Patient List Order History Chart Alert Diagnosis Administration X X Clinical X Clinical Support X X Financial Front Office X Nursing X Office Manager X X Pharmacy Practice Only
Accessing the reports
To access the reports:
- Go to Admin > Reports from the top navigation.
- There will be two buttons on the upper left side of the screen (callouts 1 and 2):
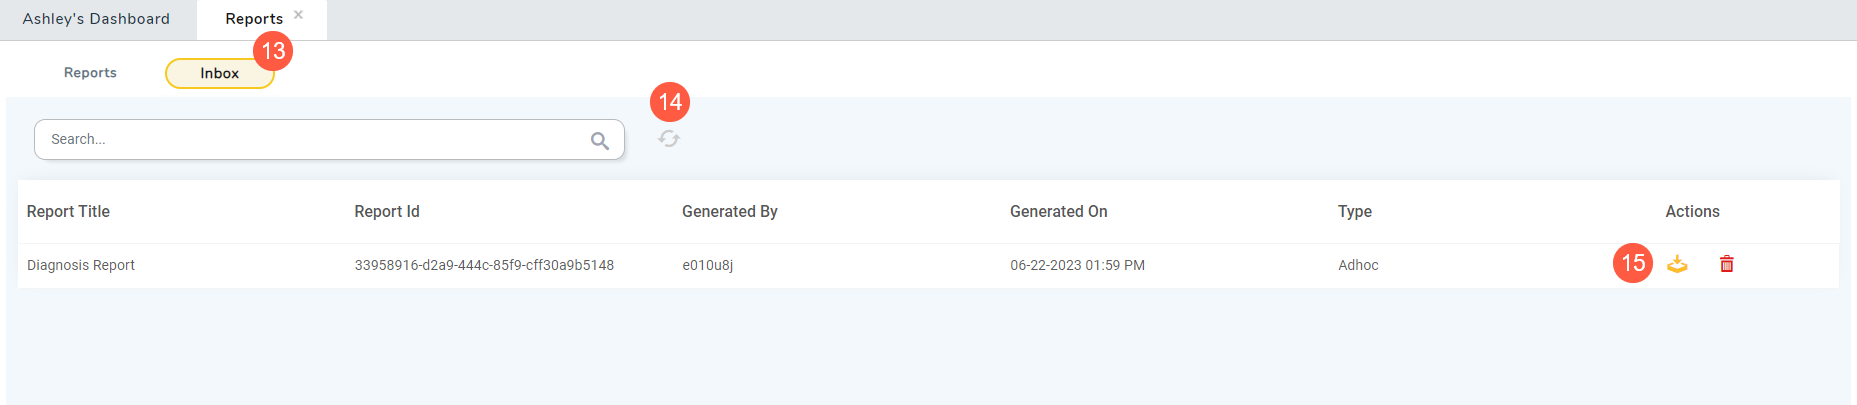
- Reports is the default view where available reports will display.
- Inbox is where any exported reports will be saved.
- To open a report, click the title of the report (callout 3).
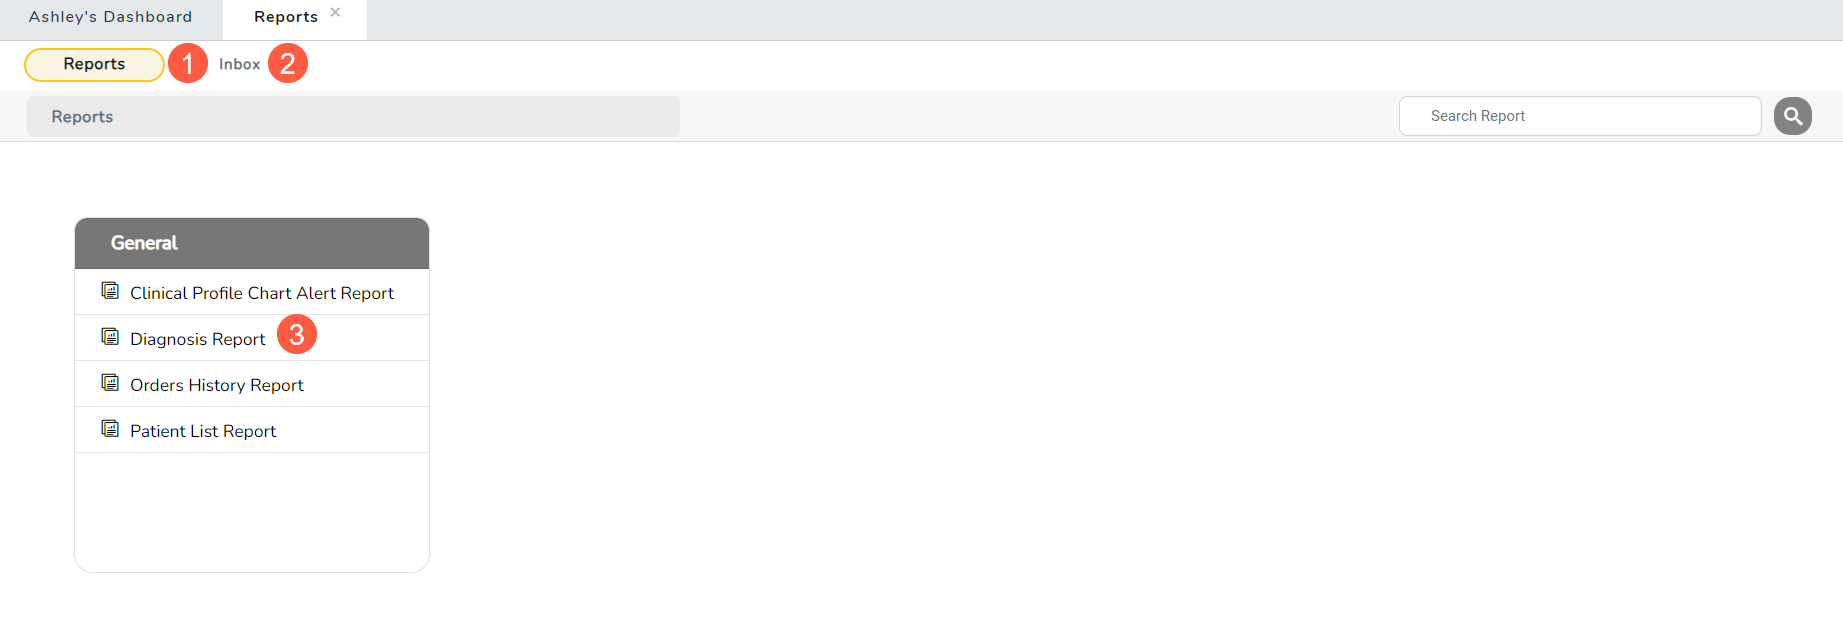
- If you need to access a different report, click Reports at the top of the screen to return to the list of available reports (callout 4).
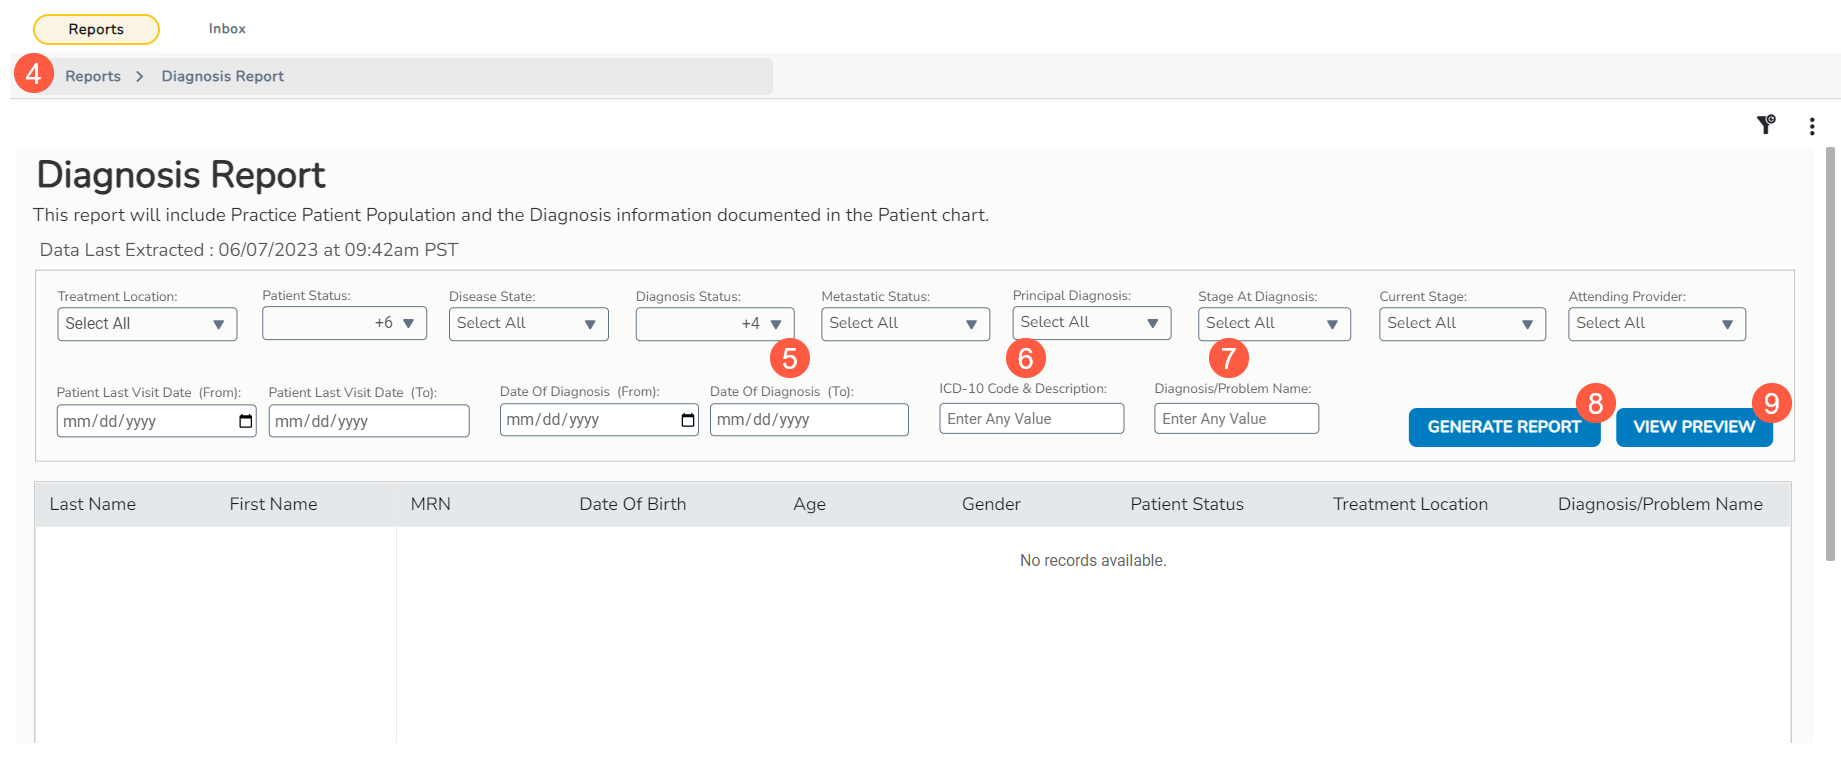
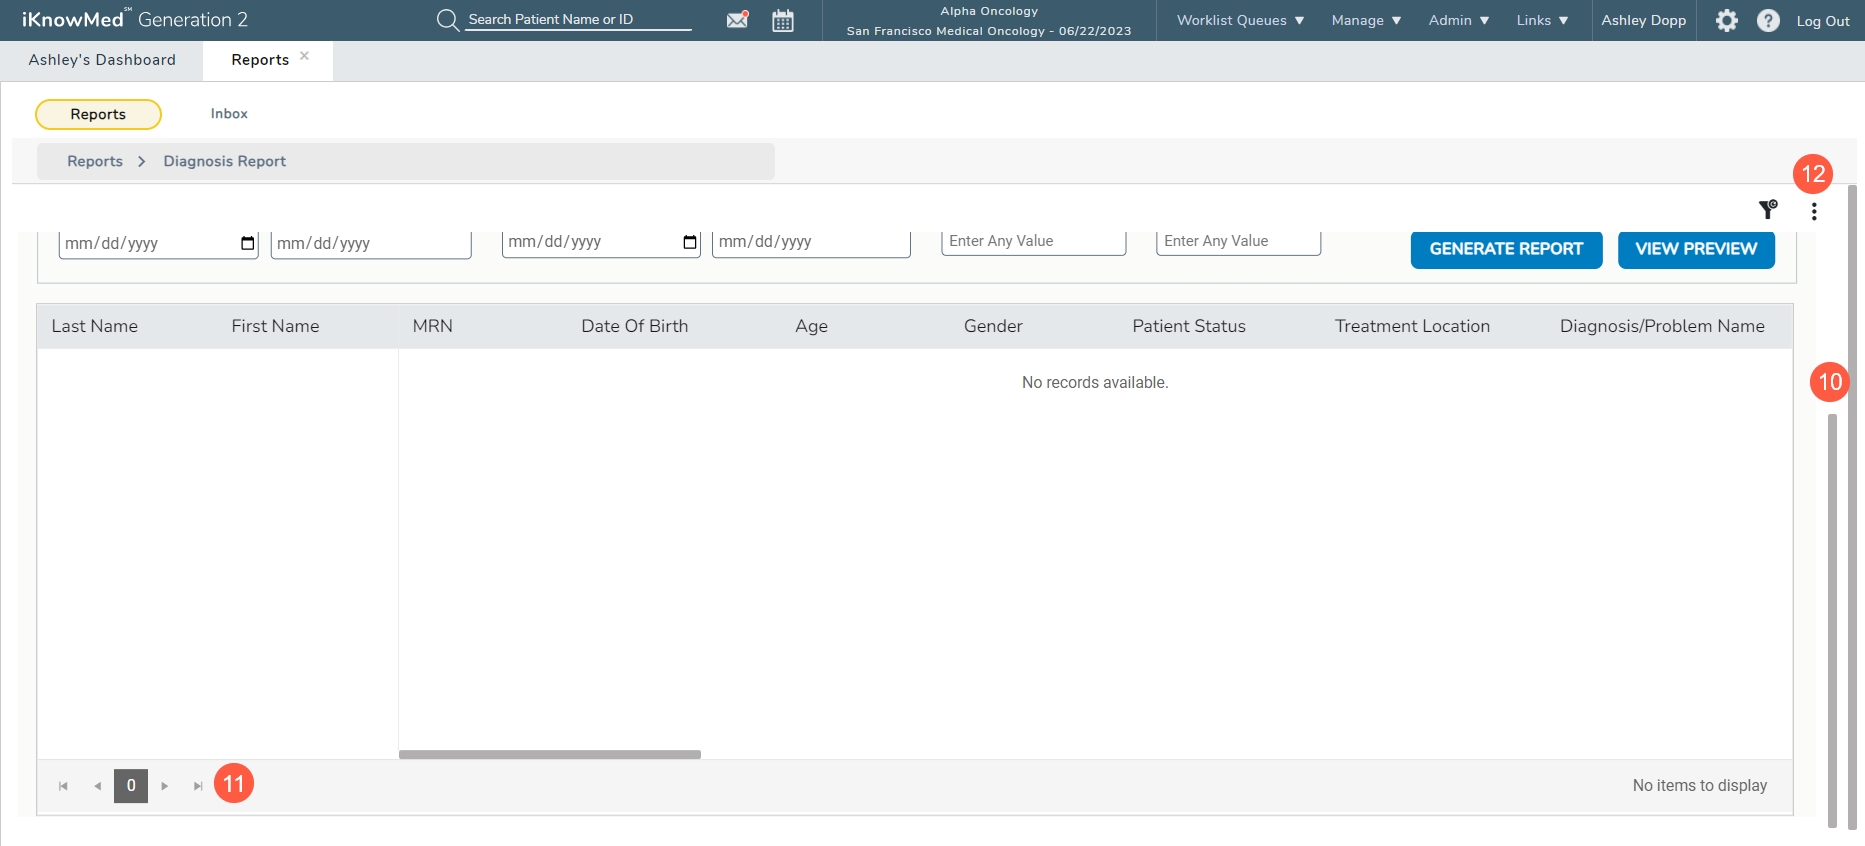
- After accessing a report, you may also select applicable filters for your report. For example:
- Time frames: narrow your search by using from/to date fields (callout 5). Currently, you can search from one year’s worth of data.
- ICD-10 Codes: search multiple ICD-10 codes by typing them into the field separated by commas with NO spaces between (e.g., c50.01,c50.022,c50.219) (callout 6).
- Manually enter terms in filters with Enter Any Value (callout 7). You may enter a single term or up to five separated by commas with NO spaces between.
- Once you select your filters, click Generate Report to download the report (callout 8) or click View Preview to see your results in the table (callout 9).
- If you decide to preview the report, use the scroll bars on the right side and at the bottom of the grid to view all columns (callout 10)
- To view the next page of information, use the arrows located on the lower left side of the screen (callout 11).
- To export the report, click on the 3 dots in the upper right corner (callout 12) and then select Download > Excel.
- If you decide to generate the report, a window will appear stating that your report is being exported and that you can retrieve it from your Inbox when ready.
- When the report is complete, go back to iKnowMed and your reports Inbox (callout 13).
- You potentially will need to click the refresh button to see your report (callout 14).
- Click the download icon under Actions to download the Excel report (callout 15).
- You may save and share the report if needed.