Enhancements to the Patient List widget Copied
In this release, we made several enhancements to the Patient List, including a new filter for patient insurance and the ability to edit an existing patient list. We also added a new user permission for the Restricted Patient List functionality that facilitates administrator control over access to patients on a list.
New Insurance filter
The new insurance search filter allows users to create a patient list by selecting one or multiple insurances to include as a search filter in patient list creation.
How to filter by a specific insurance
- Begin typing the name of the insurance in the Insurance field (callout 1) and the system will display results that correspond to the letters in your search.
- Use the checkboxes to select one or multiple insurances from the drop-down (callout 2).
- To search for more insurances, backspace or clear your previous search letters and begin typing again to see another list of insurances to choose from.
- Selected insurances included as search criteria for the patient list will be displayed below the filter. You can remove them using the X next to each name (callout 3).
Tips for using the Insurance filter
- Selecting no insurance or not using the filter means the system will provide a list of patients that meet all the other criteria selected, and insurance will not be considered.
- Selecting one insurance will generate a list of patients that have only that insurance active as their primary, secondary, or tertiary insurance in Demographics.
- Selecting more than one insurance will include all patients that have one or all selected insurances as active for their primary, secondary, or tertiary insurance in Demographics.
- Selecting all insurance is the same as selecting no insurance and is not recommended.
In addition to the new insurance filter, the screen has had subtle adjustments to group criteria and buttons together. The exclude search criteria have been grouped under Exclude (callout 4), and the Clear and Search buttons have been moved (callout 5).

Edit an existing Patient List
Users can now edit an existing patient list by rerunning the search to change the results or changing the search criteria to alter the list of patients on the list. The patient list name is preserved, and if the list is applied to a user in User Permissions > Patient List Restrictions, the relationship to that user will be maintained even when the list is updated.
How to edit an existing Patient List
- Go to the patient list widget and select the Patient List you want to edit (callout 1).
- Click the new Edit List button (callout 2).

- The patient list search window will open and load the existing list of patients and the search criteria used to generate it.
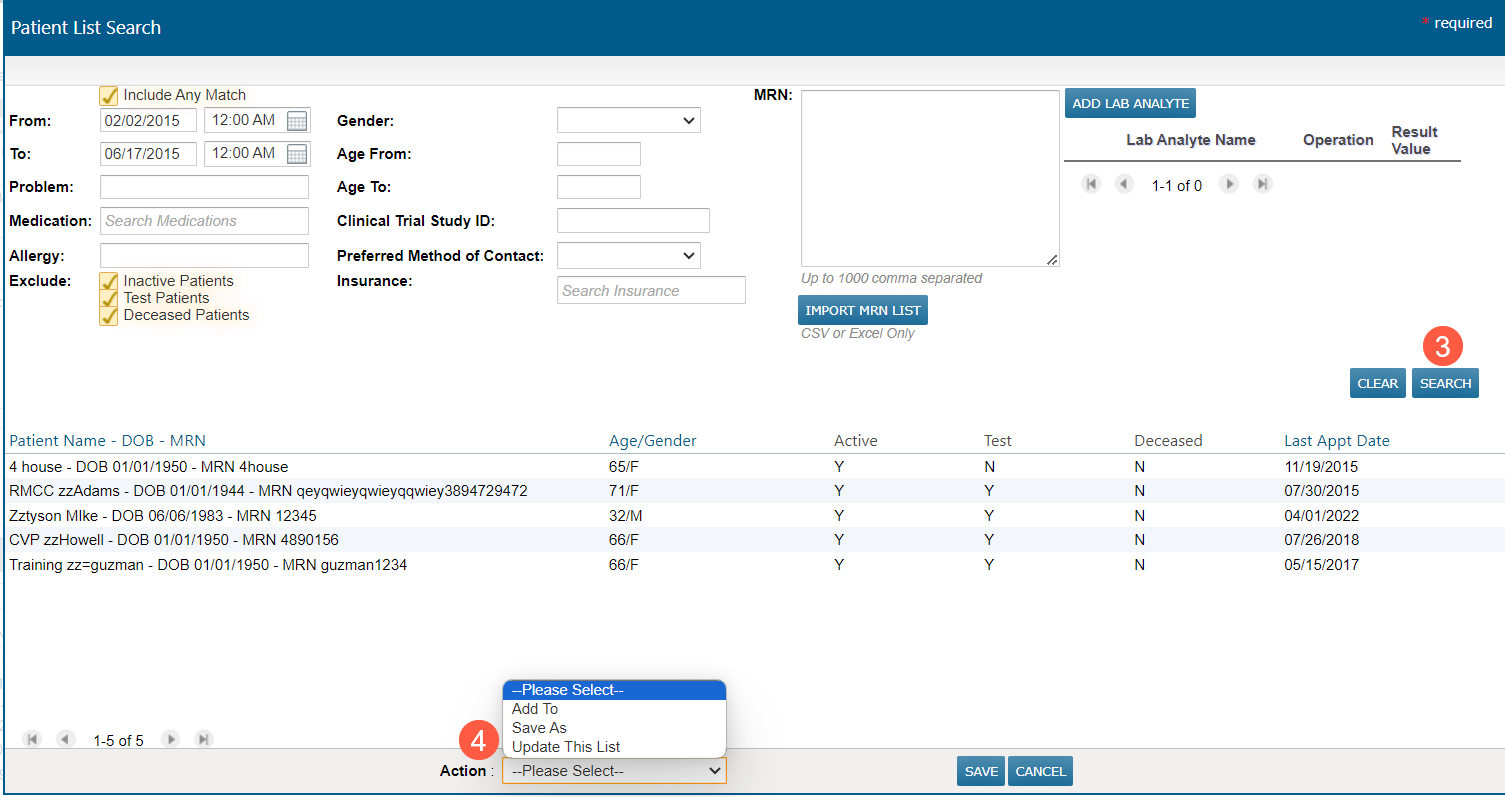
- Keep the existing search criteria and click Search (callout 3) again to generate an updated list of patients who fit the existing criteria, or you change the search filters and click Search (callout 3) to change the list of patients.
- To save your changes to the existing list, navigate to Action at the bottom of the screen and select the new Update This List option (callout 4).
- Your changes will be saved, and the next time you want to update this list, it will load the search screen with the search criteria used to create this version of the list.
Control user access to patient lists
Before this release, users could access all patient lists associated with their accounts. Now, we have added user permissions that allow administrators to control whether a user can access specific patient lists.
User Permissions are a very important piece of restricting and allowing access to patients. This feature was designed to be used with users who do not need full access to the system, such as those who are part of a Revenue Cycle or Billing team and need to view patient information to follow up on claims denials or work through prior authorization workflows, but do not need to write clinical notes, select billing codes, or perform procedures or treatments for a patient.
The deny access feature prevents users from accessing the patients list as well as from searching for the MRN, DOB, or name of any patients in that list across all patient search areas in iKnowMed. However, areas where lists of patients are visible, such as a worklist queue, must have those permissions turned off separately for access to be denied.
When applying the Patient List deny access feature to a user, we recommend working with your account manager to determine the best settings to accomplish the type of access you are looking to achieve.
How to control access to patient lists
- Go to Admin > Users from the top navigation.
- Choose a user from the list and click the Edit User button.
- Under User Details, scroll to the Patient List Restrictions section (callout 1).
- Check the Exclude access to these patient lists option (callout 2).
- In the search field, enter the name of the Patient List where access should be denied (callout 3).
- From the results, select the list that contains the patients you do not want the user to be able to search for and view in iKnowMed.
- To remove a list, click the X next to the name of the patient list (callout 4).
- To allow access to a patient list, follow these same steps under the Allow access to these patient lists option (callout 5).
Tips for patient list access
- If a user has an allow list and a deny list associated with their account, and both lists have one or more patients in common, the system will always honor the deny access list first.
- The same patient list cannot be added to a user’s allow and deny list. If a list is set as allowed for a user, it will not appear in the search as an option to deny access. The list would have to first be removed from the allow list before it can be added to the deny list.
- If a new patient is created and fits the criteria for restriction on the patient list, users must update the patient list by rerunning the search and selecting the action to Update This List to include the new patient. This also applies to patients who no longer fit the search criteria.
