Enhanced Unified Sign Queue Copied
The enhanced Unified Sign Queue makes signing all labs, imaging, orders, and other documents faster and easier in one queue for individual patients.
NOTE: All clinical notes must still be reviewed in the Notes Review queue. In a future release, we will add the ability to sign clinical notes in the Unified Sign Queue.

How to use the queue
After properly setting your practice preference and user settings, you will see the USQ 2.0 option in the Worklist Queues drop-down from the top navigation.
The original Unified Sign Queue will also be available from the Worklist Queues drop-down and will continue to display until the September 2023 release.
To use the queue:
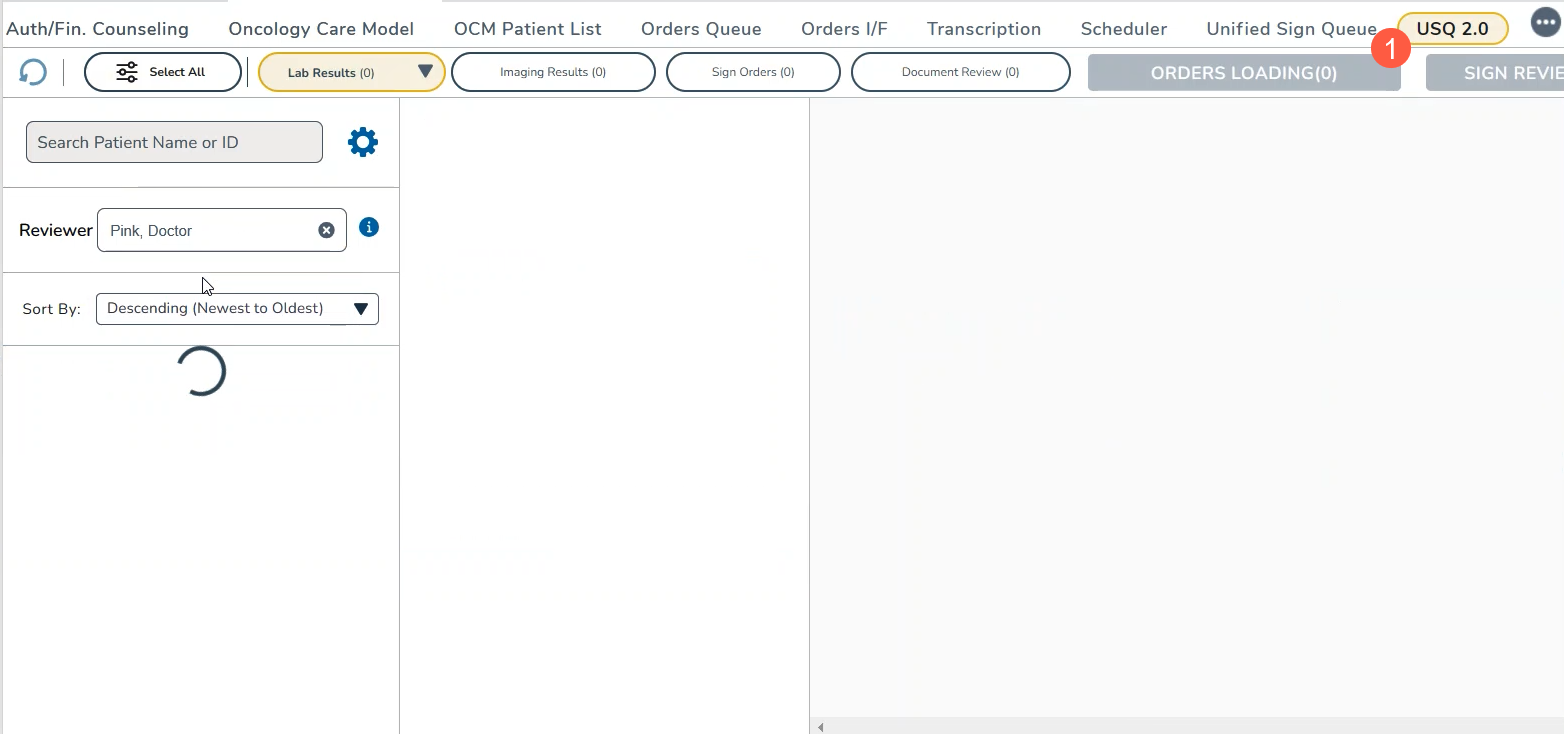
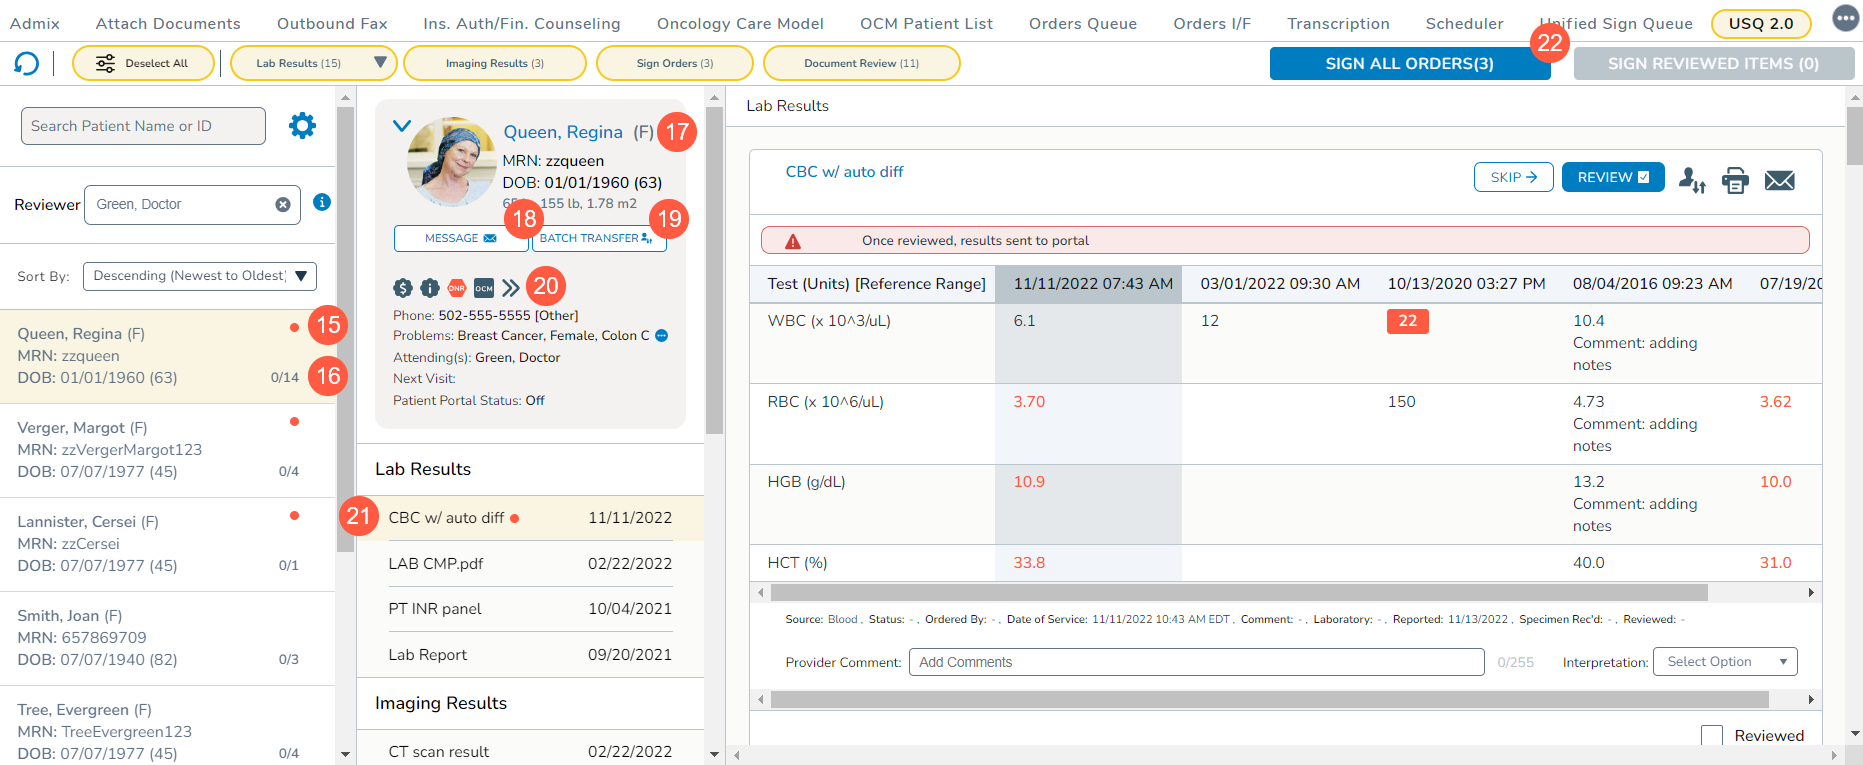
- When you first enter the queue, the Sign All Orders button at the top of the page will show as Orders Loading until all the items are present (callout 1).
- Then, it will activate and change to Sign All Orders.
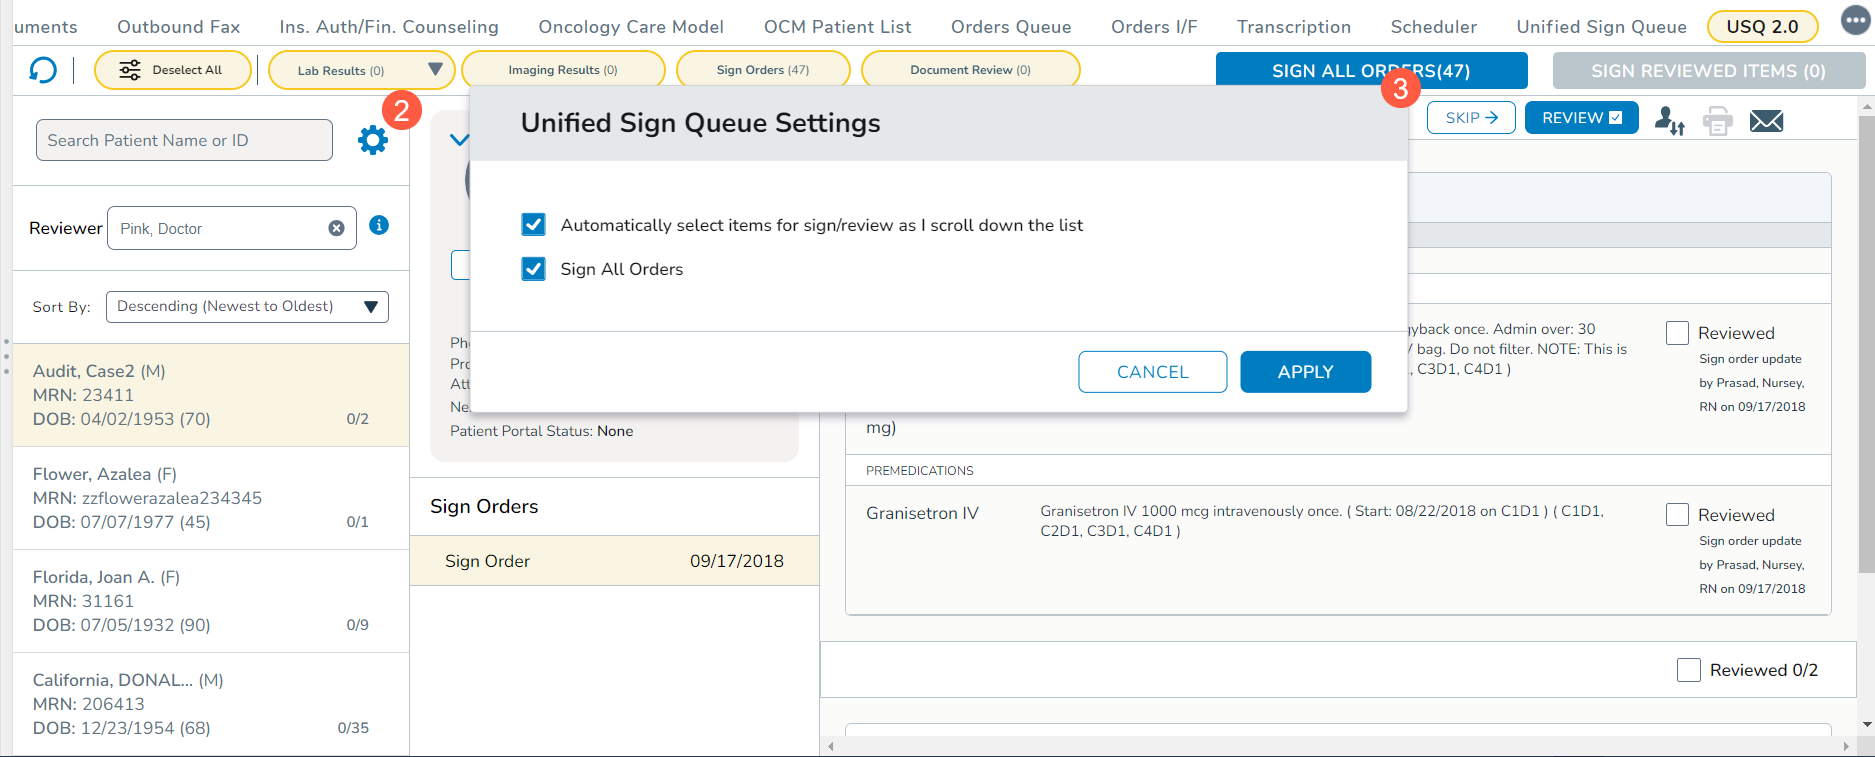
- Before reviewing and signing items, click the gear icon in the left column (callout 2) to set preferences that allow the automatic selection of items for sign/review when scrolling and/or activate the Sign All Orders button (callout 3).
- To manually refresh the queue at any time, click the refresh icon (callout 4) at the top of the queue.
- Once permissions are set and the queue is refreshed if needed, use the new filters across the top of the queue to make it easier to sign items in each category.
- All filters will be selected by default. Click the Deselect All to remove all the filters (callout 5).
- Easily turn each filter on or off by clicking on them. The filter categories include:
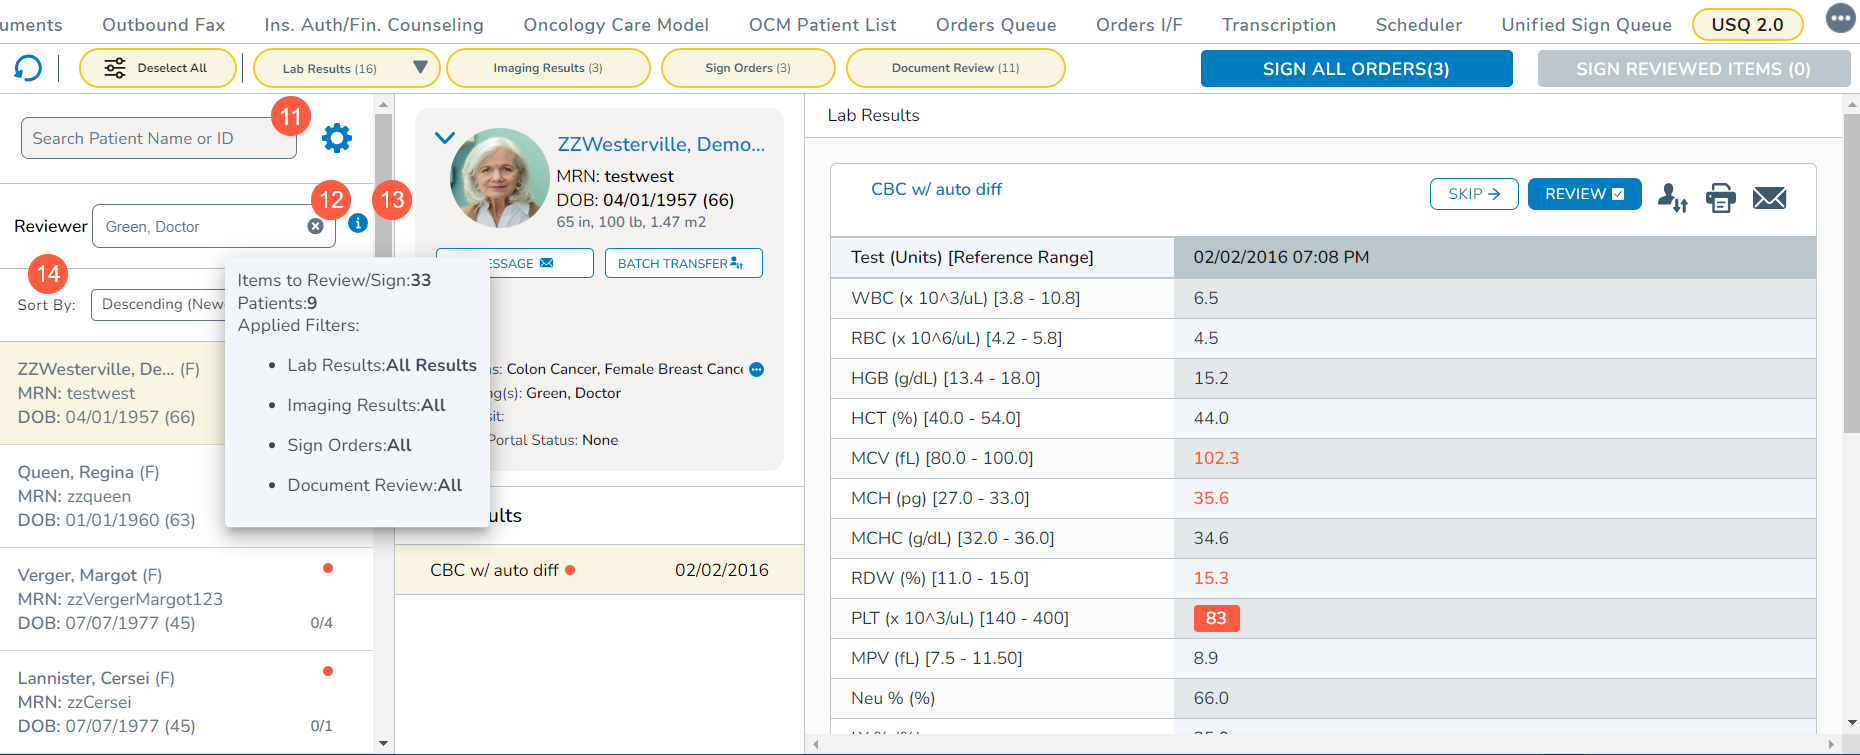
- Lab Results: the queue will show all the required CLIA documentation (ex: Source, Status, etc.) along with the provider’s interpretation and notes to the patient. The screen will show that day’s lab values to be reviewed and up to 4 previous values for comparison (callout 6).
- Labs can be further filtered by Normal Results, Abnormal Results, and/or Very Abnormal results (callout 7).
- Imaging Results: the queue will show interfaced and scanned PDF imaging that requires review (callout 8).
- Sign Orders: the queue will show all orders placed by or on behalf of the provider that requires a signature (callout 9).
- Document Review: the queue will show other document PDF images that require review (callout 10).

- Lab Results: the queue will show all the required CLIA documentation (ex: Source, Status, etc.) along with the provider’s interpretation and notes to the patient. The screen will show that day’s lab values to be reviewed and up to 4 previous values for comparison (callout 6).
- You can manually locate a patient in your queue by name or ID using the search field (callout 11) and even see items in another’s review queue by manually searching for them by name in the Reviewer field (callout 12).
- Hovering on the “i” icon will display information showing how many items need to be reviewed/signed, how many patients are in the queue, and which filters have been applied (callout 13).
- You may also sort the items in this column in ascending or descending order (callout 14).
- The items in this column are organized by patient and those with abnormal labs of any type (low, high, critical low, or critical high) will be shown at the top of the list with a red dot (callout 15).
- The column also contains a numerical representation of how many items have been reviewed for each patient (callout 16). As you review each item for the patient, the counter will increase until all items are reviewed.
- The first patient in the list will be in focus with their information populating the middle column.
- The middle column displays the patient’s information from their chart.
- Clicking on the patient’s name will direct you to your default starting patient chart tab (callout 17).
- Clicking the Message button will open a window where you can send a message regarding the patient (callout 18).
- Clicking the Batch Transfer button will open a window where you can choose to transfer one, several, or all the patient’s items in the queue to a different provider (callout 19).
- Hovering on any of the chart alert icons will display additional information about that alert (callout 20).
- Below the patient’s information, the items that require review will be organized by Lab Results, Imaging Results, Sign Orders, and Other Documents Review with abnormal results listed at the top of each category and indicated with a red dot (callout 21).
- The first item in the list will be in focus with the information populating the right-hand column.
- Depending on the permissions you set in Step 2, you may click the Sign All Orders button (callout 22) at the top of the column or scroll through the items to review and sign them.
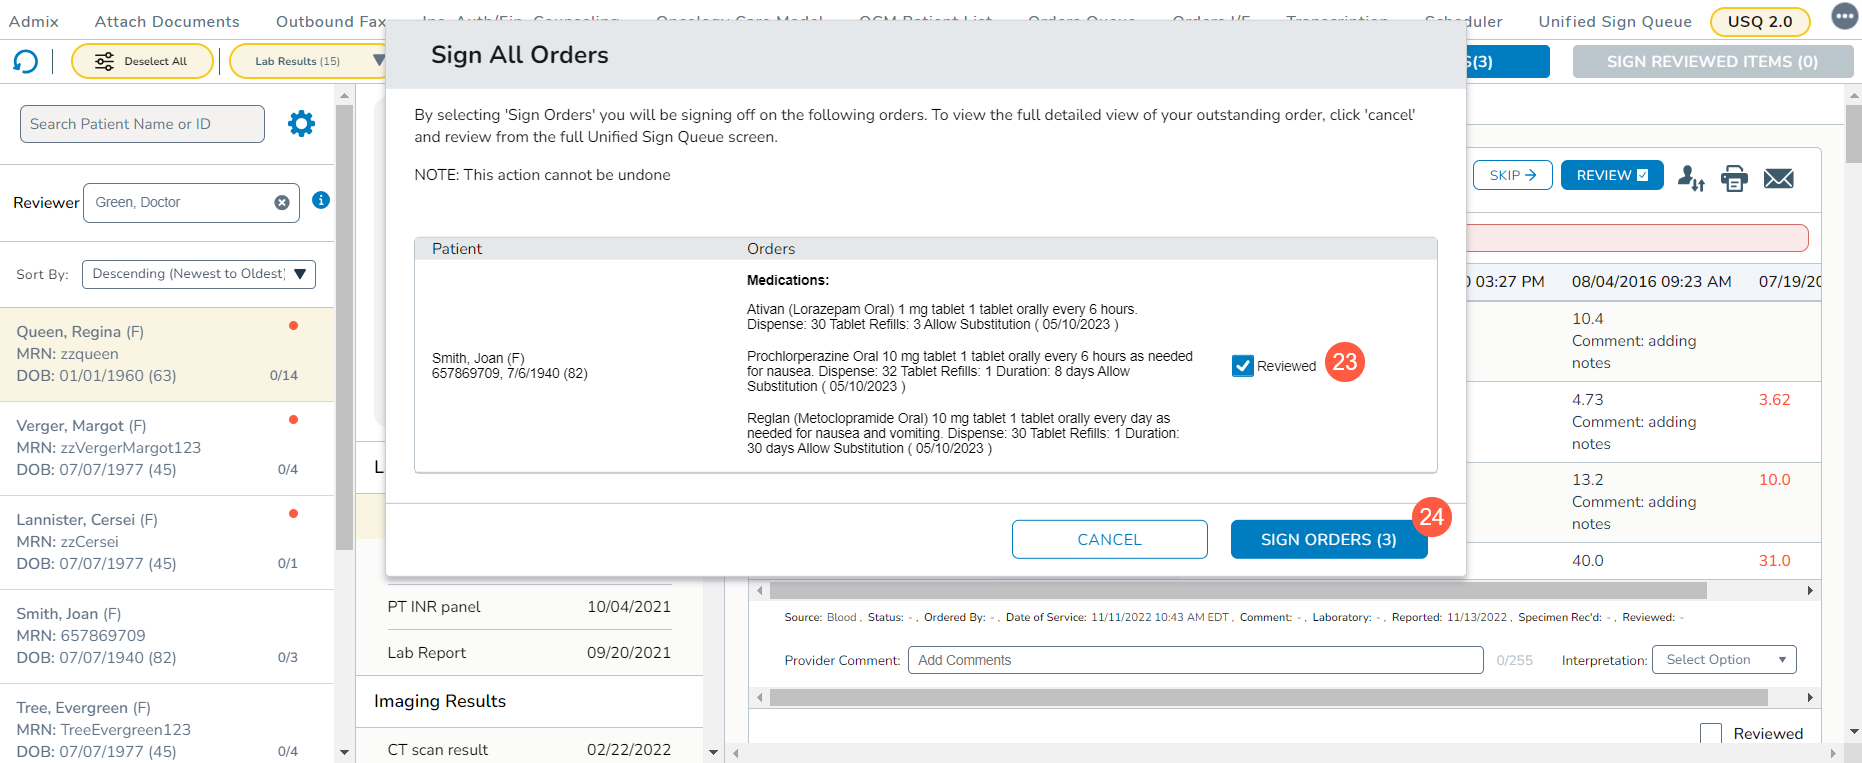
- If you click the Sign All Orders button, a window will appear listing all the items you are signing for all patients in the queue.
NOTE: Suspended regimens are also displayed in this window even though they are not included in the orders count.
- You have the option to uncheck the Reviewed box (callout 23) on any item to keep it in the queue.
- When you’re ready, click the Sign Orders button to confirm the items are ready to be signed (callout 24).
- Enter your PIN and click Submit to complete the signing process.
- If you signed all items, the item count on the Sign All Orders button will drop to zero. If you chose to retain some items, the button will reduce the count to the number of items left in the queue.
- If you decide to scroll through the items, the Reviewed box (callout 25) will automatically be checked for each item.
- When you reach the end of the patient’s items, you will see a notice at the bottom of the screen instructing you to keep scrolling to see the next patient in the queue (callout 26).
- As items are marked as reviewed, a count will appear in the Sign Reviewed Items button at the top of the page (callout 27).
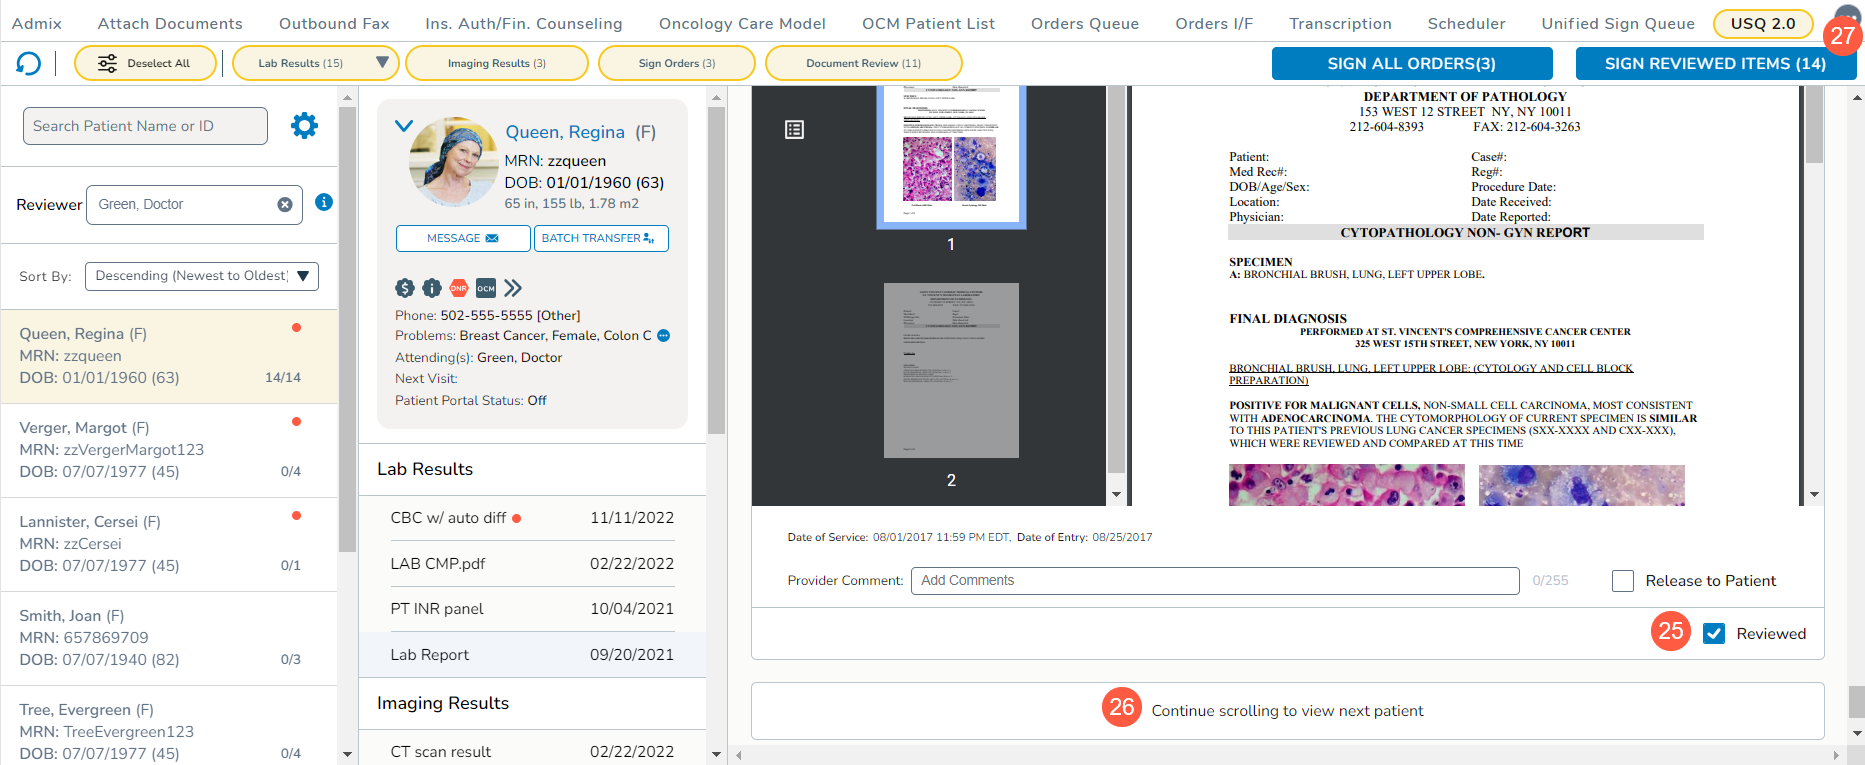
- When ready, click that button to sign the reviewed items.
- Enter your PIN and click Submit to complete the signing process.
- If you signed all items, the item count on the Sign Reviewed Items button will drop to zero. If you chose to retain some items, the button will reduce the count to the number of items left in the queue.
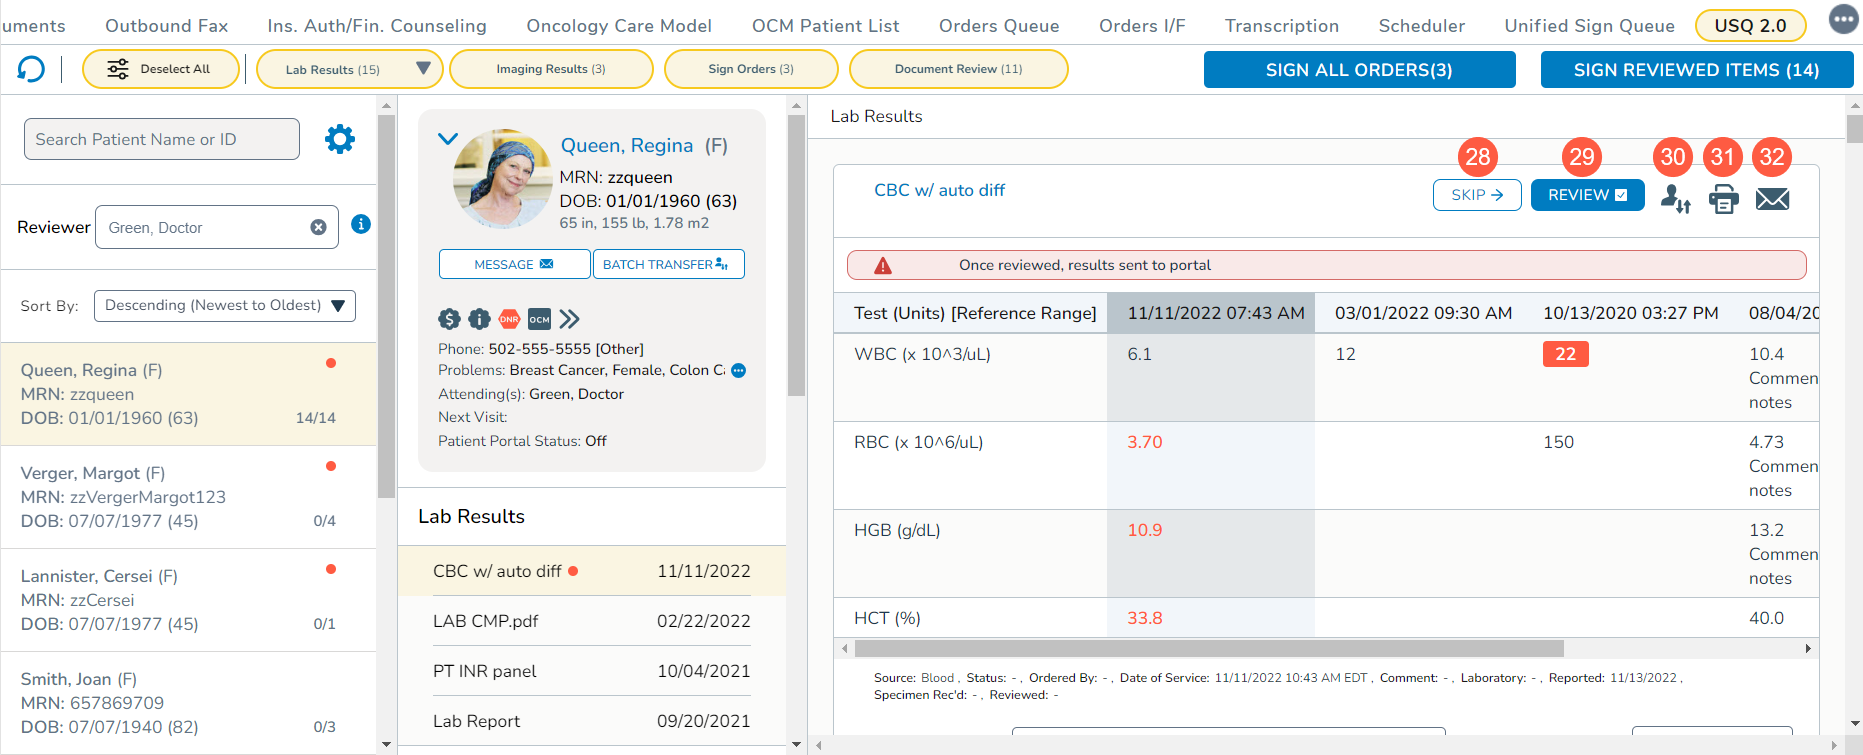
- Lastly, when viewing items in the right-hand column, you will notice buttons on each item.
- There is an option to skip the item, mark it as reviewed, transfer the item, print it, and send a message about this one item (callouts 28-32).
NOTE: Only lab results can be printed using the printer icon in the queue. To print other items, you must download and/or print them as you would normally for PDFs.