Customize the patient banner to see the most relevant information Copied
You can now customize the patient banner to view information such as the primary care provider, referring provider, and performance status, making it easier to locate and view patient information in one place (callout 1).
New fields in the patient banner include:
- Primary Care Provider: this field will display the primary care physician captured in the Demographics tab.
- Referring Provider: this field will display the provider listed as the referring physician in the Demographics tab.
- Performance Status: this field will display the latest scale/measure, observation date, and score/status captured in the Clinical Profile > Observations tab.

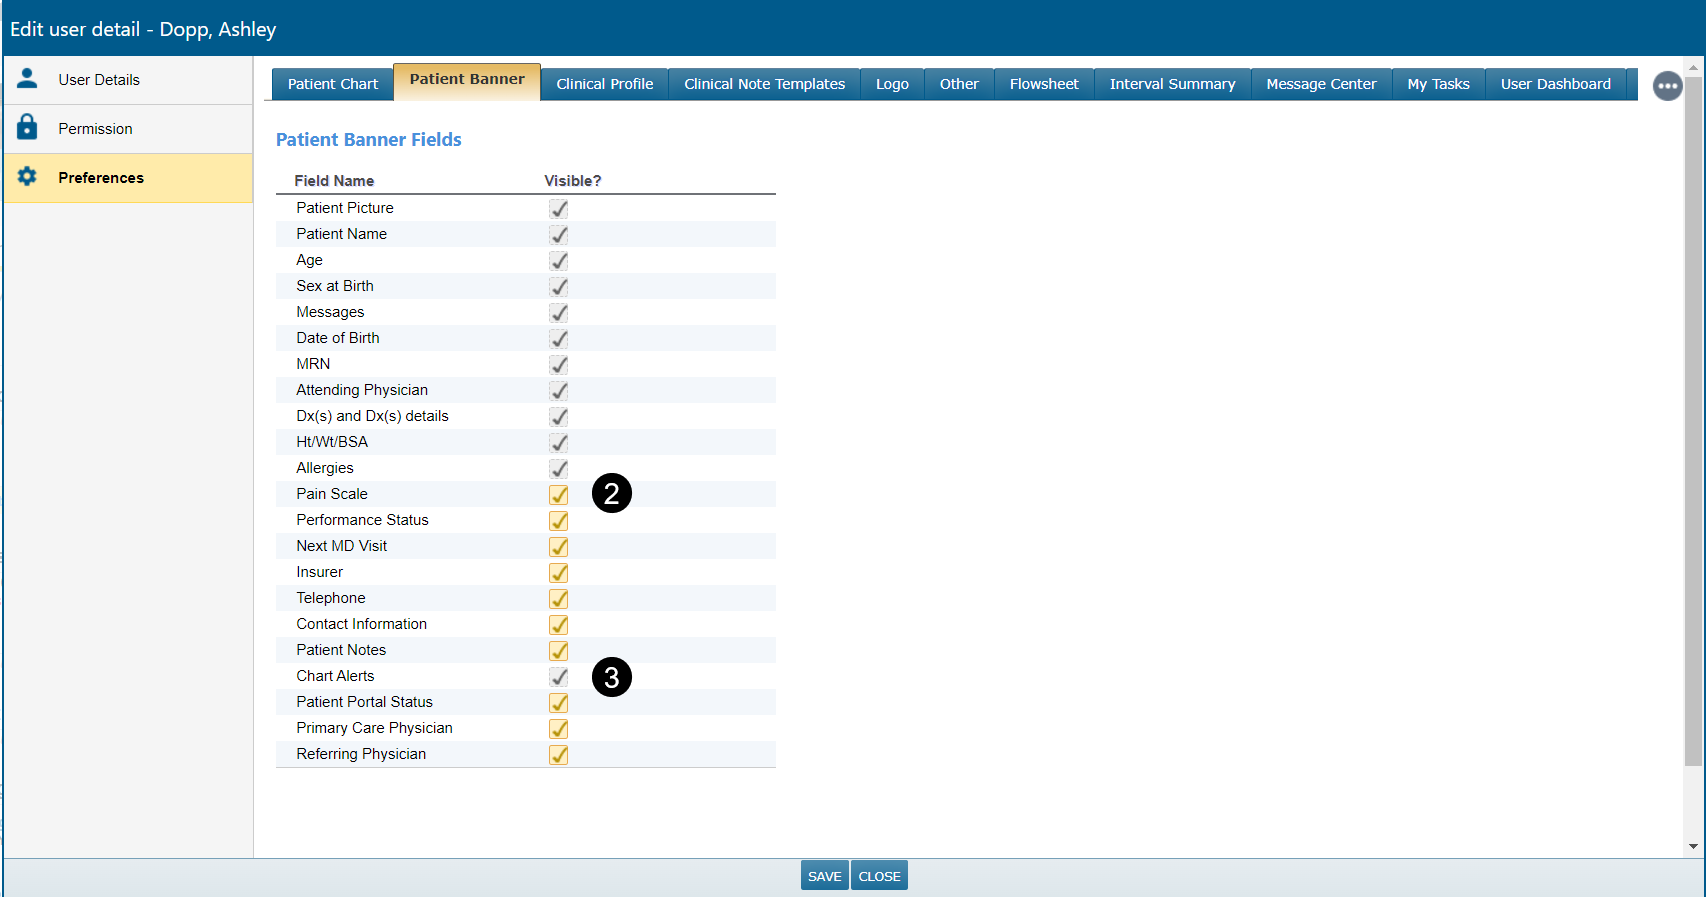
To customize your patient banner:
- Go to your user preferences and open the new Patient Banner tab (callout 1).
- Add or remove certain data elements by checking or unchecking the box under the Visible column (callout 2).
- Some data elements cannot be removed and must remain on the patient banner by default, such as Chart Alerts (callout 3). These options will be grayed out and unclickable.
- Save your changes. Log and back in for these changes to take effect.
Lastly, practice admins can make bulk changes to the patient banner for users to create consistency across their practice.
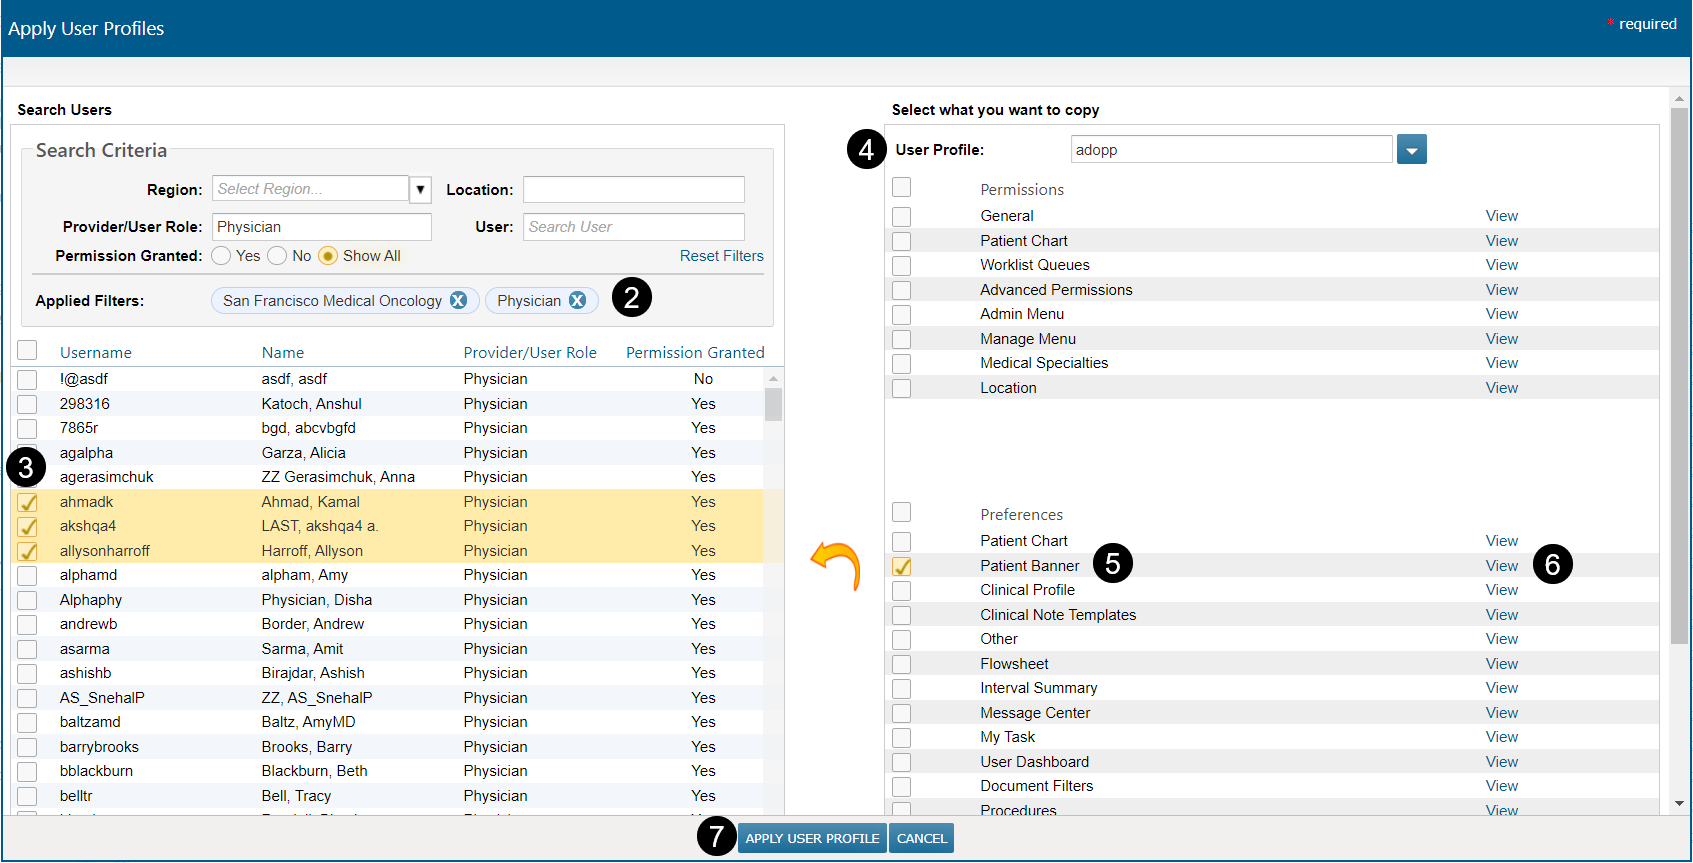
To make bulk changes to users’ patient banners:
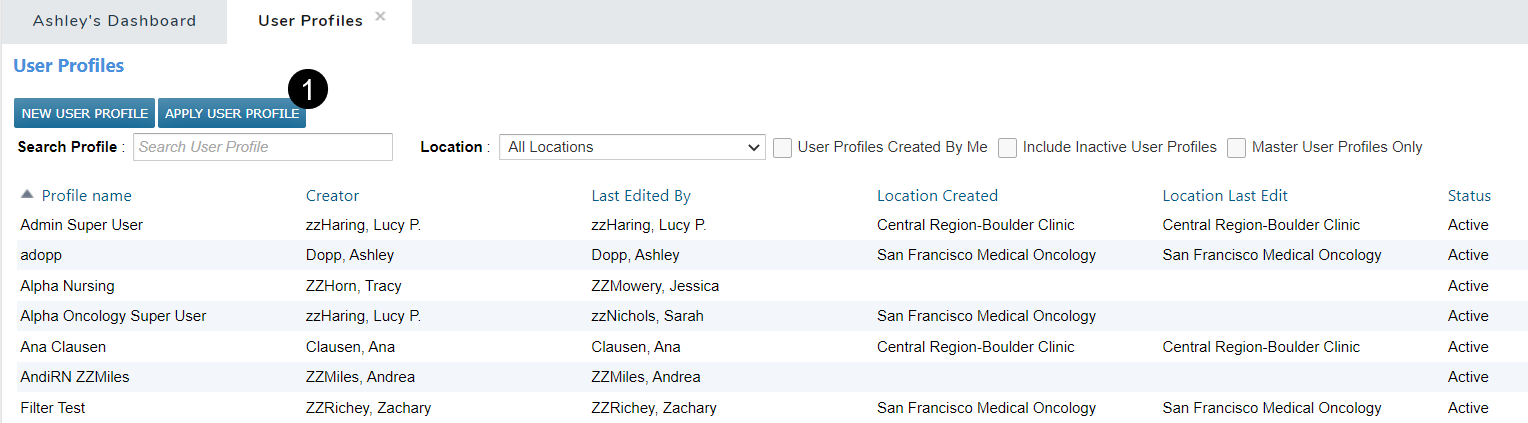
- Go to Admin > User Profiles.
- Select Apply User Profile (callout 1).
- Apply the appropriate filters to locate the users that need to be updated (callout 2). Check the boxes next to their usernames (callout 3).
- Locate the profile you would like to copy by entering the profile name in the User profile field (callout 4).
- Check the box next to the Patient Banner option (callout 5).
- Selecting the View link (callout 6) will display the patient banner settings applied to your selected users.
- Click Apply User Profile (callout 7) to push the patient banner settings to the selected users.
- Users may need to log out and back in for these changes to take effect.