Capture supportive care interventions directly in iKnowMed Copied
The new Supportive Care Interventions section in the Patient Hx tab of the patient chart is designed specifically for social workers and nurse navigators. This addition enables you to capture all charting information within iKnowMed, eliminating the need for external systems.
By centralizing supportive care documentation, your practice can enhance team collaboration and record-keeping efficiency.
NOTE: Self-service reporting for Supportive Care Interventions will be available at a future date, allowing you to generate customized reports based on the data captured in this section.
How to use Supportive Care Interventions
- Navigate to the new section.
- Open a patient chart and go to Clinical Profile > Patient Hx.
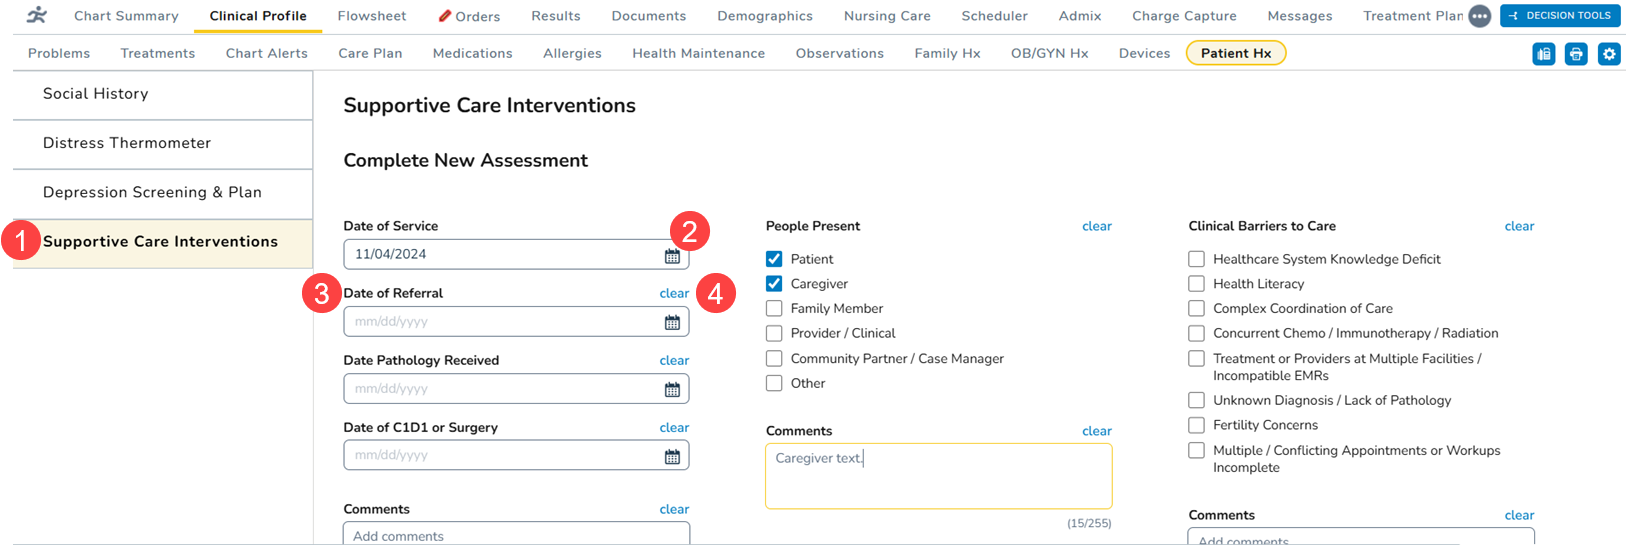
- In the Patient Hx tab, select Supportive Care Interventions from the left-hand menu (callout 1).
- Capture key visit information.
- The top of the page includes fields for essential visit details, like Date of Service, which defaults to today’s date but can be changed as needed (callout 2).
- Complete other relevant date fields, such as Date of Referral, Date Pathology Received, and Date of C1D1 or Surgery as needed (see callout 3 for example).
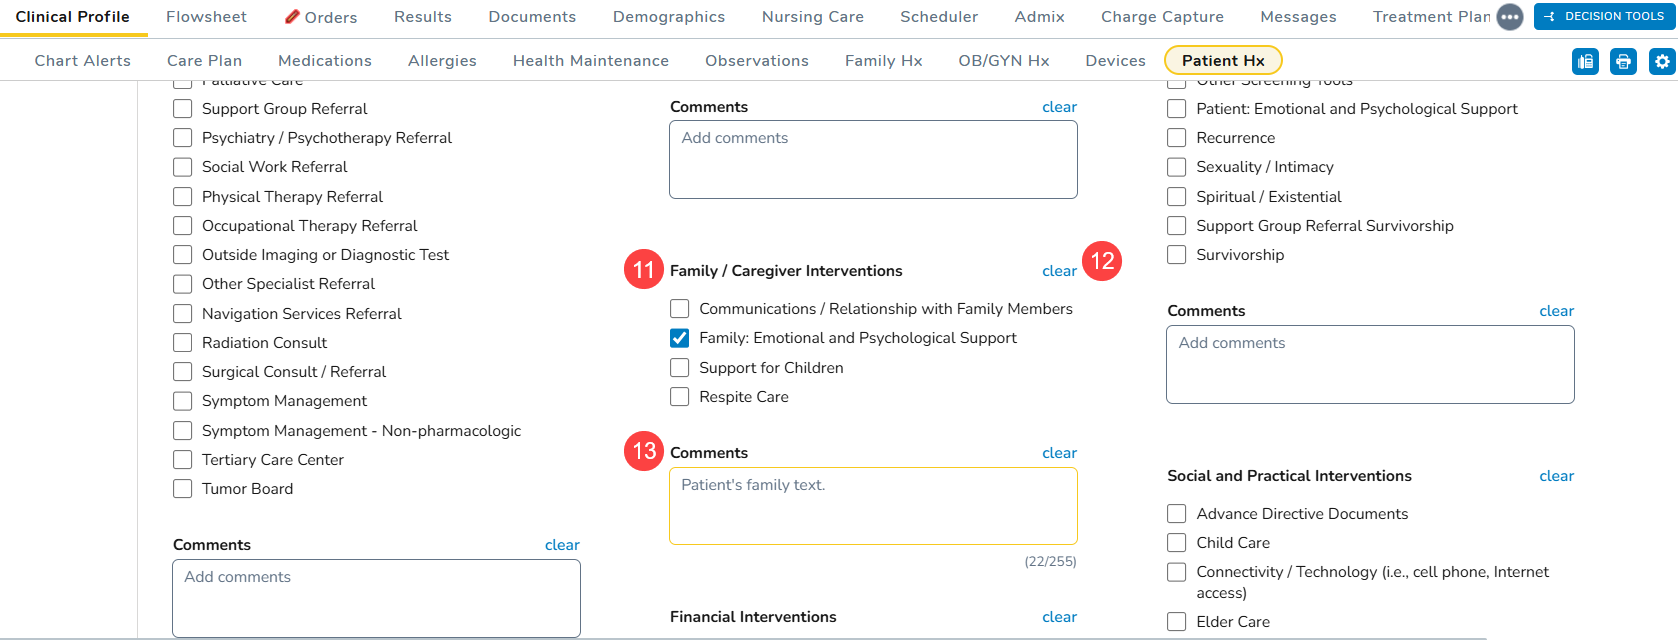
- Select options as needed or skip categories if not applicable. Use the Clear link to remove any selections (callout 4).
- Document appointment details.
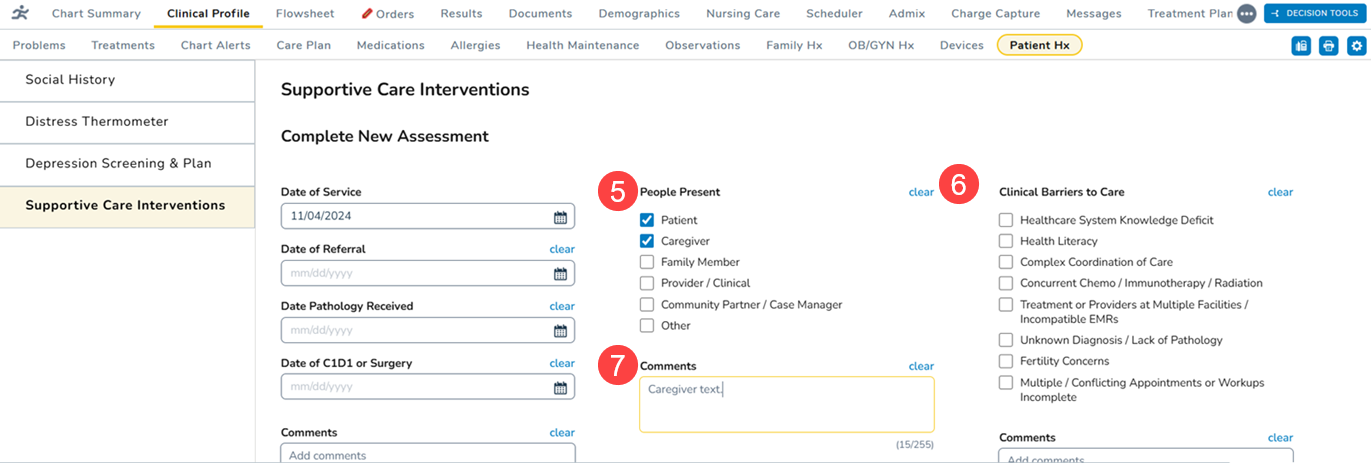
- Use categories like Communication Method, People Present, Referral Source, and Clinical Barriers to Care to capture detailed appointment information (see callout 5 for example).
- Select multiple options as needed or skip categories if not applicable. Use the Clear link to remove any selections (callout 6).
- Each category includes a Comments box to enter any additional details manually (callout 7).
- Track tasks and time spent, if needed.
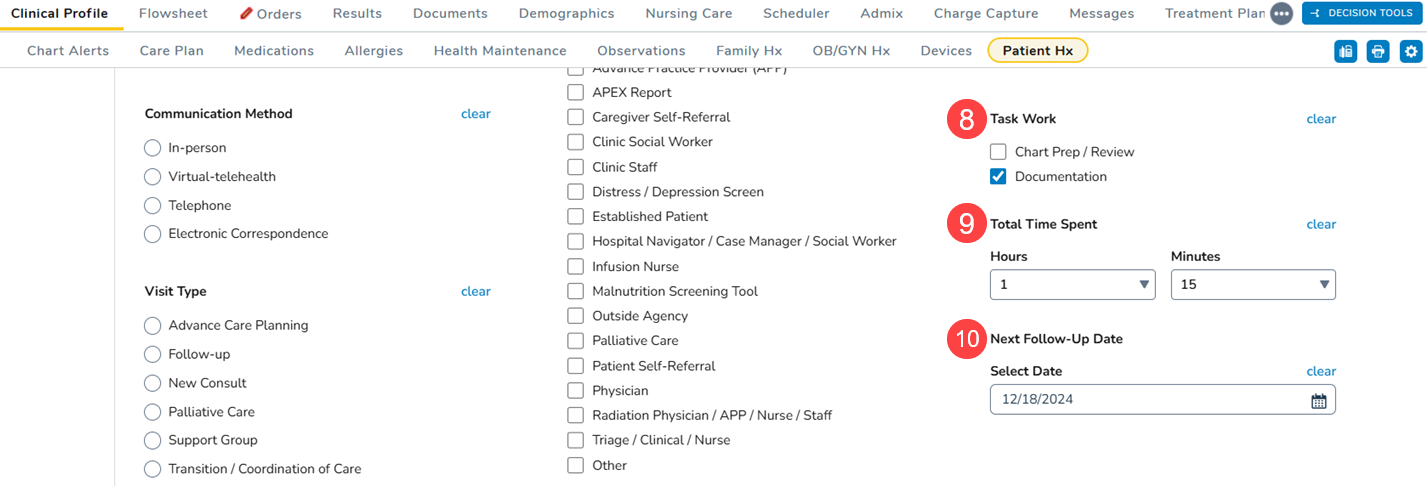
- In the Task Work section, check the relevant boxes to log the types of tasks performed (callout 8).
- Use the drop-downs to record Total Time Spent in hours and minutes for each task (callout 9).
- If a follow-up appointment is required, enter the appointment date using the date picker (callout 10).
- Record any interventions.
- The bottom of the page lists interventions categories such as Care Coordination Interventions, Clinical Nutrition Interventions, and Social and Practical Interventions (see callout 11 for example).
- Select multiple options as needed or skip categories if not applicable. Use the Clear link to remove any selections (callout 12).
- Each category includes a Comments box to enter any additional details manually (callout 13).
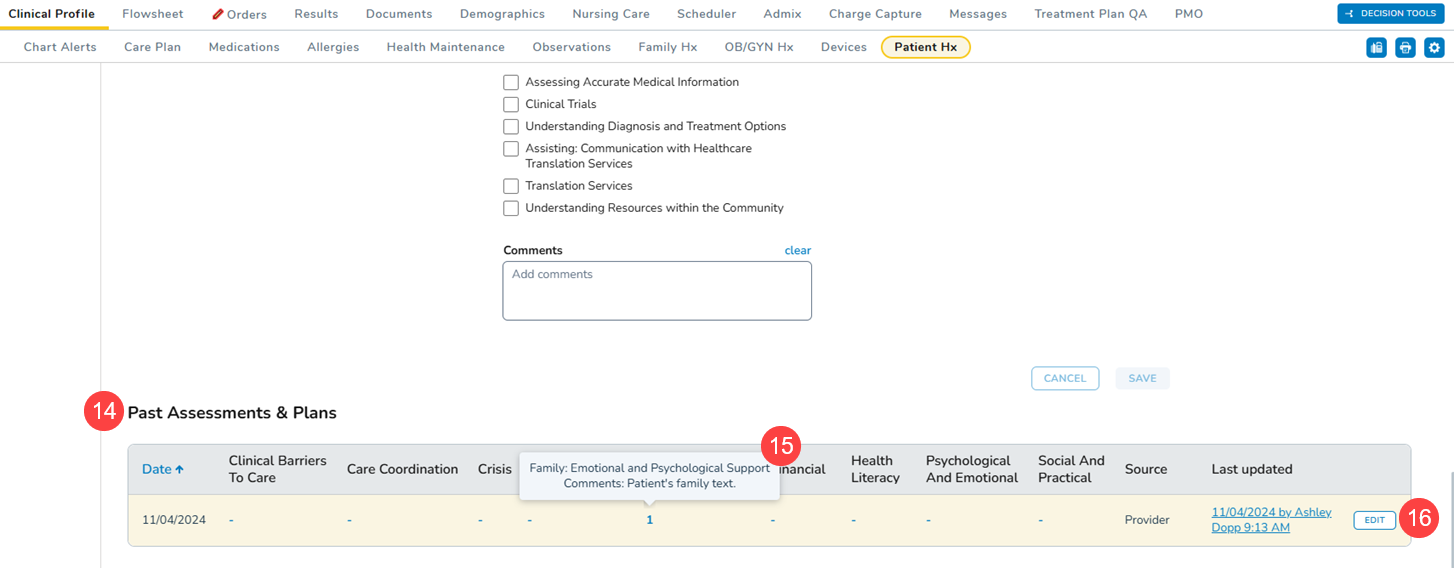
- Save and review entries.
- Once completed, save your changes.
- The information will appear in the Past Assessments & Plans table (callout 14).
- The table summarizes the number of items chosen per category. Hover over any entry to see a full list of selections (callout 15).
- To add or update the information in the assessment, click the Edit button (callout 16).
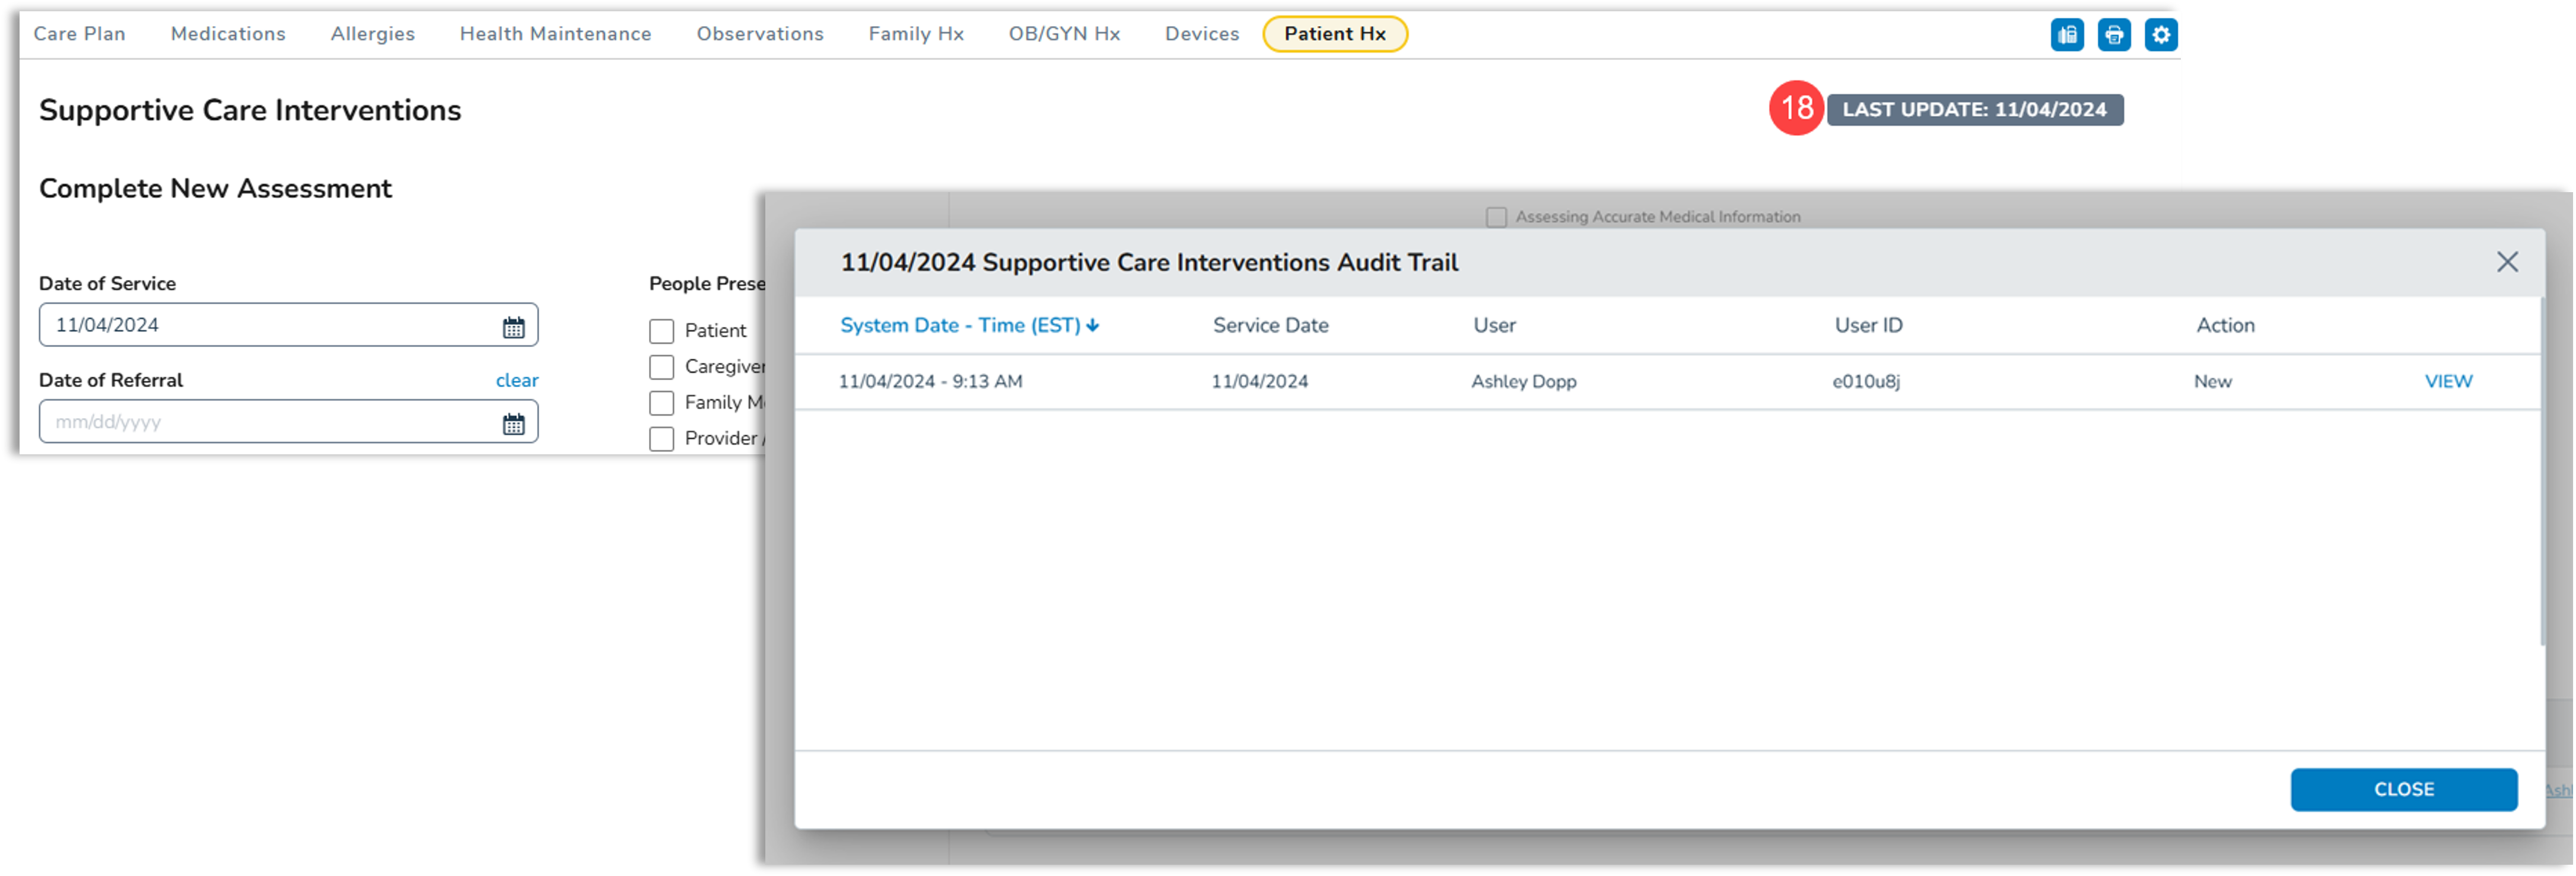
- The Last Updated column displays who last edited the assessment and when. Click on an entry to view the full audit trail (callout 17).
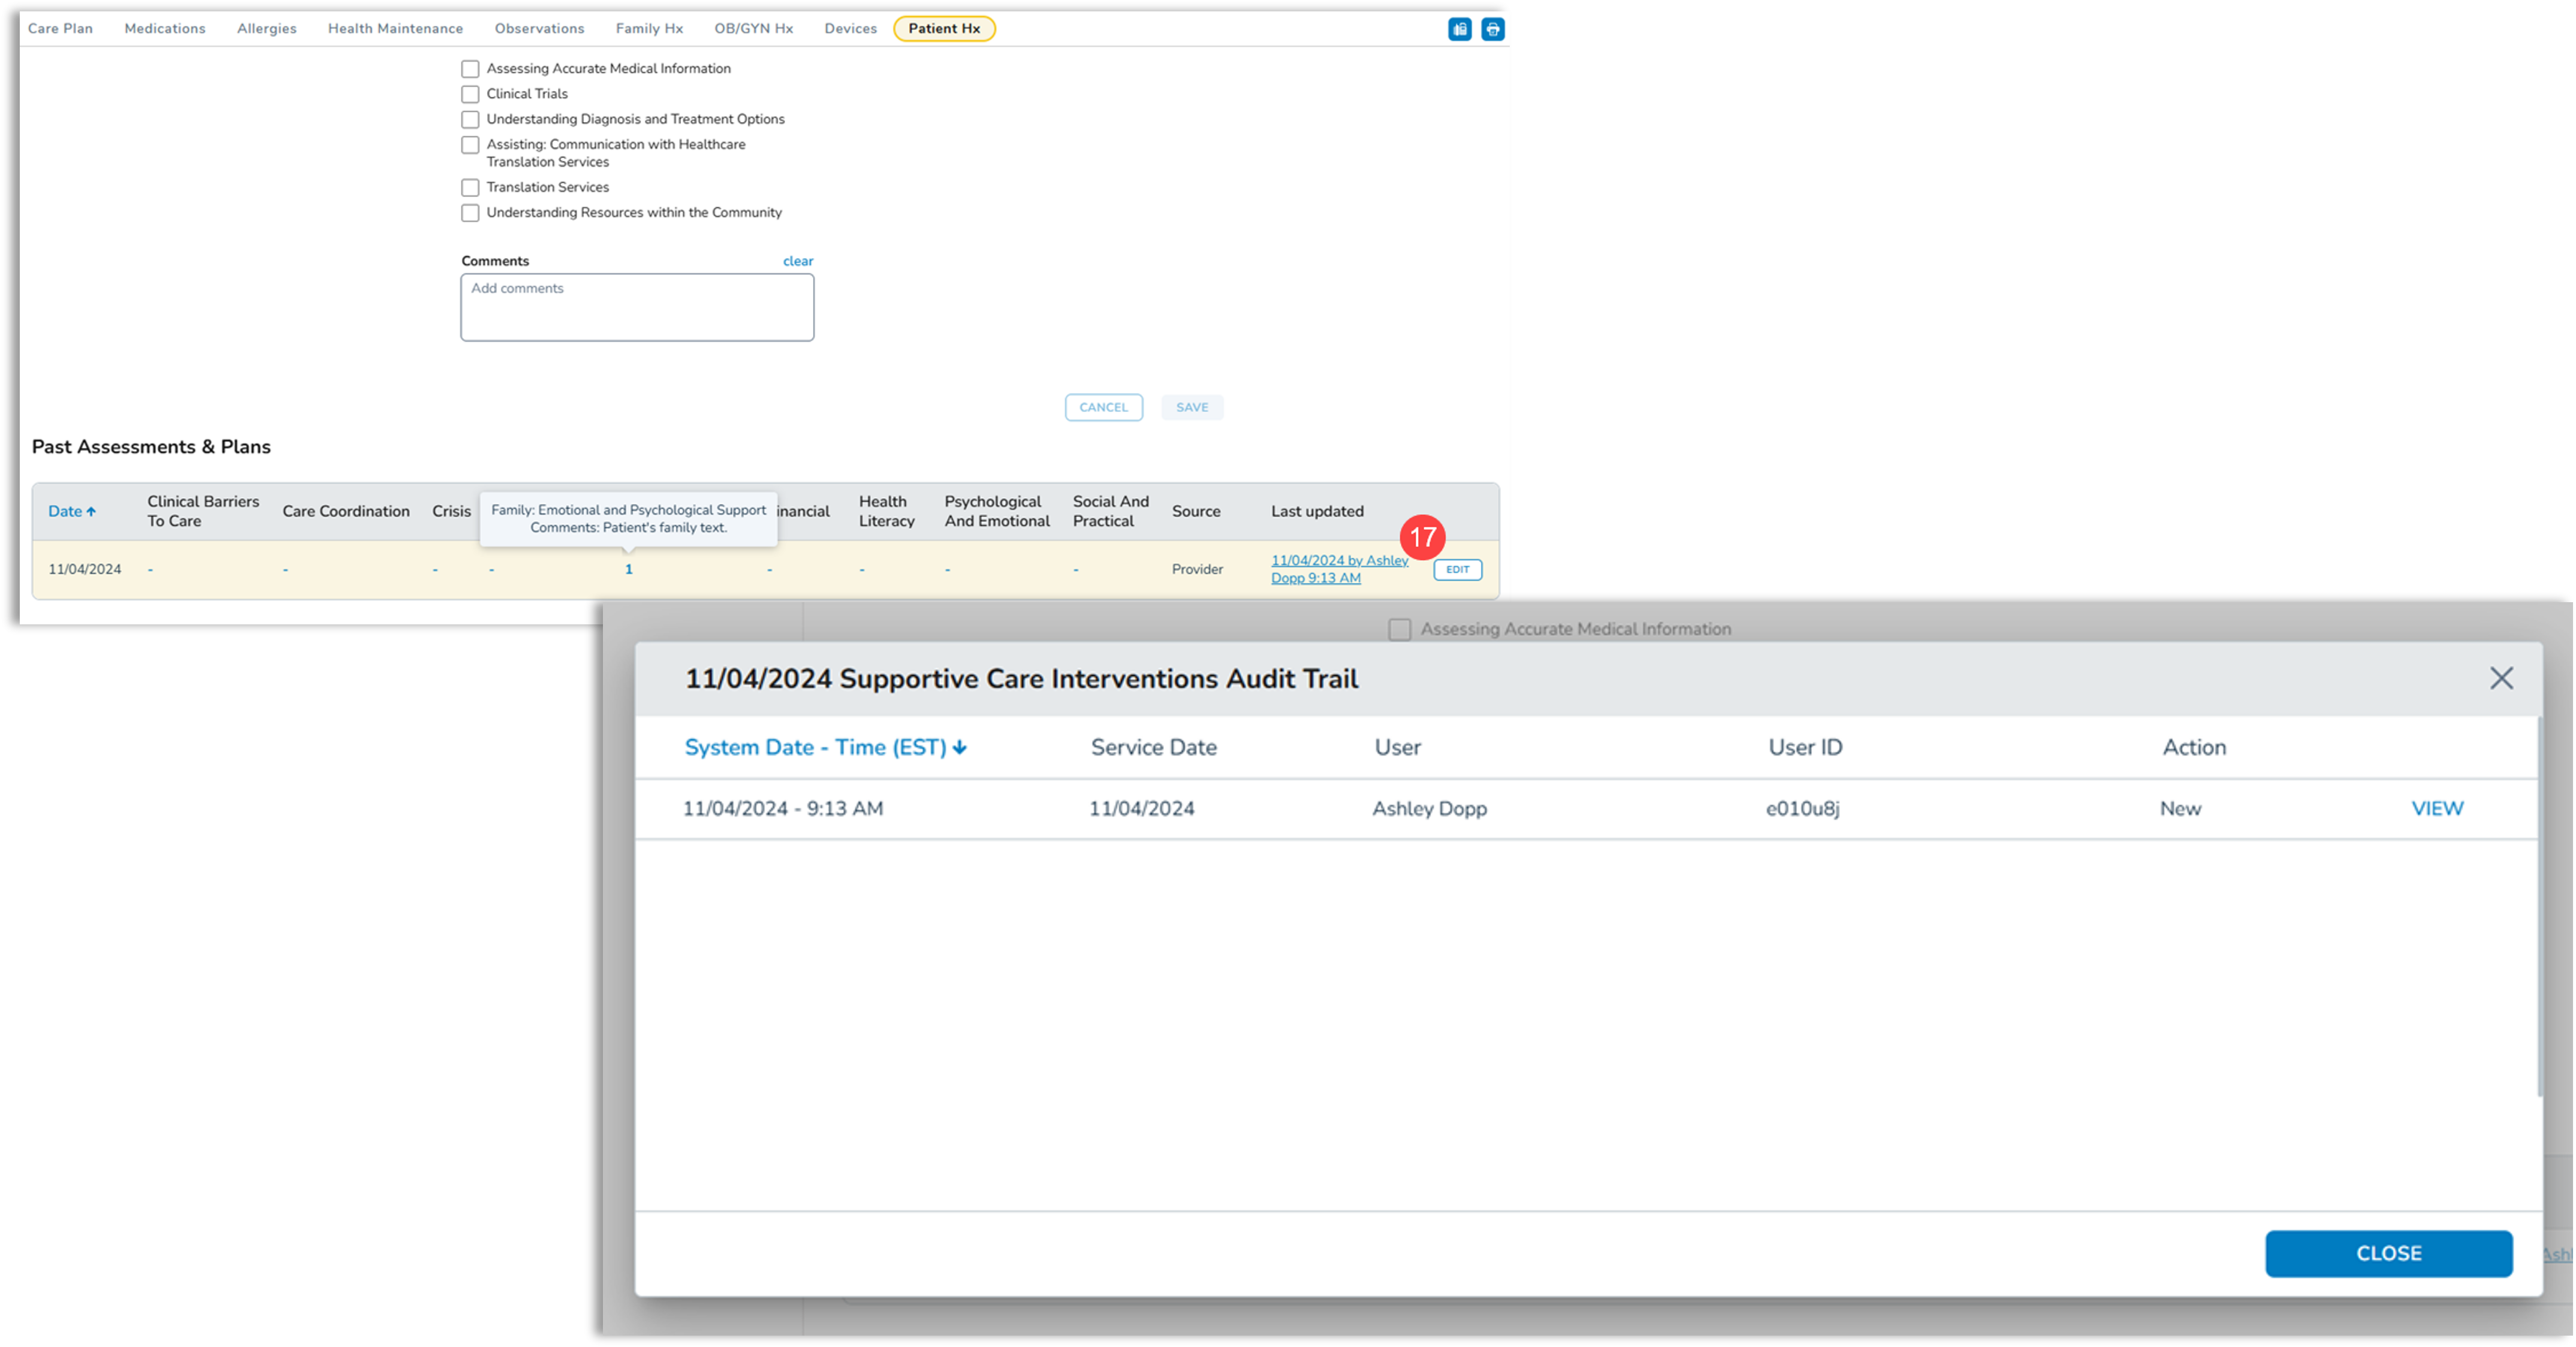
- You can also access the audit trail by clicking the Last Update badge at the top of the page (callout 18).