Biomarker Results Integration Copied
With biomarker results integration, you can streamline your workflow to save results from Caris Life Sciences, Foundation Medicine, Tempus, and Guardant Health directly to the Problems tab for all solid tumor diagnoses supported in iKnowMed. Certain biomarker values will also be auto-populated for Non-Small Cell Lung Cancer and Prostate Cancer.

With biomarker results integration, you can streamline your workflow to save results from Caris Life Sciences, Foundation Medicine, Tempus, and Guardant Health directly to the Problems tab for all solid tumor diagnoses supported in iKnowMed. Certain biomarker values will also be auto-populated for Non-Small Cell Lung Cancer and Prostate Cancer.
By accessing and utilizing the most current and relevant biomarker results, your practice can make informed decisions about patient care and continue to advance the quality of care provided to patients.
How to use the molecular results integration
- Open a patient’s chart and navigate to the Results tab.
- Click on the Molecular Results sub-tab.
- A red dot will be placed next to the test results not saved to the problem list from Molecular Results.
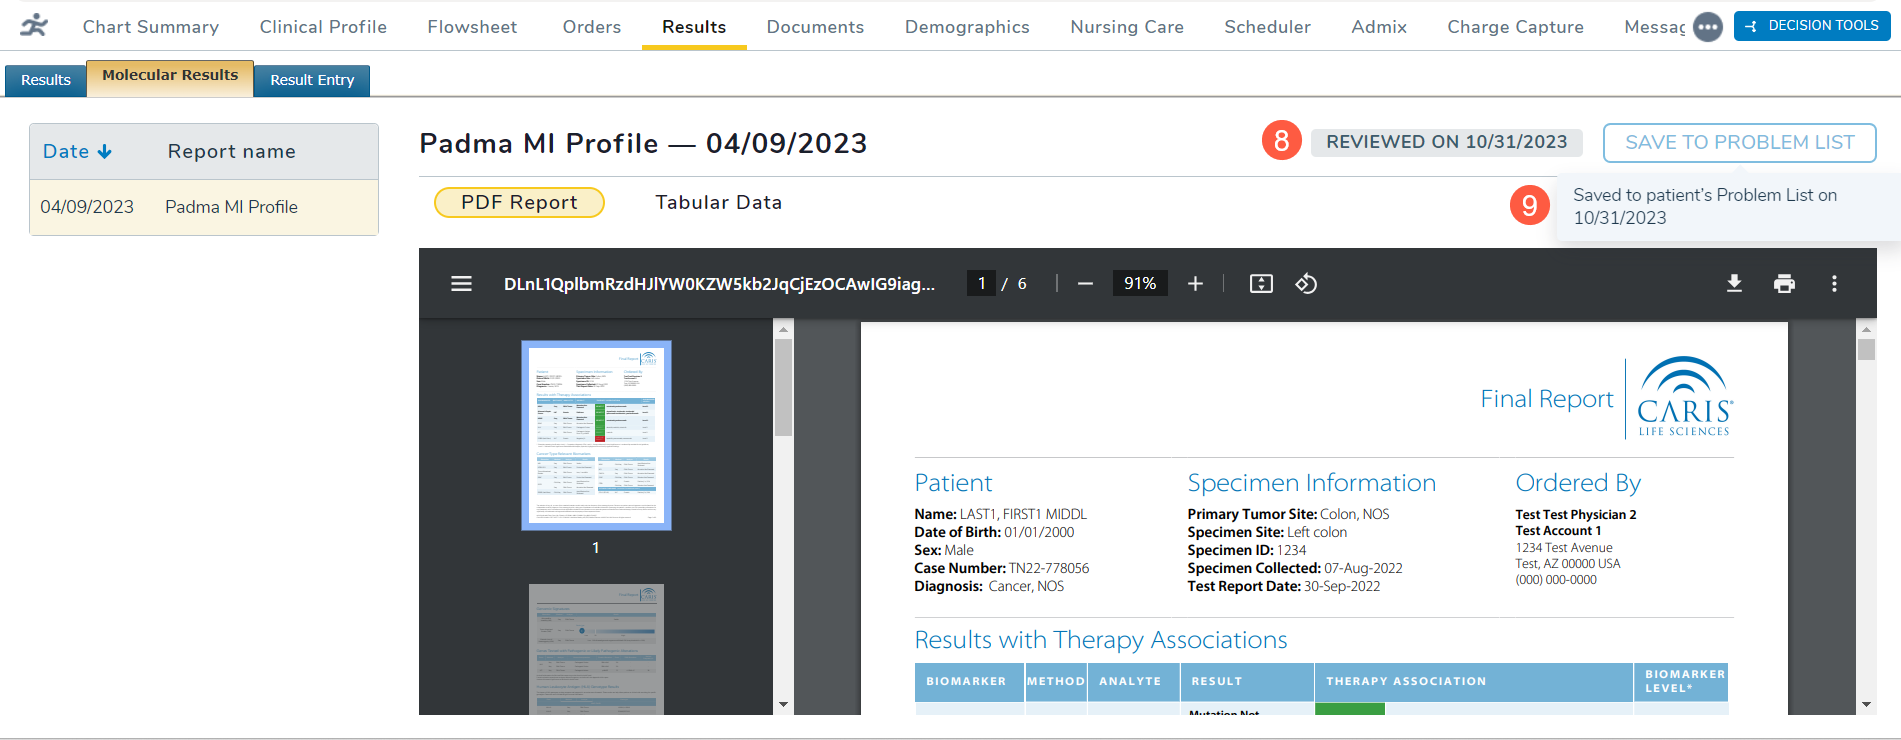
- Select a specific report to open it in the viewing pane (callout 1).
- At the top of the viewing pane, you have two options. You can click the Save To Problem List button (callout 2) or use the View And Save To Problem List link (callout 3) located in the notice above the report.
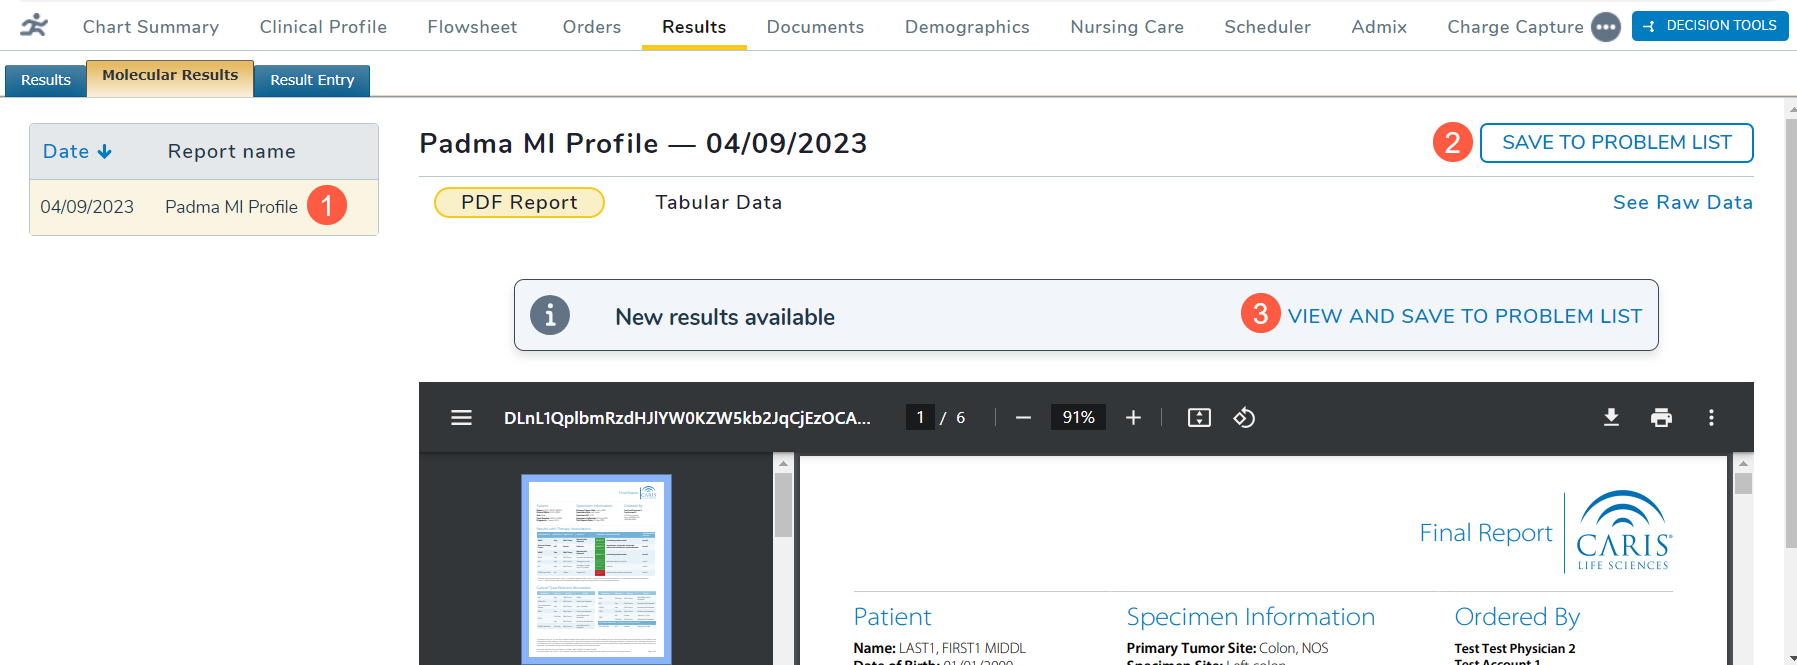
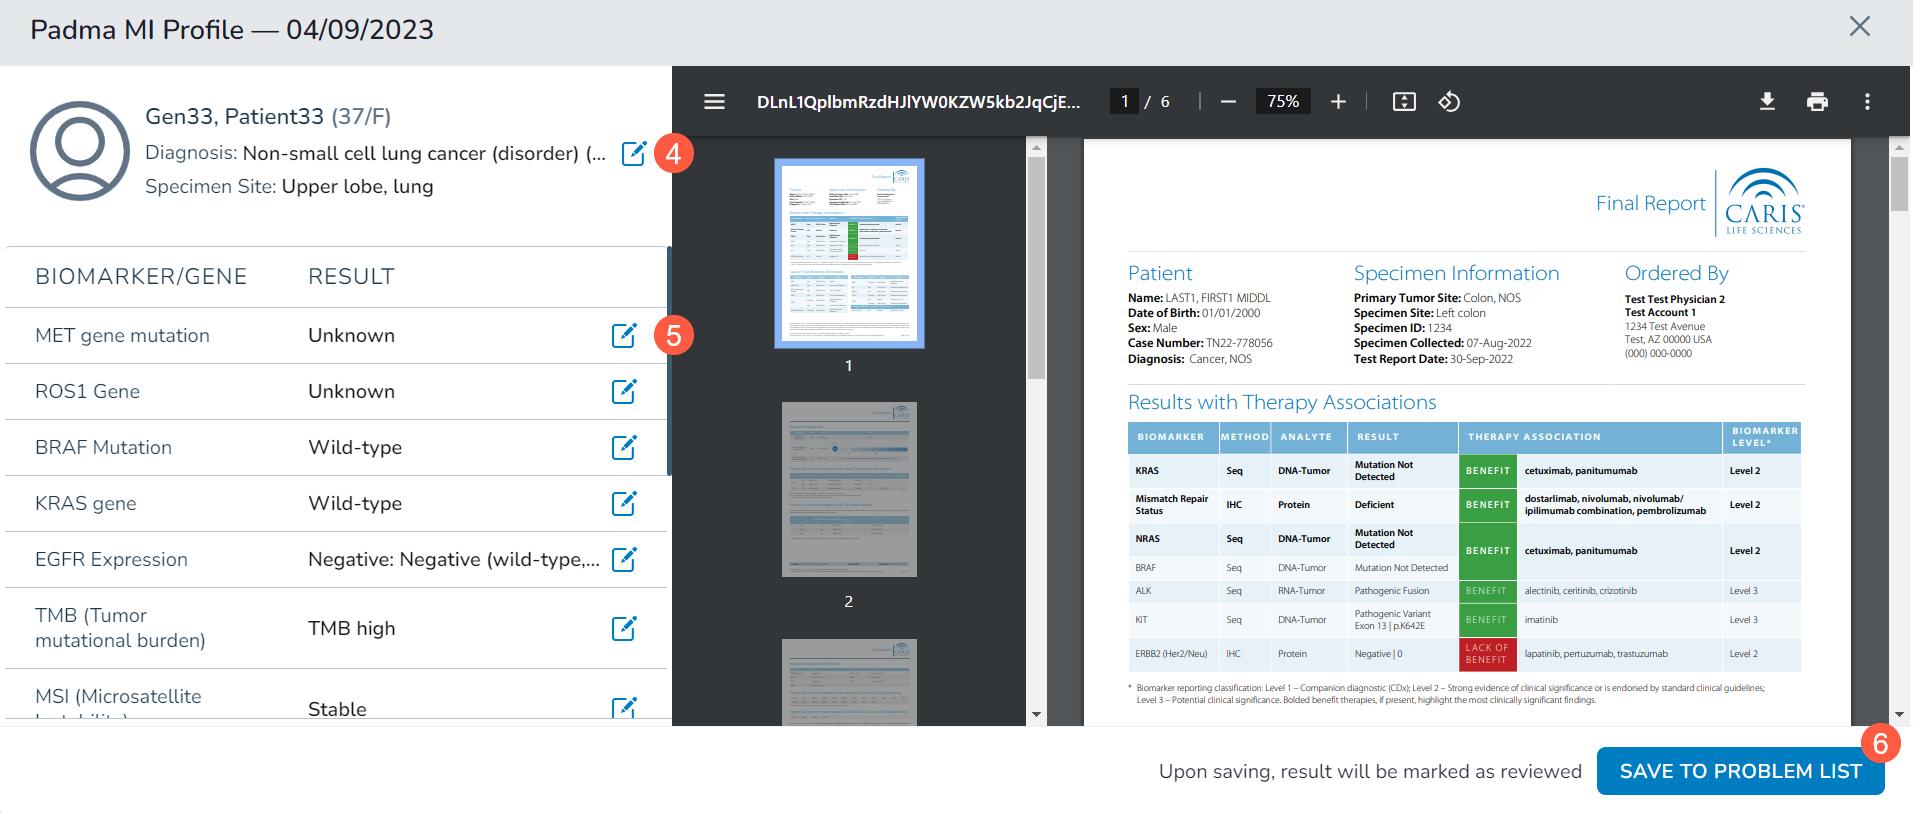
- Either action will open a new window displaying the results.
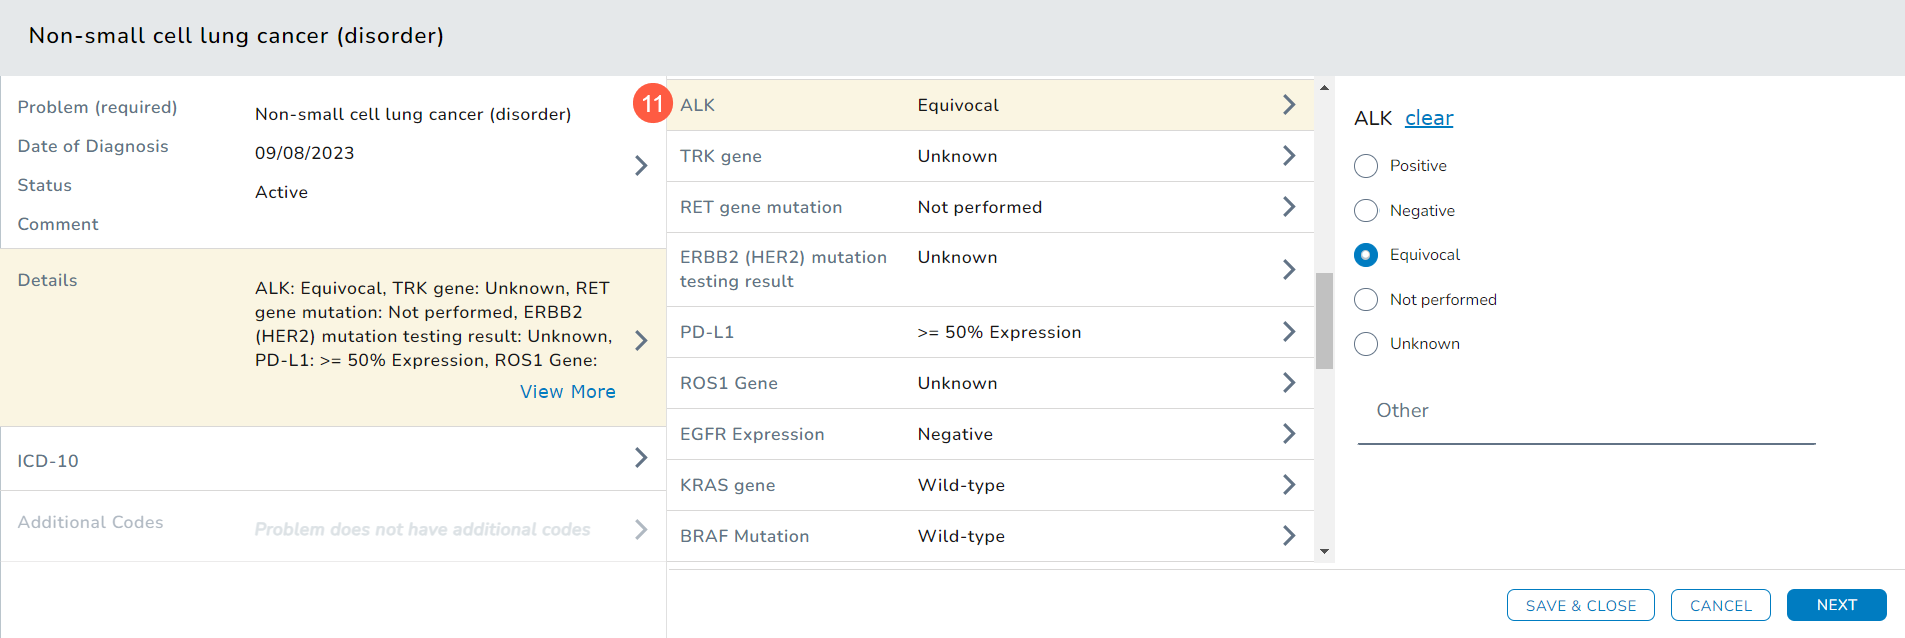
- In the left-hand panel, the patient’s diagnosis will be prepopulated. However, you can edit it as needed by using the edit icon (callout 4).
- Below the diagnosis section, certain biomarkers will have results prepopulated in the Result column. For other biomarkers, you must manually select a result.
- Choose or modify all results as needed using the edit icon (callout 5). Some biomarker results will be automatically populated and we are working to expand the number of biomarker results that can be auto-populated.
- Once all the information is accurate, click the Save To Problem List button at the bottom of the screen (callout 6).
- If the patient has more than one results report, you can also choose to click the Save & Go To Next Result button to navigate through each report.
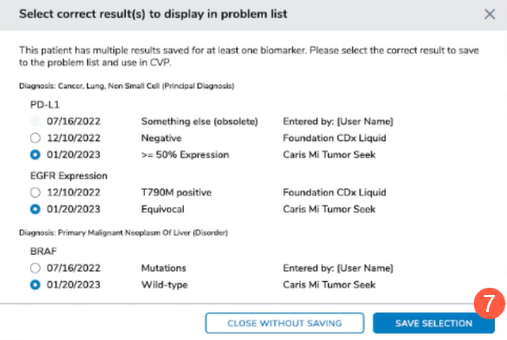
- If there are previously recorded results for a biomarker, the system will prompt you to select which results to save to the Problems tab.
- Click the Save Selection button (callout 7) after making your choices.
- After saving the results to the Problems tab, a gray badge will appear on the Molecular Results page, indicating when the results were last reviewed (callout 8). Hover over the grayed-out button to see when these results were saved to the Problems tab (callout 9).
NOTE: Each time results are reviewed, a disclaimer will be displayed at the bottom of the screen to remind users that the information presented is sourced from a third-party vendor and that any auto-populated results are generated based on NCCN guidelines purely for informational purposes.
- To view all results saved to the Problems tab, navigate to Clinical Profile > Problems.
- The results will be displayed below the diagnosis on the Problems List (callout 10).

- You can also open the diagnosis and examine the information in the Details section under Prognostic Details (see callout 11 for example).
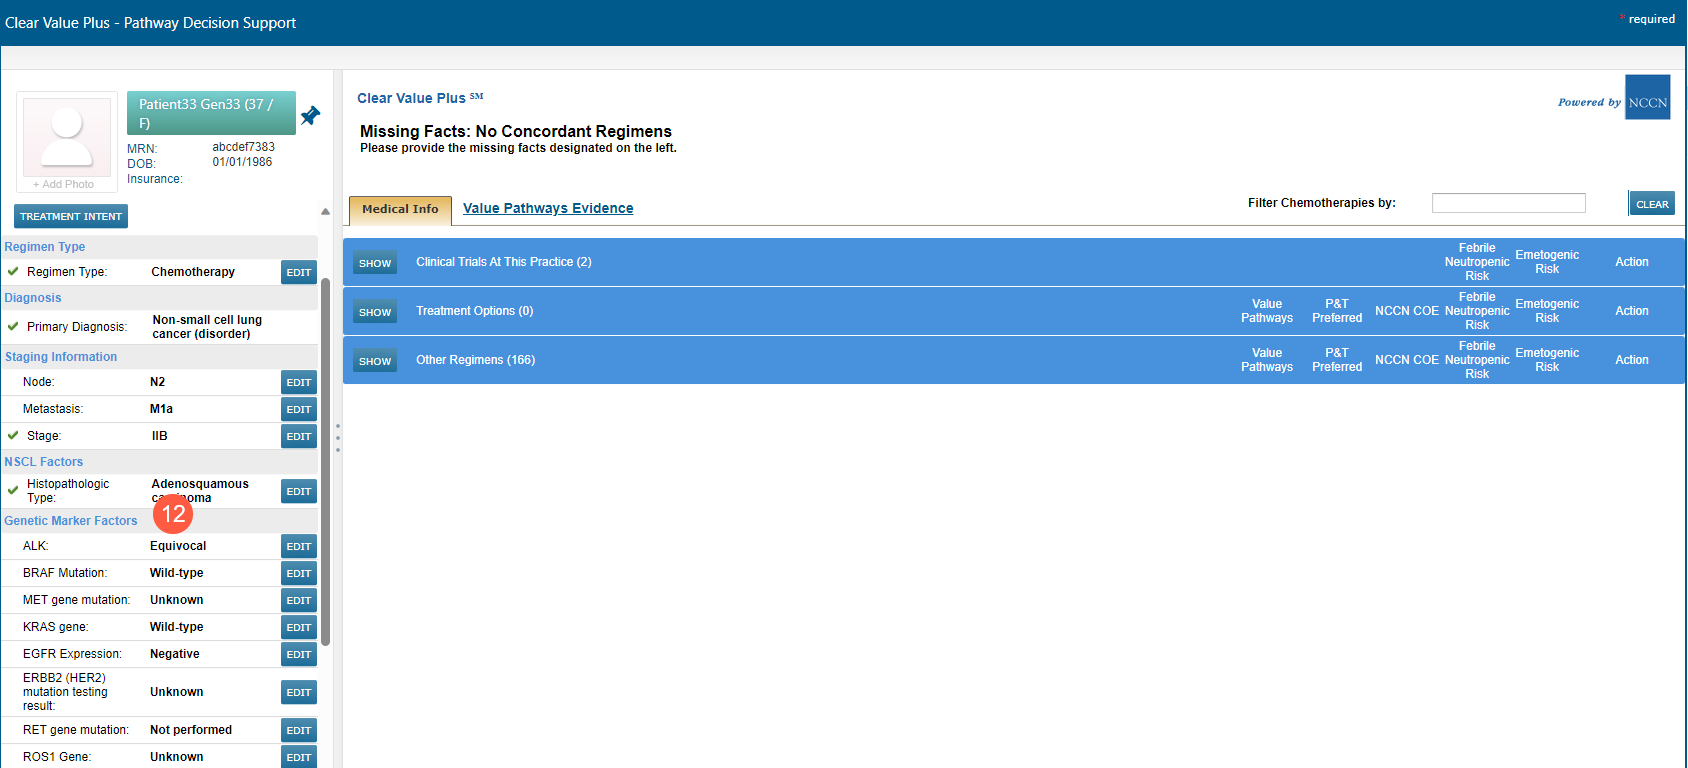
- If your practice also uses Clear Value Plus, these results will seamlessly appear there under the Genetic Marker Factors section, further enhancing your patient care and management capabilities (callout 12).