Exchange patient records with practices and health systems across the country Copied
As the final implementation phase of Carequality in iKnowMed Generation 2, practices can now access records from practices and health systems across the country participating in Carequality.

Set user permissions
Determine who at your practice can request patient information from your community partners. Users will not see any changes until the external records search is enabled for your practice.
To set an individual user’s permission:
- Go to Admin > Users.
- Select a user and click the Edit User button.
- In the window, select the Permission tab.
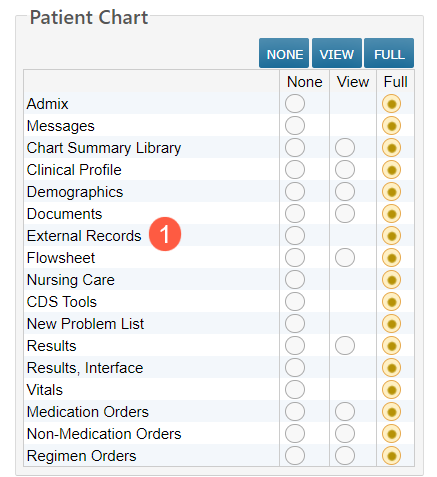
- Scroll to the Patient Chart section and set the new External Records permission to Full (callout 1). It will be set to None by default.
NOTE: The user must also have View or Full permission for Documents to access the External Records tab.
- Save your changes.
To set permission for a group of users, follow the Help site instructions that explain how to apply a specific user profile to one or more user accounts.
Locate and import external documents
Search external records that can be reviewed and imported directly to the Documents tab in your patients’ charts. Making it easier than ever to provide the highest quality of care.
To search for external records:
- Open a patient chart and go to the Documents tab.
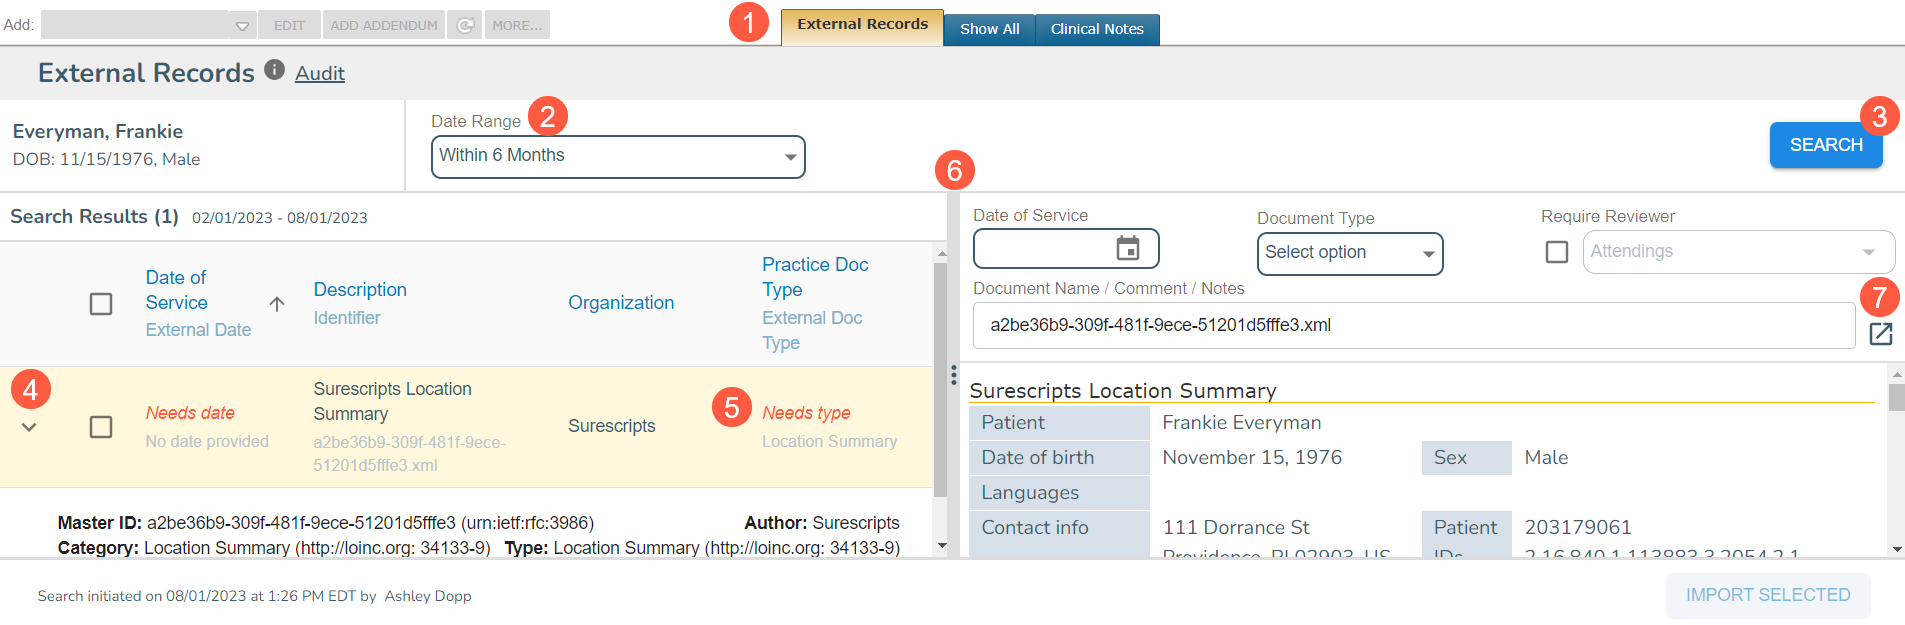
- Click the new External Records tab to launch the Carequality app (callout 1).
- You may see results based on the last search performed for the patient. If no records are shown, a search has not yet been carried out.
- To start a new search, simply use the Date Range filter to locate external documents from within the last month, within the last year, or a customized date range (callout 2), then click the Search button in the upper corner (callout 3).
- This action will initiate the search process with Surescripts to retrieve the patient’s documents from your Carequality community partners.
- If you wish to cancel the search, click the Cancel Search button on the screen.
- The results will appear in a table with a Date of Service, Description, Organization, and Practice Doc Type.
- To view more details for a particular result, click the caret icon to expand the row (callout 4).
- The table will also indicate if any data elements are missing that you must complete before the document can be imported into the patient’s chart (callout 5).
- Clicking anywhere in the search result row (to the right of the checkbox) will display the document in the preview panel.
- For a better view of the previewed document, you can move the center divider by clicking on it and dragging it either left or right (callout 6).
- You may also view the document in a new window by clicking the arrow icon in the preview panel (callout 7).
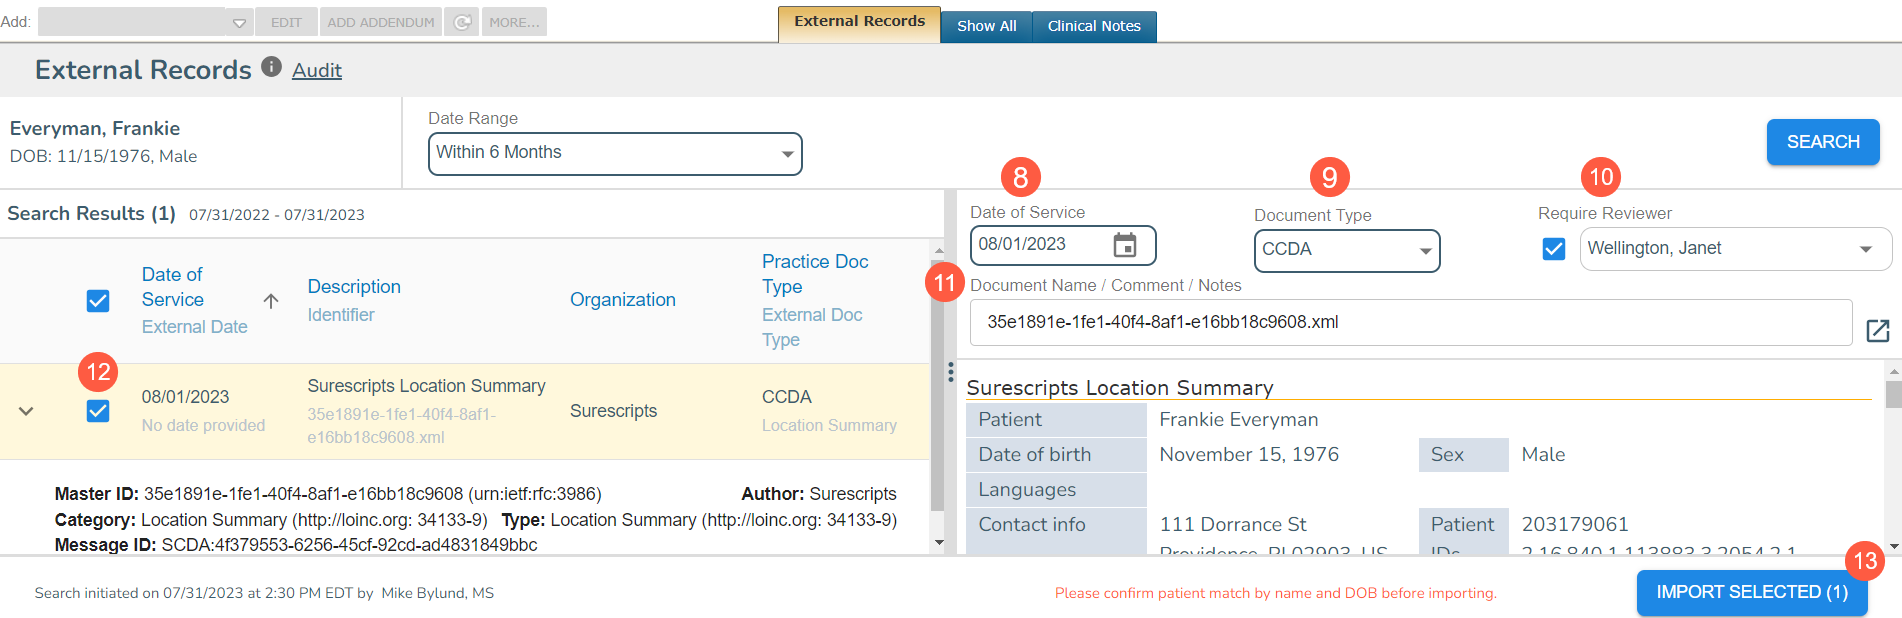
- In the preview panel, you can amend the Date of Service, select a Document Type, and Require Reviewer if needed (callouts 8-10).
- The choices for document types are based on the documents your practice has marked Visible in attaching list under Admin > Document Types.
- If you choose a document type that requires a reviewer, you can still uncheck the Require Reviewer box before importing the document.
- You may also choose to add a comment to the document using the Document Name/Comment/Notes field (callout 11). Once uploaded, comments will display where they normally do per document type. For example, uploaded Lab Results will display the comment in the Results Value tab.
- Once all the information is complete, be sure to check the box next to the document on the table to enable the Import Selected button (callouts 12 and 13).
- If a document is selected for import that does not have the required Date of Service or Practice Doc Type complete, the Import Selected button will remain inactive until those values are assigned.
- Click the button to upload the marked documents to the Show All tab and to the proper location in the patient’s chart. For example, if you choose Lab Results as the Document Type, the document will also be imported to the Results tab.
- If you wish to re-import a document, select it in the table (callout 14) to view it in the preview panel.
- Clicking the Reimport button (callout 15) will allow you to edit the document attributes and upload the document to the patient’s chart.
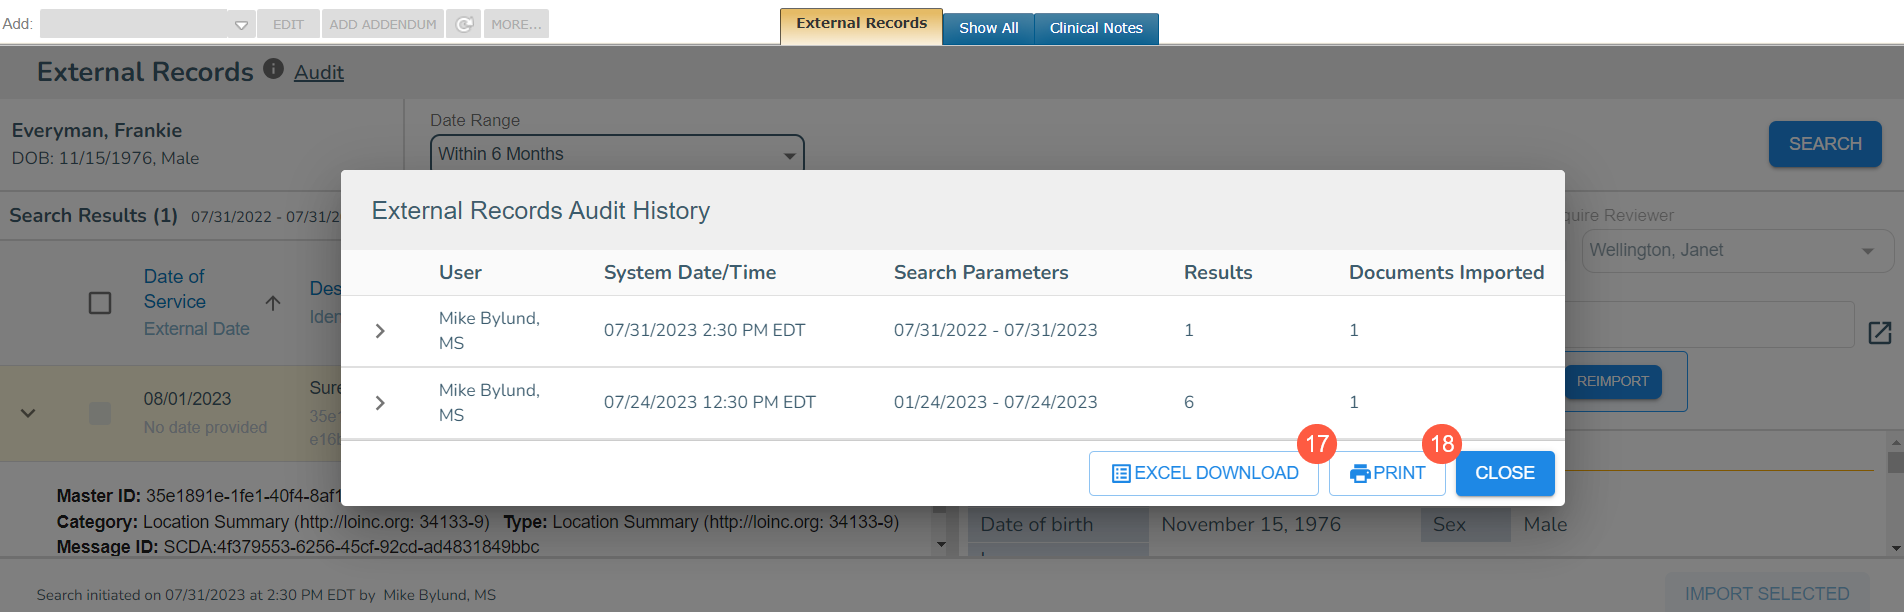
- You may view the past searches performed for the patient using the Audit link at the top of the page (callout 16).
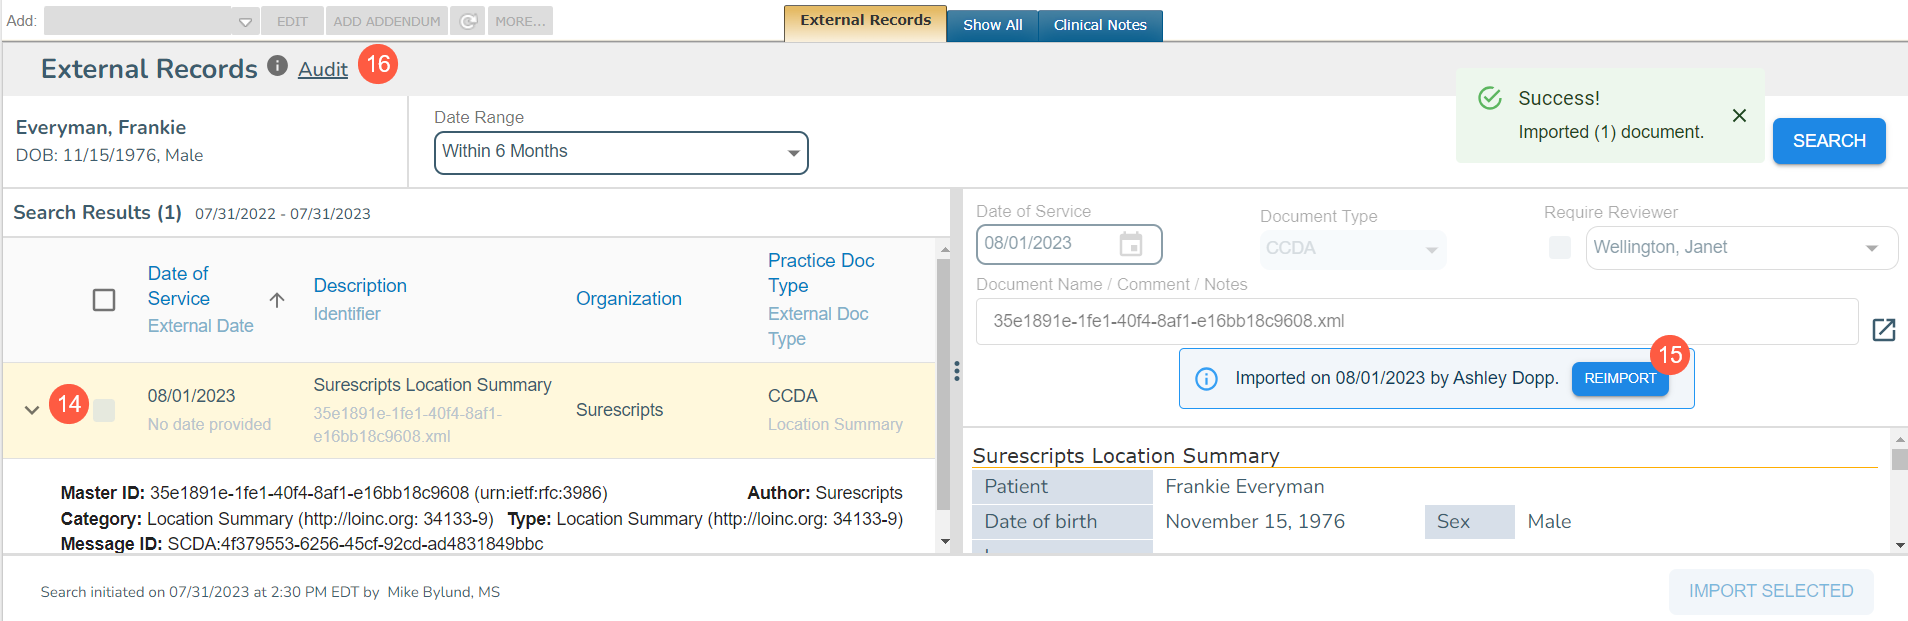
- The audit history will show who ran the last search for external documents and when, as well as how many documents were found and if those documents were uploaded to the patient’s chart.
- Lastly, you may print or export the audit history as an Excel document (callouts 17-18) for your personal records.