Introducing the enhanced Treatment Plan Copied
The enhanced Treatment Plan can streamline your workflow with easy access directly from the patient’s chart. An improved user experience helps you keep track of prior treatment plans with a dedicated section. Furthermore, edit or add information as needed using dropdowns, automatic answers, or manual data entry.
These updates give your practice the flexibility to tailor treatment plans according to individual patient needs and provide your practice with a thorough review of past decisions for more informed treatment planning.

How to use the enhanced treatment plan
- Start by opening the patient’s chart and navigating to the newly added Treatment Plan tab (callout 1) or click the Decision Tools button to jump directly to the tab (callout 2).
- Within the tab, you’ll find two dropdown options to assist you.
- Keep track of the patient’s history by viewing the number of prior treatment plans in the Prior Treatment Plans section. Use the caret icon to expand or collapse the view (callout 3).
- You can also perform several quick actions on prior treatment plans using the icons:
- Duplicate a previous treatment plan by selecting the copy icon (callout 4). This opens the previous plan in an editable window.
- To review a previous treatment plan, click on the eye icon (callout 5).
- Print a previous plan by clicking on the printer icon (callout 6).
- In cases where an error occurs, re-save the plan to the patient’s chart using the red paper plane icon (callout 7).
- To create a new treatment plan, use the caret icon to expand or collapse the view (callout 8), click the Create Treatment Plan header (callout 9), or click the Create button (callout 10).
NOTE: The system will save your save progress if you navigate away from this tab. When you return, your draft will be ready for continuation. If you return more than 30 minutes later, you will be prompted to continue with your saved draft or to create a new plan.

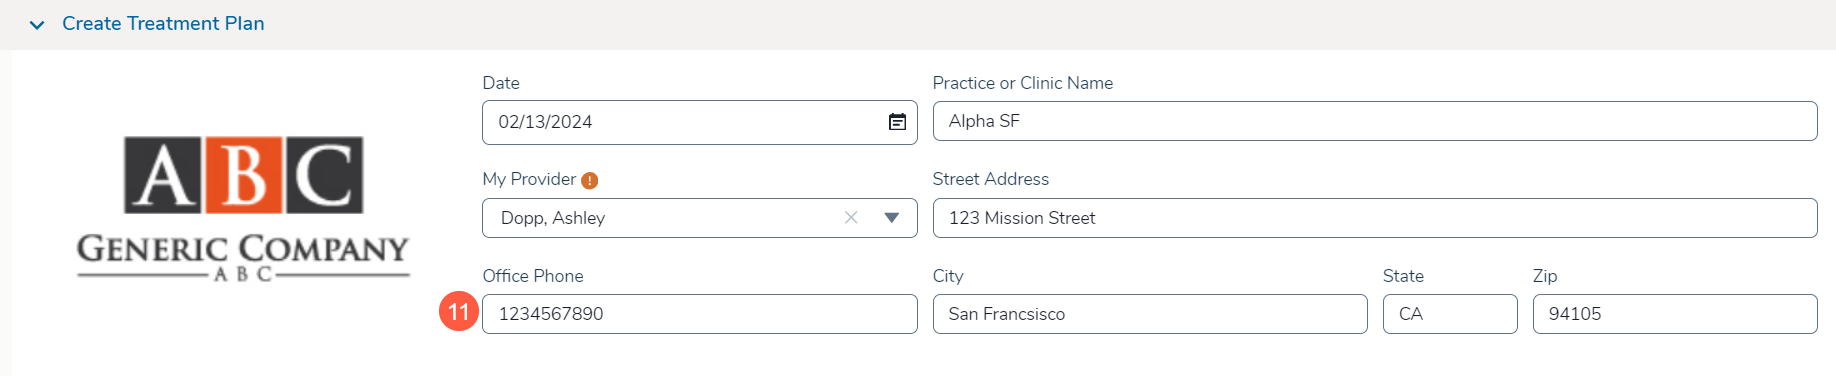
- The new plan will auto-fill data from the patient’s chart, including date, provider, practice details, and more.
- Edit or add information as needed using the provided dropdowns or by manually entering data into the text fields (see callout 11 for an example).
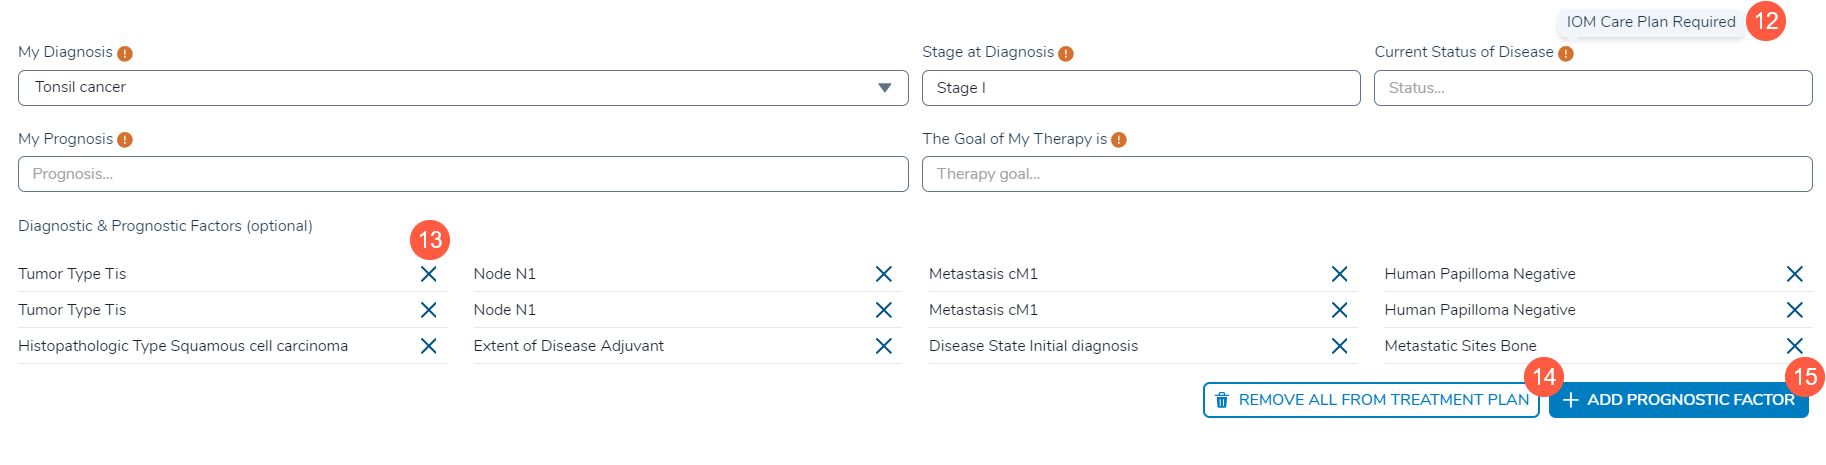
- In the diagnostic and prognostic factors section, edit or add information as needed using the provided dropdowns or automatic answers, or by manually entering data into the text fields.
- Fields that need to be filled in to meet a Value-Based Care program’s requirements will include an indicator and tooltip stating so (callout 12). However, skipping these fields will not block your ability to save the plan to the patient’s chart or print it as needed.
- Remove items by clicking the X icons (callout 13). You can also choose to remove all factors by clicking Remove All From Treatment Plan (callout 14).
NOTE: This action will only remove information from the Treatment Plan. It will not remove this information from other locations in the patient chart.
- To add new diagnostic and prognostic factors, click Add New Prognostic Factor (callout 15). This will add a new entry to the table where you can manually type the data into the text field.
- In the treatment section, the system will pre-select the most recent, active treatment from the patient’s Orders > Regimens tab (callout 16).
- All treatments created for the patient, including drafts associated with the chosen diagnosis, will be available to select as an alternative.
- Remove treatments by clicking the caret icon in the lefthand table (callout 17).
- To add a treatment auto-populated by the system, click the caret icon in the righthand table (callout 18).
- To add a treatment not listed, click the Add Treatment button (callout 19). This will add a new entry to the table where you can manually type the data into a text field.
- A note has been added beneath the tables as a reminder that the information added or removed from this section will only change the treatment plan, not any information in the patient’s chart (callout 20).
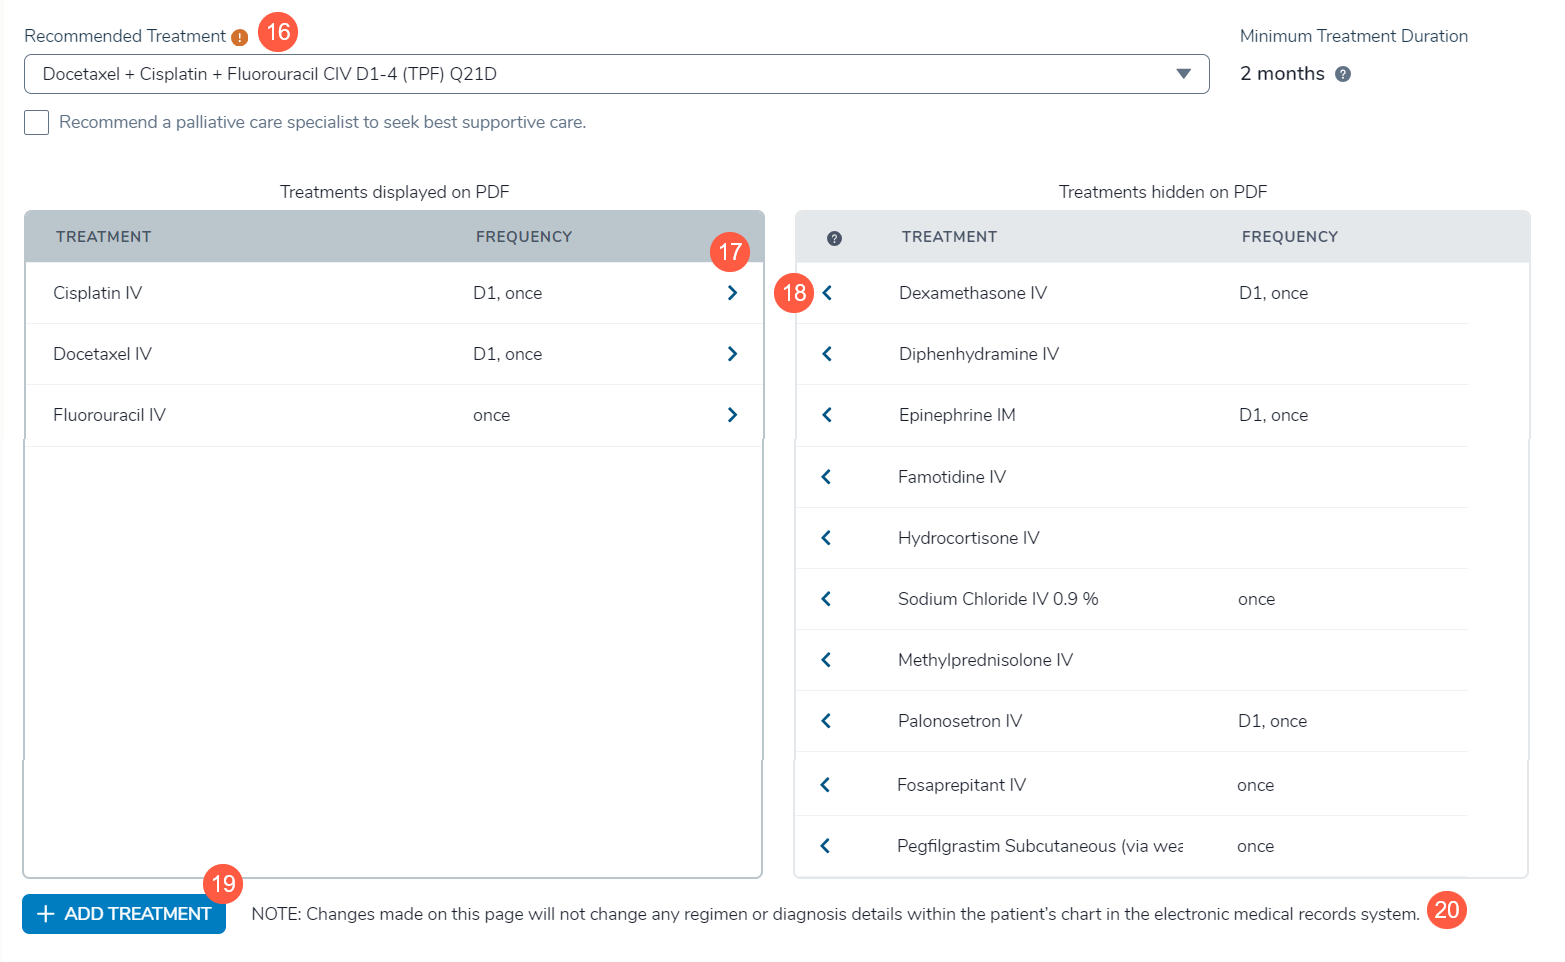
- Additional fields that need to be filled in to meet a Value-Based Care program’s requirements will include an indicator and tooltip stating so (callout 21). However, skipping these fields will not block your ability to save the plan to the patient’s chart or print it as needed.
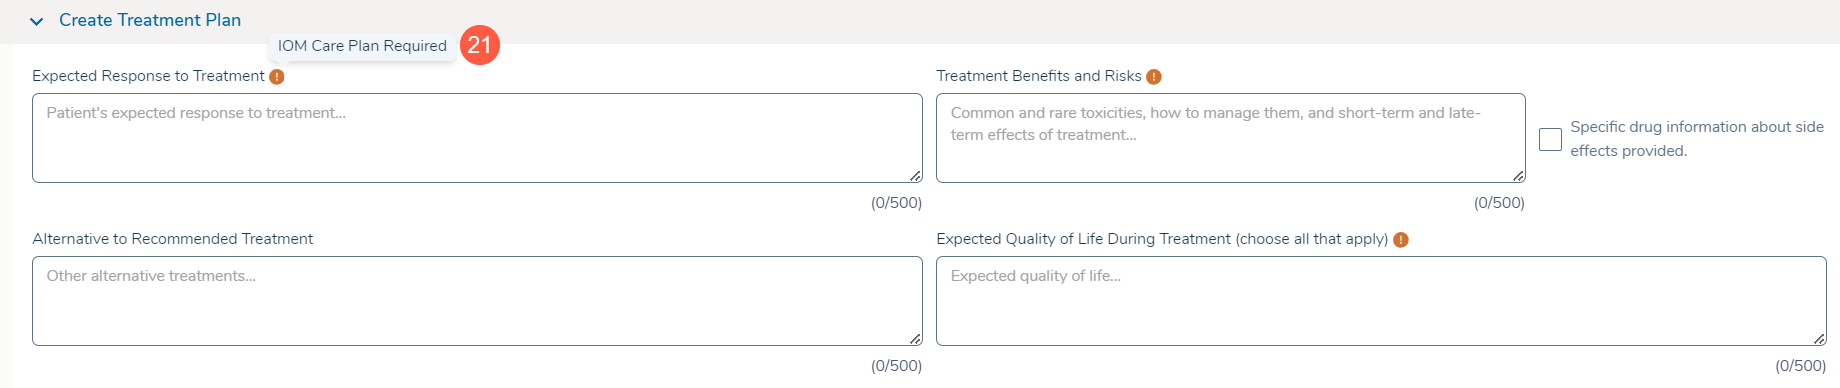
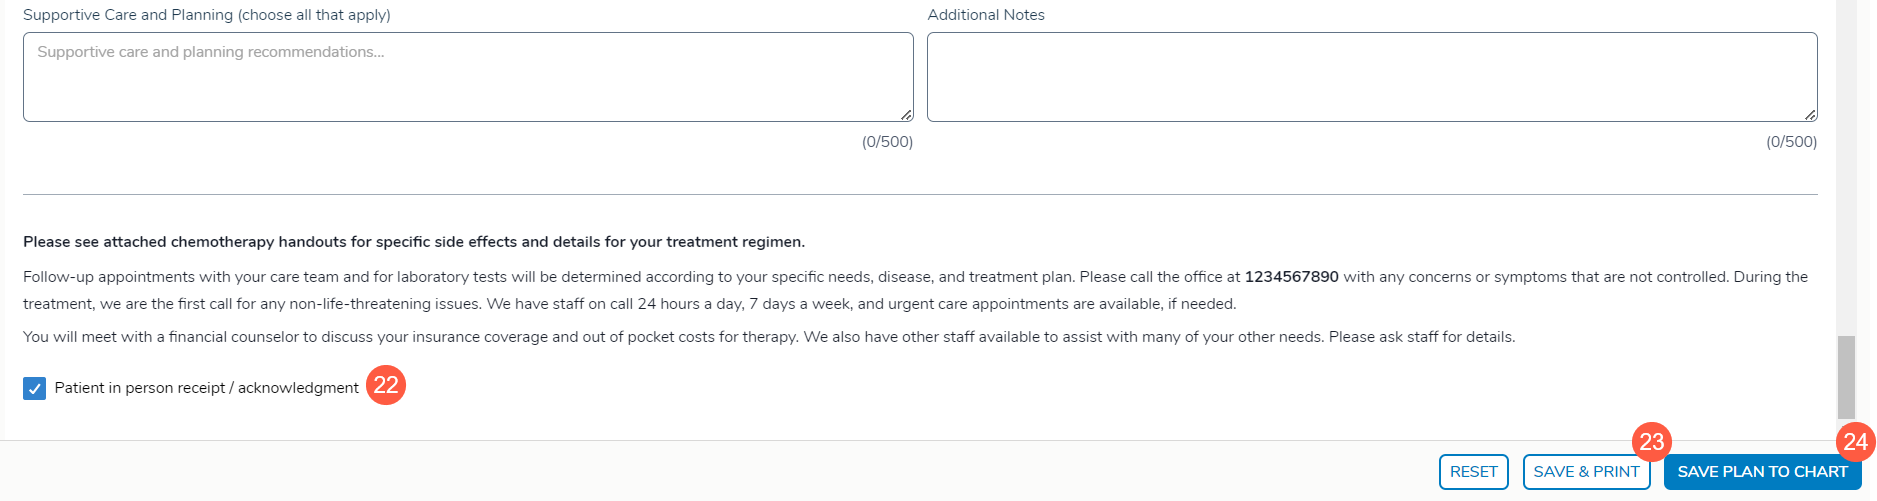
- Once the plan is complete, check the box next to the patient acknowledgment statement (callout 22).
- Choose from the following save options:
- Click Save & Print (callout 23) to save the plan to the Documents tab of the patient chart and generate a printable version. This allows you to maintain comprehensive records and share treatment expectations with your patients.
- Click Save Plan to Chart (callout 24) to save the plan to the Documents tab of the patient’s chart and continue your work.
- Following your preferred save option, the plan will be neatly organized within the Prior Treatment Plans section for easy access and reference.